maytag genesis double oven manual

Welcome to the Maytag Genesis Double Oven manual, your comprehensive guide to unlocking the full potential of your appliance․ This manual provides essential information on features, safety, and maintenance to ensure optimal performance and longevity․Discover how to navigate the control panel, utilize advanced cooking modes, and troubleshoot common issues․Whether you’re a seasoned chef or a new user, this manual offers the insights you need for a seamless cooking experience․

Overview of the Maytag Genesis Double Oven

The Maytag Genesis Double Oven is a high-performance appliance designed for versatile cooking needs․ It features a spacious double oven design, offering flexibility for simultaneous cooking at different temperatures․ With advanced cooking modes, precise temperature control, and smart integration, this oven is built for efficiency and durability․ Its sleek design and robust construction make it a reliable choice for home cooks and professionals alike․ This manual provides a detailed guide to help users master its features and ensure optimal performance․

Importance of the Manual for Proper Usage

The manual is essential for understanding and safely operating the Maytag Genesis Double Oven․ It provides detailed guidance on installation, maintenance, and troubleshooting, ensuring optimal performance․ By following the manual, users can maximize the oven’s features, avoid common mistakes, and maintain safety standards․ It also serves as a troubleshooting guide, helping users address issues like error codes or malfunctioning parts․ Referencing the manual ensures users achieve the best results while extending the appliance’s lifespan and maintaining warranty compliance․

Key Features Highlighted in the Manual

The manual highlights the Maytag Genesis Double Oven’s advanced features, including its dual-oven design, versatile cooking modes, and precision temperature control․ It emphasizes the self-cleaning function, energy-efficient performance, and user-friendly control panel․ The manual also details special features like rapid preheating, even baking, and smart cooking algorithms․ These features ensure consistent results and simplify the cooking process, making the oven ideal for home cooks and professionals alike․ Understanding these features through the manual helps users maximize their cooking experience and maintain the appliance’s optimal performance;

Product Features and Specifications

The Maytag Genesis Double Oven features a dual-oven design, offering flexible cooking options; It includes advanced convection technology, a 6․7 cu․ ft․ total capacity, and EvenAir™ true convection for consistent results․ The oven boasts a robust construction, energy-efficient performance, and a user-friendly interface․ With Precision Cooking™ and a Sabbath mode, it caters to diverse cooking needs; The manual provides detailed specs, ensuring users understand the appliance’s capabilities and technical requirements for optimal functionality․

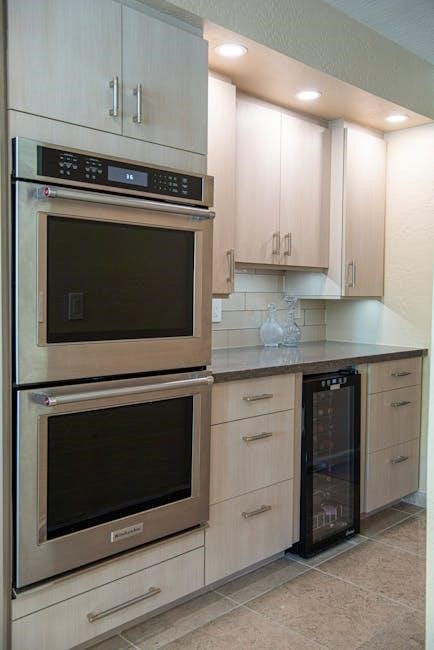
Double Oven Design and Configuration

The Maytag Genesis Double Oven features a dual-oven configuration, allowing for simultaneous cooking at different temperatures․ Its 6․7 cu․ ft․ total capacity provides ample space for large dishes․ The upper and lower ovens are designed for flexibility, with the upper oven offering EvenAir™ true convection for uniform cooking․ The lower oven is ideal for slow roasting and large batches․ Both ovens feature heavy-duty racks and high-quality insulation for consistent heat retention․ This configuration ensures efficient energy use while maintaining the same footprint as a traditional range, making it a practical addition to any kitchen․

Cooking Modes and Functions

The Maytag Genesis Double Oven offers a variety of advanced cooking modes, including EvenAir™ true convection for uniform baking and roasting․ Precision Cooking ensures accurate temperature control, while the Sabbath Mode allows for extended cooking sessions․ Additional functions include a rapid preheat feature, delayed start, and a keep-warm setting․ The ovens also support smart connectivity, enabling remote monitoring and control via the Maytag app․ These versatile modes cater to diverse cooking needs, from delicate pastries to hearty roasts, ensuring exceptional results every time․

Special Features of the Maytag Genesis Series

The Maytag Genesis Series stands out with its EvenAir™ true convection system, ensuring consistent cooking results across all racks․ It also features Sabbath Mode for extended cooking needs and smart connectivity via the Maytag app for remote monitoring․ The ovens are built with durable construction and intuitive controls, designed for heavy-duty use․ Exclusive to the Genesis Series, these features enhance both functionality and user experience, making it a top choice for home cooks and professionals alike․

Technical Specifications and Dimensions

The Maytag Genesis Double Oven measures 47․75 inches in height, 29․875 inches in width, and 24․5 inches in depth, fitting standard kitchen spaces․ Each oven compartment offers 5 cubic feet of capacity, ideal for large meals․ The unit weighs approximately 235 pounds, ensuring stability․ It requires a 240V electrical connection and is designed for 60Hz operation․ The oven is available in stainless steel, black, and white finishes, blending seamlessly with modern kitchens․ These dimensions and specifications ensure compatibility and performance for various cooking needs․

Installation and Setup

Proper installation ensures safe and efficient operation․ Refer to the manual for model-specific instructions, electrical requirements, and venting guidelines․ Contact Maytag support at 1-800-688-9900 for assistance․

Preparation for Installation

Before installing your Maytag Genesis Double Oven, ensure the installation site meets all electrical and venting requirements․ Gather the necessary tools and materials․ Locate the model and serial numbers on the oven frame for registration․ Read the manual thoroughly to understand specific installation needs․ Ensure the surrounding area is clear and safe for the installation process․ Verify the dimensions of the space to ensure a proper fit․ Contact Maytag support at 1-800-688-9900 if you encounter any issues during preparation․

Step-by-Step Installation Guide

Begin by unplugging the oven and ensuring all electrical connections are disconnected․ Carefully place the oven in its designated space, aligning it with surrounding surfaces․ Secure the unit using the provided mounting hardware to prevent movement․ Connect the electrical wires according to the manual’s wiring diagram, ensuring all connections are tight and safe․ Install the venting system as specified, adhering to local building codes․ Double-check all connections for leaks or loose fittings․ Finally, test the oven by running a short cycle to ensure proper function․ If unsure, consult a professional installer․

Venting and Electrical Requirements

Proper ventilation is essential for safe and efficient operation․ Ensure a dedicated 4-inch venting system is installed, meeting local building codes and manufacturer specifications․ The oven requires a 240V, 60Hz electrical connection with a minimum 40-amp circuit․ Use a grounded, three-prong plug or hardwire the unit as specified․ Avoid sharing the circuit with other high-power appliances to prevent overload․ Ensure all connections comply with safety standards and are inspected by a licensed electrician if unsure․ Proper installation ensures optimal performance and safety․

Safety Precautions

Ensure safety by reading the manual thoroughly․ Avoid overheating, keep flammable materials away, and supervise children․ Use oven mitts and proper cookware to prevent accidents and injuries․

General Safety Guidelines

Always read the manual thoroughly before using your Maytag Genesis Double Oven․ Ensure proper installation and venting to prevent gas or electrical hazards․ Keep flammable materials away from the oven and never leave cooking unattended․ Supervise children and pets near the appliance․ Use oven mitts or tongs to handle hot cookware․ Avoid overheating by monitoring temperatures and cooking times․ Regularly clean food residue to prevent fires․ Follow all safety guidelines to ensure safe and efficient operation of your oven․

Warnings and Cautions

Important: Always follow the Maytag Genesis Double Oven manual’s safety precautions to avoid accidents․ Never use the oven as a storage space or near flammable materials․ Avoid using abrasive cleaners, as they may damage surfaces․ Ensure proper installation and venting to prevent hazardous conditions․ Do not operate the oven without the racks in place, as this could cause damage․ Keep children and pets away during operation․ Failure to follow these guidelines may result in injury or damage and could void your warranty․ Refer to the manual for detailed instructions and safety measures․

Understanding Error Codes and Alarms

The Maytag Genesis Double Oven manual details specific error codes and alarms to help you identify and resolve issues quickly․ These codes, such as “F1” or “E2,” indicate problems like sensor malfunctions or temperature errors․ Refer to the manual’s troubleshooting section to understand each code’s meaning and the corrective actions required․ If an alarm sounds, ensure the oven is turned off and follow the recommended steps to reset or address the issue․ For persistent problems, contact Maytag customer support for professional assistance to avoid further complications or safety risks․

Operating the Maytag Genesis Double Oven

Mastering the Maytag Genesis Double Oven involves understanding its intuitive control panel, exploring versatile cooking modes, and utilizing precise temperature control for perfect results every time․

Control Panel Overview

The control panel is the central command center of your Maytag Genesis Double Oven, designed for intuitive operation․ It features a backlit display, touch-sensitive controls, and clearly labeled buttons for easy navigation․ The panel allows seamless selection of cooking modes, temperature adjustments, and timer settings․ A digital display provides real-time feedback, ensuring precise control over your cooking process․ Additional features like a clock and customizable presets enhance usability, making it simple to manage multiple dishes simultaneously․ This user-friendly interface ensures a smooth and efficient cooking experience․

Cooking Modes and Settings

The Maytag Genesis Double Oven offers a variety of cooking modes to suit every culinary need․ These include Bake, Broil, Roast, Convection, Proofing, and Sabbath Mode․ Each mode is designed for specific tasks, ensuring precise temperature control and even cooking․ The convection mode uses circulating hot air for faster cooking, while Proofing Mode helps dough rise perfectly․ Customizable settings allow you to adjust temperatures, timers, and cooking durations to achieve desired results․ With these versatile options, you can effortlessly switch between modes to prepare a wide range of dishes with ease and accuracy․

Temperature Control and Precision

The Maytag Genesis Double Oven excels in temperature control, ensuring accurate and consistent cooking results․ With advanced sensors and precise heating elements, the oven maintains the set temperature within a narrow range․ This feature is particularly beneficial for baking, roasting, and sensitive dishes that require exact heat levels․ The dual oven design allows for independent temperature control in each cavity, enabling you to cook multiple dishes simultaneously without compromising performance․ This level of precision is a hallmark of the Maytag Genesis series, delivering professional-grade results in a home kitchen setting․

Using the Timer and Clock Features

The Maytag Genesis Double Oven features a user-friendly timer and clock system, allowing you to manage your cooking schedule effortlessly․ Set the timer to alert you when your dish is ready, ensuring perfectly cooked meals every time․ The clock can be adjusted to match your kitchen’s time, providing a synchronized cooking experience․ For added convenience, the timer can be programmed in advance, giving you flexibility in meal preparation․ Refer to the manual for step-by-step instructions on setting and using these features effectively to enhance your cooking routine․

Special Cooking Features

The Maytag Genesis Double Oven boasts advanced cooking modes designed to enhance your culinary experience․ Features like multi-mode cooking allow for precision in various techniques, while smart sensors monitor dish progress․ The delayed start function lets you plan meals in advance, and the Sabbath mode ensures observance of religious practices; Additionally, Wi-Fi connectivity enables remote monitoring and control via a smartphone app․ These features, combined with the oven’s intelligent system, provide unparalleled flexibility and convenience, making it a versatile tool for both novice and experienced cooks alike․

Cleaning and Maintenance

Regular maintenance ensures optimal performance․ The self-cleaning function simplifies oven care, while wipe-downs after use prevent grime buildup․ Avoid harsh chemicals to protect the finish and interior․

Self-Cleaning Function Explained

The self-cleaning function on your Maytag Genesis Double Oven uses high temperatures to burn food residue into ash, simplifying cleanup․ Before starting, remove racks and shelves, and cover the floor with a sheet to catch ash․ Set the self-clean mode via the control panel, ensuring the oven is empty and ventilation is adequate․ After the cycle, let the oven cool, then wipe down surfaces with a damp cloth․ This feature saves time and effort, keeping your oven pristine without harsh chemicals․

Manual Cleaning and Care Tips

For manual cleaning, unplug the oven for safety․ Remove racks and shelves, washing them with mild detergent․ Wipe interior surfaces with a soft cloth and gentle cleaner, avoiding abrasive materials․ For tough stains, mix baking soda and water to create a paste, applying it overnight before rinsing․ Regularly clean the exterior with a damp cloth and mild soap․ Avoid harsh chemicals or abrasive cleaners, as they may damage the finish․ Always refer to recommended cleaning products to maintain your oven’s appearance and functionality․

Maintenance Tips for Longevity

Regularly inspect and clean the oven vent to ensure proper airflow and prevent overheating․ Check door seals for wear and tear, replacing them if leaks occur․ Run the self-clean cycle periodically to maintain interior condition․ Avoid using abrasive cleaners on surfaces․ Inspect racks and shelves for damage, replacing as needed; Ensure all electrical connections are secure and meet safety standards․ Refer to the manual for recommended maintenance schedules․ Address error codes promptly to prevent long-term damage․ Proper care extends the lifespan and performance of your Maytag Genesis Double Oven․

Troubleshooting Common Issues

If your Maytag Genesis Double Oven displays error codes, refer to the manual for decoding and resolving issues․ Check electrical connections if the oven fails to power on․ For uneven heating, ensure racks are properly positioned and sensors are clean․ If the self-clean cycle malfunctions, reset the oven or cancel the cycle․ Addressing issues promptly prevents further damage․ Always consult the manual for detailed troubleshooting steps to restore functionality and maintain performance․ Regular checks and timely interventions ensure your oven operates efficiently and reliably for years to come․

Accessing the Manual Online

Visit the official Maytag website, enter your oven’s model number, and download the manual directly․ For assistance, call 1-800-688-9900 or refer to the provided resources online․

Where to Find the Maytag Genesis Double Oven Manual

To access the Maytag Genesis Double Oven manual, visit the official Maytag website․ Navigate to the support section and enter your oven’s model number in the search bar․ This will direct you to the specific manual for your appliance․ Alternatively, you can download the manual directly from trusted online resources or contact Maytag customer support at 1-800-688-9900 for assistance․ Ensure you have your model and serial number ready for a smooth experience․ The manual is also available for printing or saving digitally for future reference․

Downloading and Saving the Manual

Downloading the Maytag Genesis Double Oven manual is straightforward․ Visit the official Maytag website, navigate to the support section, and enter your oven’s model number in the search bar․ Once located, click the download button to save the manual as a PDF․ Ensure your device has enough storage space for the file․ Save the manual in a easily accessible folder or cloud storage for future reference․ This digital copy allows you to access it anytime, even without internet connection, ensuring you always have the guide handy for troubleshooting or operational guidance․

Printing the Manual for Easy Reference

To print the Maytag Genesis Double Oven manual, first ensure you have the PDF downloaded to your device․ Open the file using a PDF reader like Adobe Acrobat or your browser’s built-in viewer․ Use the print function and select a standard printer․ Choose landscape orientation for better readability․ Consider printing on high-quality paper for clarity․ For convenience, organize the pages in a binder or use a three-ring binder with hole-punched sheets․ This physical copy allows easy access without needing digital devices, making it a practical reference for daily use or troubleshooting․

Warranty and Customer Support

Understand your warranty terms for coverage details․ Register your product at www․maytag․com or www․maytag․ca for warranty validation․ Contact Maytag support at 1-800-688-9900 for assistance․ Dedicated service ensures your needs are met promptly and efficiently, providing peace of mind for your investment․

Understanding the Warranty Terms

Your Maytag Genesis Double Oven is backed by a comprehensive warranty ensuring coverage for parts and labor under specific conditions․ The warranty period varies by component, with details outlined in your manual․ Proper registration on Maytag’s official website is required to validate your warranty․ Coverage includes repairs and replacements for defective parts, excluding normal wear and tear․ Understanding your warranty terms ensures you maximize protection for your investment․ Refer to the manual for full details on what is covered and for how long․

Registering Your Product

Registering your Maytag Genesis Double Oven is a straightforward process that ensures warranty validation and access to exclusive customer support benefits․ Visit the official Maytag website at www․maytag․com (or www․maytag․ca for Canadian customers) and navigate to the product registration section․ You will need your oven’s model and serial numbers, typically located on the frame behind the storage drawer panel․ Create an account or log in, then fill out the registration form with accurate personal and product details․ Upon completion, you’ll receive confirmation of successful registration, ensuring your warranty remains active and you stay updated on product-related information․

Contacting Maytag Customer Support

For assistance with your Maytag Genesis Double Oven, contact customer support at 1-800-688-9900․ This service is available to address any questions or concerns you may have․ Additionally, you can visit the official Maytag website at www․maytag․com (or www․maytag․ca for Canadian customers) to access online support resources, including FAQs, troubleshooting guides, and live chat options․ Be prepared to provide your oven’s model and serial numbers for efficient assistance․

Continue Reading

white rodgers 1f80 361 instruction manual

The White Rodgers 1F80-361 is a programmable digital thermostat from the Classic 80 Series, featuring microcomputer technology for precise temperature control․ It offers 5-day/1-day/1-day scheduling, temporary hold, and manual override options․ With a backlit LCD display and compatibility with various HVAC systems, this thermostat provides user-friendly energy management solutions for home comfort;

Overview of the 1F80-361 Model

The White Rodgers 1F80-361 is a programmable electronic digital thermostat from the Classic 80 Series․ It features a solid-state microcomputer for precise temperature control, offering 5-day/1-day/1-day scheduling options․ The thermostat includes a backlit LCD display for easy readability and supports temporary hold functionality․ It is compatible with a wide range of HVAC systems and provides flexible programming options, including manual overrides․ The device operates within a temperature range of 45°F to 90°F and includes terminal designations such as RC, RH, C, W, Y, G, O, and B․ Designed for energy efficiency and user convenience, the 1F80-361 is a reliable choice for home comfort control․

Importance of Reading the Manual

Reading the White Rodgers 1F80-361 instruction manual is essential for proper installation, operation, and troubleshooting․ It provides critical safety precautions to avoid personal injury or property damage․ The manual outlines step-by-step installation guidance, ensuring compatibility with your HVAC system․ Understanding the thermostat’s features, such as programming options and temporary hold functions, requires referencing the manual․ It also covers maintenance tips and advanced settings, ensuring optimal performance․ Failure to follow the instructions can lead to improper setup or operation, reducing efficiency and potentially causing system malfunctions․ Always refer to the manual before attempting any adjustments or repairs to ensure safety and effectiveness․

Installation Instructions

The White Rodgers 1F80-361 installation requires turning off power, gathering necessary materials, and following step-by-step manual instructions to ensure safe and proper setup of the thermostat․

Materials Needed for Installation

For installing the White Rodgers 1F80-361 thermostat, you will need a screwdriver, wire strippers, and a voltage tester․ Ensure compatibility with your HVAC system (24V AC)․ Gather the thermostat unit, mounting hardware, and wires․ Turn off power at the circuit breaker before starting․ Refer to the manual for specific terminal connections (RC, RH, C, W, Y, G, O, B)․ Use the provided wall plate and screws to secure the thermostat․ Ensure all wires are properly stripped and connected to avoid electrical issues․ Safety precautions, such as wearing insulated gloves, are recommended․ Follow the step-by-step guide in the manual for accurate installation․

Step-by-Step Installation Process

Begin by turning off the power to your HVAC system at the circuit breaker․ Remove the old thermostat and disconnect the wires, noting their connections․ Mount the new wall plate using the provided screws․ Connect the wires to the corresponding terminals (RC, RH, C, W, Y, G, O, B) as per the wiring diagram․ Secure the thermostat to the wall plate and restore power․ Use the voltage tester to ensure no live wires are present during connections․ Follow the manual’s instructions for programming and setting up your preferred schedule․ Test the system to ensure proper operation․ Always refer to the 1F80-361 manual for specific guidance․

Wiring Diagram and Connections

The White Rodgers 1F80-361 thermostat requires precise wiring connections to ensure proper functionality․ Refer to the wiring diagram in the manual to identify the correct terminals: RC (24V common), RH (24V heating), C (common), W (heating), Y (cooling), G (fan), O (heat pump), and B (reversing valve)․ Ensure all wires are securely connected to their respective terminals․ If replacing an old thermostat, label the wires before disconnecting them to avoid confusion․ Double-check the connections to prevent errors․ The thermostat is compatible with most HVAC systems, but verify compatibility with your specific setup․ Always turn off the power at the circuit breaker before starting any wiring work to ensure safety․ Follow the manual’s wiring instructions carefully to avoid damage or malfunction․

Mounting the Thermostat

Mounting the White Rodgers 1F80-361 thermostat requires careful attention to ensure proper installation․ Begin by turning off the power to the HVAC system at the circuit breaker․ Remove the thermostat’s faceplate and attach the subbase to the wall using the provided screws and wall anchors․ Ensure the subbase is level for accurate temperature sensing․ If necessary, drill pilot holes for the screws․ Once the subbase is secure, reattach the faceplate, ensuring all wiring connections are safely routed through the wall․ The thermostat is designed to fit standard gang boxes, but verify compatibility with your existing setup․ Mounting the thermostat at the correct height (typically 52-60 inches from the floor) ensures accurate temperature readings․ Refer to the manual for specific mounting guidelines and safety precautions․ Proper installation ensures reliable performance and energy efficiency․ Always follow the manufacturer’s instructions to avoid damage or malfunction․

Programming Features

The White Rodgers 1F80-361 offers flexible programming options, including 5-day/1-day/1-day scheduling, weekend programming, and temporary hold functionality, allowing users to customize temperature settings for energy efficiency and comfort․

5-Day/1-Day/1-Day Programming Options

The White Rodgers 1F80-361 thermostat offers versatile 5-Day/1-Day/1-Day programming, allowing users to set distinct temperature schedules for weekdays and weekends․ This feature enables precise control over heating and cooling systems, optimizing energy usage and comfort․ Users can program different temperature settings for each day of the week, with specific start and end times․ The 5-Day option covers Monday through Friday, while the two 1-Day options are typically for Saturday and Sunday․ This flexibility ensures that the thermostat adapts to varying lifestyles and schedules, providing consistent comfort while reducing energy waste․ The programming is easily customizable via the thermostat’s interface, making it user-friendly and efficient․

Weekend Programming Options

The White Rodgers 1F80-361 thermostat provides specific weekend programming options, allowing users to set distinct temperature schedules for Saturday and Sunday․ This feature is part of the 1-Day programming options, enabling tailored comfort and energy efficiency during weekends․ Users can program different start and end times for each day, ensuring the thermostat adapts to their unique weekend routines․ The interface allows for easy customization, and the LCD display clearly shows the programmed settings․ This flexibility ensures that the thermostat operates efficiently, maintaining desired temperatures while reducing energy waste․ The weekend programming feature complements the 5-Day/1-Day/1-Day scheduling, offering a comprehensive solution for varying lifestyles․

Manual Override and Temporary Hold

The White Rodgers 1F80-361 thermostat offers a Manual Override feature, allowing users to temporarily adjust the temperature without altering the programmed schedule․ By pressing the HOLD button, the thermostat will maintain the manually set temperature until the next programmed period begins․ This is ideal for occasional adjustments, such as when leaving the house earlier than usual or returning later․ The Temporary Hold function ensures that the thermostat resumes its normal programming after the hold period ends, providing both convenience and energy efficiency․ This feature is particularly useful for balancing comfort and energy savings, especially during unexpected schedule changes․

Operating the Thermostat

The 1F80-361 thermostat features a user-friendly interface with an LCD display showing setpoint and current temperature․ It allows easy adjustments, temporary hold, and manual overrides for precise control․

Basic Operation and Display Functions

The 1F80-361 thermostat features a backlit LCD display that shows the current temperature, setpoint, and system status․ Users can easily adjust settings using the arrow keys․ The display alternates between current temperature and setpoint for clear visibility․ The thermostat’s interface is intuitive, allowing quick access to basic functions like temperature adjustment and system mode selection․ A temporary hold feature is also accessible, enabling manual overrides without disrupting the programmed schedule․ The LCD provides real-time feedback, ensuring precise control over heating and cooling systems․ This user-friendly design makes it easy to monitor and manage home comfort settings efficiently․ The display also includes indicators for system operation, such as heating or cooling mode․

Temperature Override Until Next Program Period

The 1F80-361 thermostat allows users to temporarily override the programmed temperature settings until the next scheduled period․ This feature provides flexibility for unexpected changes in comfort needs without altering the entire schedule․ By pressing the arrow keys, users can adjust the temperature, and the override will remain active until the next programmed setpoint․ The display will show both the current temperature and the overridden setpoint, ensuring clarity․ This function is ideal for situations where temporary adjustments are necessary, such as when the house is unoccupied or during special events․ The override can be canceled at any time by pressing the HOLD button, restoring the original programming․ This feature enhances convenience and energy efficiency․

Manual Program Override (HOLD Temperature)

The 1F80-361 thermostat’s HOLD function allows users to override the programmed temperature settings manually․ To activate, press the HOLD button, which locks the current temperature until the next scheduled period or until deactivated․ The display indicates “HOLD” when active․ Pressing HOLD again or adjusting the temperature returns the thermostat to its programmed schedule․ This feature is ideal for temporary adjustments without altering the entire program․ It works in both heating and cooling modes, with temperature adjustments limited to the thermostat’s range․ The display shows the overridden temperature, ensuring clarity․ This convenient override enhances flexibility while maintaining energy efficiency․

Advanced Features

The 1F80-361 thermostat features advanced options like Fahrenheit to Celsius conversion, temporary HOLD functionality, and microcomputer technology for precise temperature control, ensuring efficient and customizable operation․

Fahrenheit to Celsius Convertibility

The White Rodgers 1F80-361 thermostat offers a convenient Fahrenheit to Celsius conversion feature, allowing users to toggle between temperature units based on their preference․ This feature ensures flexibility for individuals accustomed to either scale, providing clear and accurate temperature display․ The thermostat’s LCD screen seamlessly switches between °F and °C, maintaining precise temperature control and readability․ This functionality is particularly useful for international users or those who prefer metric measurements․ The conversion process is straightforward, often accessible via the thermostat’s menu, ensuring a user-friendly experience․ This feature enhances the thermostat’s versatility, making it suitable for a wide range of applications and user needs․

Temporary HOLD Function

The White Rodgers 1F80-361 thermostat features a Temporary HOLD function, allowing users to override the programmed schedule temporarily․ This function is ideal for adjusting the temperature without altering the entire program․ By pressing the HOLD button, the thermostat maintains the current temperature setting until the next programmed period begins․ This feature provides flexibility for short-term changes, such as when the house is unoccupied or during unexpected events․ The Temporary HOLD function ensures energy efficiency while offering convenience․ It is easily activated and canceled, making it a practical solution for varying temperature needs․ This function is a key advantage of the thermostat’s programmable design․

Microcomputer Technology for Precise Control

The White Rodgers 1F80-361 thermostat utilizes advanced microcomputer technology to deliver accurate and reliable temperature control․ This solid-state microcomputer enables precise time and temperature management, ensuring consistent heating and cooling performance․ The technology allows for real-time adjustments and maintains programmed settings with high accuracy․ It supports features like 5-day/1-day/1-day scheduling and temporary overrides, making it adaptable to various household needs․ The microcomputer ensures smooth operation of all thermostat functions, including temperature hold and manual overrides․ This advanced technology enhances energy efficiency and provides a user-friendly experience․ The 1F80-361 model is designed to integrate seamlessly with compatible HVAC systems, offering reliable and efficient climate control for any home․

Technical Specifications

The White Rodgers 1F80-361 operates on 24V systems, with a temperature range of 45°F to 90°F․ It features RC, RH, C, W, Y, G, O, and B terminals for compatibility with various HVAC setups․

Voltage and Compatibility Requirements

The White Rodgers 1F80-361 thermostat is designed to operate on a 24V AC system, ensuring compatibility with most standard HVAC setups․ It supports a wide range of heating, cooling, and heat pump systems, making it versatile for various home configurations․ The thermostat is compatible with single-stage and multi-stage systems, as well as dual-fuel setups․ Its terminal designations include RC, RH, C, W, Y, G, O, and B, providing flexibility for different wiring configurations․ The thermostat’s voltage requirements ensure safe and efficient operation, while its compatibility with multiple system types makes it a reliable choice for precise temperature control in residential environments․

Temperature Range (45°F to 90°F)

The White Rodgers 1F80-361 thermostat operates effectively within a temperature range of 45°F to 90°F, ensuring optimal comfort and energy efficiency․ This range allows precise temperature control during both heating and cooling cycles․ The thermostat’s microcomputer technology maintains consistent temperatures, reducing fluctuations and providing a stable environment․ Whether in summer or winter, the 1F80-361 adapts to maintain your preferred settings, ensuring energy savings and comfort․ Its temperature range is suitable for most residential applications, making it a reliable choice for maintaining desired indoor conditions throughout the year․

Terminal Designations (RC, RH, C, W, Y, G, O, B)

The White Rodgers 1F80-361 thermostat features specific terminal designations to ensure proper wiring and functionality․ The terminals are labeled as follows: RC (24V common), RH (24V heating), C (common), W (heating stage), Y (cooling stage), G (fan), O (heat pump reversing valve), and B (common for heat pump systems)․ Correct wiring according to these designations is essential for safe and efficient operation․ The manual provides detailed wiring diagrams to guide installation, ensuring compatibility with various HVAC systems․ Proper terminal connections are critical to avoid malfunctions and ensure precise temperature control․ Always refer to the manual for specific wiring instructions tailored to your system configuration․

Product Dimensions and Weight

The White Rodgers 1F80-361 thermostat has dimensions of 5․5 inches in height, 4․5 inches in width, and 1․5 inches in depth․ Its lightweight design makes it easy to handle and install, weighing approximately 6․4 ounces․ These compact dimensions ensure the thermostat fits seamlessly into standard wall plates, maintaining a sleek appearance while providing efficient temperature control․ The weight is minimal, reducing the strain on the wall and ensuring stability during operation․ Knowing the product dimensions and weight is essential for installers to plan and execute the installation accurately, ensuring proper fitment and functionality․

Troubleshooting Common Issues

The 1F80-361 thermostat may face issues like not turning on, incorrect temperature display, or programming problems․ These are often resolved by checking power, calibration, and wiring connections․

Thermostat Not Turning On

If the White Rodgers 1F80-361 thermostat fails to turn on, ensure the power source is stable․ Check the circuit breaker or fuse box to confirm power supply․ Verify wiring connections at the thermostat and HVAC system for looseness or damage․ If using batteries, replace them with fresh ones, ensuring correct polarity․ Reset the thermostat by removing batteries or disconnecting power for 30 seconds․ Consult the manual for specific reset procedures․ If issues persist, contact a licensed technician to inspect the system․

Incorrect Temperature Display

If the White Rodgers 1F80-361 thermostat displays an incorrect temperature, first check the sensor accuracy․ Ensure the thermostat is properly calibrated by following the manual’s recalibration steps․ Verify that no objects are blocking the sensor or affecting its readings․ Loose wiring or faulty connections may also cause inaccuracies․ Reset the thermostat by removing batteries or disconnecting power for 30 seconds․ If the issue persists, ensure the thermostat is mounted level and in an area with consistent temperature․ Consult the manual for specific calibration instructions or contact a professional if the problem remains unresolved․

Programming Issues and Solutions

If programming issues arise with the White Rodgers 1F80-361, ensure the thermostat is properly powered and all wires are securely connected․ Reset the device by removing batteries or disconnecting power for 30 seconds․ Verify that the programmed schedule is correctly set, as incorrect time or date settings can disrupt operation․ If issues persist, perform a factory reset by holding the HOLD button for 5 seconds․ Consult the manual for detailed reset instructions․ Ensure firmware is up-to-date if applicable․ If problems continue, contact customer support or a licensed technician for assistance․ Always refer to the manual for troubleshooting specific programming-related errors․

Maintenance and Care

Regularly clean the White Rodgers 1F80-361 thermostat’s display and internal components to ensure optimal performance․ Replace batteries annually or as needed․ Check for software updates and install them to maintain functionality and efficiency․ Refer to the manual for detailed maintenance instructions to prolong the device’s lifespan and ensure accurate temperature control․ Always follow safety guidelines when performing any maintenance tasks․ Proper care will help sustain the thermostat’s reliability and effectiveness in regulating your home’s climate․ Regular maintenance is essential for consistent operation and energy efficiency․ Follow the manual’s guidelines for best results․ Ensure all components are clean and free from dust buildup․

Cleaning the Thermostat

To clean the White Rodgers 1F80-361 thermostat, use a soft, dry cloth to gently wipe the exterior and display screen․ Avoid using liquids or abrasive materials, as they may damage the device․ For stubborn grime, a slightly damp microfiber cloth can be used, but ensure it is not soaking wet to prevent moisture damage․ Do not open the thermostat to clean internal components, as this could void the warranty or cause operational issues․ Instead, use compressed air cautiously to remove dust from vents or crevices․ Regular cleaning helps maintain functionality and ensures accurate temperature control․ Always refer to the manual for specific cleaning recommendations to preserve the thermostat’s performance and longevity․

Battery Replacement (if applicable)

The White Rodgers 1F80-361 thermostat operates on two AA alkaline batteries, which typically need replacement every 12-24 months․ To replace the batteries, locate the battery compartment on the rear of the thermostat․ Open it by sliding it downward or removing the faceplate, depending on the model․ Carefully remove the old batteries and insert the new ones, ensuring the polarity matches the diagram inside the compartment․ Avoid using rechargeable batteries, as they may not provide consistent power․ After replacing, replace the compartment or reattach the faceplate and test the thermostat to ensure it functions correctly․ Always refer to the manual for specific instructions to avoid any issues․ Regular battery replacement prevents system downtime and ensures reliable performance․

Updating Software (if applicable)

The White Rodgers 1F80-361 thermostat does not typically require software updates, as it is a programmable digital thermostat with fixed firmware․ However, if updates are available, they are usually performed by replacing the thermostat’s control module․ Always ensure the thermostat is powered off before attempting any updates․ Consult the user manual or contact White Rodgers customer support for specific instructions․ If software updates are required, they may involve downloading the latest version from the manufacturer’s website and transferring it to the thermostat using a compatible interface․ Always follow safety precautions and manufacturer guidelines to avoid damaging the device․

Downloading the Manual

The White Rodgers 1F80-361 manual is available for download as a PDF from sources like ManualsDir․com or the manufacturer’s official website․ Ensure you select the correct model for accurate instructions․

Sources for the 1F80-361 Manual

Sources for the 1F80-361 Manual

The White Rodgers 1F80-361 manual can be downloaded from various online sources, including ManualsDir․com, the official White Rodgers website, and ntsupply․com․ These platforms provide free access to the PDF version of the manual, ensuring easy installation and operation guidance․ Additionally, the manual is available on multiple HVAC supply websites, making it widely accessible for users․ The document covers installation, programming, and troubleshooting, making it an essential resource for homeowners and technicians․ Ensure to verify the model number before downloading to guarantee compatibility with your thermostat․

How to Download the PDF Manual

To download the White Rodgers 1F80-361 manual, visit the official White Rodgers website or trusted platforms like ManualsDir․com or ntsupply․com․ Navigate to the support or resources section, search for the 1F80-361 model, and select the PDF manual․ Ensure the document is labeled for the correct model to avoid mismatches․ Some sites may require creating an account or verifying the model number․ Once verified, click the download link to save the manual․ The process is straightforward, and the manual is typically free to access․ This ensures easy access to installation, programming, and troubleshooting guidelines for optimal thermostat operation․

Safety Precautions

Always turn off power before installation or servicing․ Avoid direct electrical contact․ Follow all instructions carefully to prevent injury or property damage․ Adhere to guidelines strictly․

General Safety Guidelines

Always disconnect power before installing or servicing the thermostat to avoid electrical shock․ Ensure the system is turned off at the circuit breaker or fuse box․ Never touch bare wires, as this can cause injury or damage․ Follow all instructions carefully to prevent personal harm or property damage․ Handle the thermostat gently to avoid physical damage․ Adhere to local electrical codes and regulations during installation․ Keep the area clean and dry to ensure proper function․ Avoid exposing the thermostat to extreme temperatures or moisture․ Regularly inspect wires and connections for wear or damage․ If unsure, consult a licensed professional for assistance․ Safety is paramount․

Electrical Safety Warnings

Disconnect power before installing or servicing the thermostat to prevent electrical shock․ Never touch internal components or wires with bare hands, as this can cause injury․ Ensure all connections are secure and properly insulated․ Use the correct voltage rating specified in the manual to avoid damage or fire hazards․ Do not overload circuits, and keep wires away from flammable materials․ Avoid using damaged or frayed wires, as they can lead to electrical fires․ Always follow the manufacturer’s instructions for wiring and connections․ If unsure about any procedure, consult a licensed electrician․ Electrical safety is critical to prevent accidents and ensure proper thermostat function․

The White Rodgers 1F80-361 programmable thermostat is a reliable and efficient solution for managing home temperatures․ With its advanced microcomputer technology, 5-day/1-day/1-day programming, and user-friendly interface, it offers precise control and energy savings․ The manual provides comprehensive guidance for installation, operation, and troubleshooting, ensuring optimal performance․ By following safety precautions and proper maintenance, users can extend the lifespan of the thermostat․ Whether for residential or light commercial use, the 1F80-361 is a practical choice for modern heating and cooling systems․ Always refer to the official manual for detailed instructions to maximize its functionality and ensure safe operation․

Continue Reading

jeep grand cherokee 2017 manual

The 2017 Jeep Grand Cherokee manual is an essential guide for owners, providing detailed information on operation, maintenance, and troubleshooting. It offers comprehensive insights into vehicle features, ensuring optimal performance and safety for drivers.

Overview of the Manual

The 2017 Jeep Grand Cherokee manual is a detailed guide designed to help owners understand and maintain their vehicle. Available in PDF format, it spans 638 pages and covers essential topics such as operation, maintenance, and troubleshooting. The manual includes sections on vehicle features, safety precautions, and diagnostic procedures. It also provides step-by-step instructions for routine tasks and advanced driving tips. Whether you’re familiar with the Grand Cherokee or new to the model, this manual serves as a comprehensive resource. It is free to download and accessible online, ensuring easy access to critical information for optimal vehicle performance and longevity.

Key Features of the 2017 Jeep Grand Cherokee

The 2017 Jeep Grand Cherokee is renowned for its blend of luxury and off-road capability. It features a range of engine options, including a 3.6-liter V6 producing 295 horsepower and a 5.7-liter V8 for enhanced power. The SUV also offers a 3.0-liter EcoDiesel V6 for improved fuel efficiency. Four-wheel drive is standard across trims, providing exceptional traction. Inside, the Grand Cherokee boasts a spacious interior with a 7-inch touchscreen, dual-zone climate control, and heated seats. Advanced safety features like adaptive cruise control and blind-spot monitoring ensure a secure driving experience. Its robust design and versatile features make it ideal for both on-road comfort and off-road adventures;

Maintenance and Repair Information

Maintenance and repair details for the 2017 Jeep Grand Cherokee are outlined in the manual, covering routine checks, oil changes, tire rotations, and fluid replacements. Repair guides are included for common issues, ensuring owners can address problems efficiently.

Routine Maintenance Schedule

The 2017 Jeep Grand Cherokee manual outlines a routine maintenance schedule to ensure optimal performance and longevity. Regular oil changes are recommended every 5,000 to 7,500 miles, depending on driving conditions. Tire pressure should be checked monthly and adjusted as needed. Brake fluid replacement is advised every two years, while coolant and transmission fluid services are typically due at higher mileage intervals. The manual also specifies inspections for belts, hoses, and battery health at 50,000-mile increments. Adhering to this schedule helps prevent mechanical issues, ensuring the vehicle runs efficiently and reliably over time.

Periodic Service Requirements

The 2017 Jeep Grand Cherokee manual specifies periodic service requirements to maintain vehicle health. Major services are recommended every 2 years or 30,000 kilometers, including oil changes, tire rotations, and fluid checks. The air filter should be replaced every 15,000 miles, while spark plugs are due at 100,000 miles. Brake pads and rotors require inspection every 10,000 miles. Additionally, the manual advises checking belts and hoses at 50,000-mile intervals. Properly following these guidelines ensures the vehicle remains reliable, performs efficiently, and avoids costly repairs. Regular inspections and timely replacements are key to preserving the Grand Cherokee’s durability and performance.

Operating Instructions

The 2017 Jeep Grand Cherokee manual provides clear guidance on basic vehicle operations, including seat adjustments, folding rear seats, and resetting tire pressure for optimal performance.

Basic Vehicle Operations

The manual outlines essential functions for seamless driving. Adjusting seats involves using the side lever to slide forward or backward. Opening the fuel door requires pulling the lever near the driver’s door hinge. Folding rear seats is done by releasing handles on seatbacks to expand cargo space. For headlight replacement, access the bulb from the hood, twist counterclockwise, and replace with a new one. Tire pressure reset involves using the steering wheel menu to navigate to the Tire Pressure option and holding the OK button until settings update. These steps ensure optimal vehicle functionality and driver convenience.

Advanced Driving Tips

The manual provides tips for maximizing the Grand Cherokee’s performance. For off-road driving, use the 4×4 system with modes like Rock or Sand/Mud for traction. On-road, enable adaptive cruise control for safe distance maintenance. Hill descent control assists in steep declines by regulating speed. Use the Selec-Terrain system to adapt to surfaces like snow or sand. Sport mode enhances throttle response for dynamic driving. Always maintain proper tire pressure for efficiency and safety. Familiarize yourself with these features to optimize your driving experience, whether on paved roads or challenging terrain.

Trim Levels and Customization Options

The 2017 Jeep Grand Cherokee offers multiple trim levels, including Laredo, Limited, Trailhawk, Overland, and SRT. Each trim provides unique features, such as advanced 4×4 systems, luxury interiors, and performance enhancements. Owners can customize their vehicle with optional engines, wheel designs, and technology upgrades, ensuring a tailored driving experience that suits both on-road comfort and off-road adventures.

Available Trims and Their Features

The 2017 Jeep Grand Cherokee is available in five distinct trims: Laredo, Limited, Trailhawk, Overland, and SRT. The Laredo comes with a 3.6-liter V6 engine, 7-inch touchscreen, and rearview camera. The Limited adds leather-trimmed seats and a heated steering wheel. The Trailhawk is designed for off-road enthusiasts, featuring a disconnecting front sway bar and all-terrain tires. The Overland offers luxury with premium materials, a dual-pane sunroof, and advanced safety features. The SRT trim delivers high performance with a 6.4-liter V8 engine, sport-tuned suspension, and track-ready capabilities. Each trim offers customization options to enhance performance, comfort, and style.

Customization Options for Enhanced Performance

The 2017 Jeep Grand Cherokee offers various customization options to enhance performance. Owners can upgrade the engine with performance tuning kits or install high-flow air filters and exhaust systems for improved power. Suspension upgrades, such as lift kits or heavy-duty shocks, can enhance off-road capabilities. Additionally, lightweight alloy wheels with high-performance tires provide better traction and handling. For tech enthusiasts, advanced engine management systems can optimize fuel efficiency and power delivery. These modifications allow drivers to tailor their vehicle to their driving style, whether for off-road adventures or sporty on-road performance, ensuring a personalized and enhanced driving experience.

Safety Features and Guidelines

The 2017 Jeep Grand Cherokee manual highlights advanced safety features, including blind-spot monitoring, rear cross-traffic alert, and adaptive cruise control, ensuring a secure driving experience with a 5-star safety rating.

Standard Safety Features

The 2017 Jeep Grand Cherokee includes a robust array of standard safety features, such as a rearview camera, electronic stability control, and seven airbags. Advanced systems like blind-spot monitoring and rear cross-traffic alert are also standard, enhancing driver awareness and collision prevention. The vehicle’s high-strength steel frame and advanced braking systems further contribute to its exceptional safety ratings. These features work seamlessly to protect occupants and provide peace of mind, whether on paved roads or challenging off-road terrains.

Using Safety Features Effectively

To maximize safety, familiarize yourself with the 2017 Jeep Grand Cherokee’s features. Adjust settings like blind-spot monitoring and forward collision warning to suit your driving style. Regularly check systems like the rearview camera for clarity and ensure sensors are clean. Use adaptive cruise control on highways for reduced fatigue. Always reference the manual for specific guidance on activating and customizing these features. Proper utilization enhances safety and driving confidence, ensuring a secure experience on any terrain.

Troubleshooting Common Issues

Consult the manual for diagnosing issues like error lights, infotainment malfunctions, or battery problems. Check connections, reset systems, and address symptoms promptly for optimal vehicle performance.

Diagnosing Common Problems

The 2017 Jeep Grand Cherokee manual provides detailed guidance for diagnosing common issues, ensuring optimal vehicle performance. Common problems include error lights, infotainment malfunctions, and battery issues. For error lights, owners should check the owner’s manual or use a code reader to identify the issue. Infotainment problems may require resetting the system or checking connections. Battery issues often involve loose terminals or drained power. The manual also covers periodic service requirements, such as brake fluid changes every two years and tire pressure monitoring. By following these guidelines, drivers can address problems promptly, maintaining their vehicle’s reliability and safety on the road.

Step-by-Step Solutions for Minor Repairs

The 2017 Jeep Grand Cherokee manual offers clear, step-by-step solutions for minor repairs, empowering owners to handle issues confidently. For example, replacing a headlight bulb involves opening the hood, disconnecting the wiring harness, and twisting the bulb counterclockwise. Resetting the tire pressure system requires inflating tires to the recommended level and using the steering wheel controls to recalibrate. Additionally, the manual guides users through refilling fluids, such as windshield washer fluid, and troubleshooting common electrical issues. These instructions are designed to be easy to follow, ensuring minor repairs are completed efficiently and safely without professional assistance.

Continue Reading

myq manual

Welcome to the MyQ manual, your guide to understanding and utilizing the MyQ smart garage system. This manual provides step-by-step instructions, troubleshooting tips, and feature explanations to enhance your experience with smart garage technology.

1.1 Overview of MyQ Technology

MyQ technology is a smart garage system designed to enhance convenience and control over garage door operations. It integrates advanced hardware and software, enabling users to monitor and manage their garage doors remotely via the MyQ app. The system includes components like smart garage hubs, sensors, and compatibility with various garage door openers. MyQ technology allows seamless integration with smart home systems, voice assistants, and automation platforms. It offers real-time notifications, scheduling features, and diagnostics to ensure smooth operation. Designed for both residential and commercial use, MyQ technology aims to improve security, efficiency, and user experience. Regular updates and a user-friendly interface make it a reliable choice for modern smart home solutions.

1.2 Benefits of Smart Garage Systems

Smart garage systems like MyQ offer numerous benefits, enhancing convenience, security, and peace of mind. Remote access allows users to open or close their garage doors from anywhere, ensuring they never have to worry about whether they left the door open. Customizable notifications provide real-time alerts, reducing the risk of unauthorized access. Scheduling features enable automatic operation, making daily routines easier. Integration with smart home systems and voice assistants adds hands-free control, while energy-efficient designs minimize power consumption. Enhanced security features, such as encryption and activity monitoring, protect users’ properties. These systems also reduce maintenance needs by providing diagnostic tools and updates. Overall, smart garage systems streamline garage management, offering a blend of innovation and reliability for modern homes.

Installation and Setup

Ensure hardware compatibility and follow step-by-step installation guides for seamless setup. Mount sensors, sync devices, and complete initial configuration via the MyQ app for optimal performance.

2.1 Hardware Requirements and Compatibility

For proper installation, ensure your garage door opener is compatible with MyQ technology. Most modern belt-drive and chain-drive openers work seamlessly, but older models may require additional sensors. Verify that your opener has a compatible control panel or consider upgrading to a MyQ-enabled device. The system typically requires a stable Wi-Fi connection and a power source. Check the MyQ compatibility list online to confirm your hardware works with the system. Ensure your router is within range and your garage door opener is properly wired. If using a non-MyQ opener, additional accessories like sensors or a universal hub may be necessary. Always refer to the official MyQ website or manual for specific hardware requirements and compatibility guidelines before proceeding with installation.

2.2 Software Installation and Initial Setup

Start by downloading the MyQ app from the official app store. Create an account or log in if you already have one. Ensure your smartphone and garage hub are connected to the same Wi-Fi network. Open the app, select “Add Device,” and choose your MyQ hub from the list. Follow the in-app instructions to pair the hub with your garage door opener. If prompted, enter the serial number manually if the scan feature doesn’t work. Once connected, test the system by opening and closing your garage door via the app. Ensure your router is in range and your devices are powered on during setup. If issues arise, restart your router and retry. After successful setup, explore features like remote access, scheduling, and notifications for a seamless smart garage experience.

Using the MyQ App

The MyQ app offers a user-friendly interface for controlling your garage door remotely. Use it to open/close, schedule operations, and receive real-time notifications. Troubleshoot issues like connectivity problems and app errors by restarting devices or checking Wi-Fi compatibility. Ensure your garage door opener is properly linked and test its functionality after setup. Explore advanced features like voice control and custom alerts for enhanced convenience. Regularly update the app to maintain optimal performance and security.

3.1 Navigating the App Interface

Navigating the MyQ app interface is designed to be intuitive and user-friendly. Upon opening the app, you’ll see a dashboard view of your connected devices, including your garage door opener. Tap on the device to access its controls, such as opening or closing the door remotely. The app also displays real-time status updates, like whether the door is open or closed. Notifications and alerts are prominently featured to keep you informed of any activity or issues. A settings menu allows you to customize preferences, such as scheduling, notifications, and security features. Troubleshooting tools and help resources are also accessible within the app to assist with common issues. By exploring these features, you can maximize the convenience and functionality of your MyQ smart garage system.

3.2 Scheduling and Automation Features

The MyQ app offers robust scheduling and automation features to streamline your garage door operations. Users can set custom schedules to open or close the garage door at specific times, enhancing convenience and security. For example, you can program the door to close automatically every night or open during your daily commute. The app also allows you to create recurring schedules, ensuring consistent operation. Additionally, you can enable automated closing, which shuts the door after a set period of inactivity. Custom notifications keep you informed of all scheduled actions and any unexpected changes; These features integrate seamlessly with smart home systems, providing a hands-free experience. By leveraging scheduling and automation, you can enjoy greater control and peace of mind with your MyQ smart garage system.

Troubleshooting Common Issues

Identify and resolve common MyQ issues quickly. Check Wi-Fi connectivity, device proximity, and app updates. Restart devices or reset settings if problems persist. Ensure smooth operation always.

4.1 Diagnosing Connection Problems

Diagnosing connection issues with your MyQ system involves several key steps. First, ensure your garage door opener and hub are properly connected to your Wi-Fi network. Check your router’s settings to confirm the device is listed and active. If issues persist, reboot both your router and MyQ hub. Verify that your internet connection is stable and that no outages are reported in your area. Additionally, ensure your MyQ app is up to date, as outdated versions may cause connectivity problems. If the issue remains unresolved, check for any physical obstructions between the hub and the garage door opener. Resetting the hub or performing a factory reset on the opener may also resolve the issue. Always refer to the MyQ manual for specific troubleshooting steps tailored to your device.

4.2 Resolving App-Related Errors

Resolving app-related errors in the MyQ system starts with basic troubleshooting steps. If the app fails to connect, force-stop it, then restart and reopen. Ensure your device has a stable internet connection and that your Wi-Fi network is functioning properly. Check for app updates in the Play Store or App Store and install the latest version. If issues persist, uninstall and reinstall the MyQ app. For login problems, reset your password via the “Forgot Password” option. If the app shows incorrect door status, refresh the app or restart the hub. For notification issues, ensure notifications are enabled in your device settings. If errors continue, contact MyQ customer support for further assistance. Always refer to the MyQ manual for detailed troubleshooting guides specific to your device.

Advanced Features and Integrations

Explore advanced features like voice control via Amazon Alexa or Google Home, custom notifications, and seamless integration with smart home systems for enhanced automation and convenience.

5.1 Home Automation and Voice Control

Integrate your MyQ system with popular smart home platforms like Amazon Alexa and Google Home for voice control. This feature allows you to open or close your garage door using simple voice commands. Additionally, MyQ can be linked with other smart devices, enabling automated routines. For instance, your garage door can automatically open when you arrive home, or your lights can turn on when the door closes. Ensure compatibility by checking the supported platforms and follow the manual’s setup guide to enable these integrations. This seamless integration enhances convenience and elevates your smart home experience to the next level.

5.2 Custom Notifications and Alerts

Custom notifications and alerts in the MyQ app allow you to stay informed about your garage door’s status. Receive real-time updates when the door is opened, closed, or left open. Set specific alerts for unusual activity or when the door remains open beyond a set time. Notifications can be tailored to individual users or shared with family members. For troubleshooting, ensure your device’s notification settings are enabled and your internet connection is stable. Some users reported issues with alerts after iOS updates, requiring app reinstallation or device reboot. Use these features to enhance security and convenience, ensuring you’re always aware of your garage door’s status, no matter where you are.

Security and Maintenance

Secure your MyQ system with strong passwords and two-factor authentication. Regularly update firmware and monitor activity for suspicious actions. Ensure stable internet connectivity for reliable operation.

6.1 Securing Your MyQ System

Securing your MyQ system is essential to protect your garage and home from unauthorized access. Start by enabling two-factor authentication for your MyQ account and using a strong, unique password. Regularly update your system’s firmware to ensure you have the latest security patches. Additionally, restrict access to trusted devices and monitor activity logs for suspicious behavior. Always ensure your Wi-Fi network is secure, as your MyQ system relies on it for connectivity. If you suspect a breach, reset your password and review connected devices. For added safety, disable unused features and keep your MyQ app updated. By following these steps, you can safeguard your smart garage system effectively.

6.2 Regular Maintenance and Updates

Regular maintenance and updates are crucial for ensuring your MyQ system operates smoothly and securely. Begin by checking the sensors and cleaning them to avoid malfunctions. Update the MyQ app and firmware promptly to access new features and security patches. Reboot your devices periodically to resolve connectivity issues. Inspect the garage door and opener for wear and tear, addressing any physical damage. Monitor the system’s activity logs to identify unusual patterns. Additionally, ensure your Wi-Fi network is stable and compatible with your MyQ hub. Neglecting updates or maintenance can lead to security vulnerabilities or system errors. By staying proactive, you can maintain optimal performance and protect your investment.

Continue Reading

ganpati stotra pdf

Ganpati Stotra is a sacred hymn dedicated to Lord Ganesha, revered for removing obstacles and granting prosperity. Its PDF versions in English and Sanskrit are readily available online.

Overview of Ganpati Stotra and Its Significance

Ganpati Stotra, dedicated to Lord Ganesha, is a revered hymn that extols the virtues of the remover of obstacles. Its verses highlight Ganesha’s attributes, such as his elephant head and large ears, symbolizing wisdom and understanding. Composed in Sanskrit, it holds deep spiritual significance and is often chanted to seek blessings for success and prosperity. The stotra is believed to bring positive energy and aid in overcoming challenges. It is also valued for its role in enhancing spiritual growth and mental well-being. Available in PDF format in both English and Sanskrit, Ganpati Stotra is easily accessible for devotees worldwide, facilitating its recitation and preserving its ancient teachings for future generations.

Importance of Ganpati Stotra in Hindu Devotional Practices

Ganpati Stotra holds immense significance in Hindu devotional practices, serving as a powerful tool for spiritual growth and worship. It is widely recited to invoke Lord Ganesha’s blessings, ensuring the removal of obstacles and the attainment of prosperity. The stotra is often chanted during rituals, ceremonies, and daily prayers, embodying the devotee’s deep connection with the divine. Its verses, rich in spiritual meaning, are believed to purify the mind and bring inner peace. The availability of Ganpati Stotra in PDF formats has made it easily accessible, allowing devotees to recite it anytime, anywhere. This ancient hymn bridges the gap between traditional and modern worship, preserving its cultural and spiritual essence for generations to come;

Key Components of Ganpati Stotra

Ganpati Stotra comprises sacred verses, rhythmic chants, and devotional hymns. Its structure includes praises of Lord Ganesha, seeking his blessings for obstacle removal and prosperity, blending Sanskrit and English.

Structure and Lyrics of Ganpati Stotra

Ganpati Stotra is a devotional hymn structured with rhythmic verses and shlokas, primarily in Sanskrit, praising Lord Ganesha’s attributes and seeking his blessings. The stotra typically begins with an invocation, followed by descriptive praises of Ganesha, emphasizing his role as the remover of obstacles. The lyrics are rich in spiritual significance, often highlighting his elephant-headed form and divine qualities. Many versions, like the Sankata Nashan Ganesh Stotram, feature a specific meter and rhyme, making them melodious and easy to chant. The stotra concludes with a plea for prosperity and wisdom. Available in both Sanskrit and English translations, the lyrics are accessible to a broad audience. This structured format, combined with its meaningful content, makes Ganpati Stotra a powerful tool for devotion and spiritual growth.

Meaning and Interpretation of the Stotra

The Ganpati Stotra holds profound spiritual significance, dedicating its verses to the glorification of Lord Ganesha as the remover of obstacles and the granter of prosperity. Its lyrics, often written in Sanskrit, reflect deep reverence and devotion, emphasizing Ganesha’s divine attributes and his role as a guiding force in overcoming life’s challenges. The stotra is not merely a prayer but a philosophical guide, encouraging followers to embrace wisdom, humility, and moral integrity. Interpreting its meaning, the stotra symbolizes the quest for balance in life, urging devotees to seek blessings for success and harmony. By chanting it, believers aim to cultivate inner peace and align themselves with divine energy, making it a powerful tool for spiritual growth and self-reflection. Its timeless message resonates with those seeking solace, prosperity, and enlightenment.

Popular Versions of Ganpati Stotra

Popular versions include Sankata Nashan Ganesh Stotram, Ganapati Atharvashirsha, and English/Sanskrit translations, all widely available in PDF formats for easy access and chanting.

Sankata Nashan Ganesh Stotram

The Sankata Nashan Ganesh Stotram is a divine hymn dedicated to Lord Ganesha, known for its power to alleviate obstacles and bestow prosperity. Composed by Sage Narada, it extols Ganesha as the remover of challenges and the granter of desires. The stotram begins with the invocation of Ganesha, describing his attributes and the benefits of worshiping him. It emphasizes the importance of devotion and the recitation of his name for achieving success and longevity. The lyrics also highlight Ganesha’s role as the protector of his devotees and the remover of all adversities. This stotram is widely recited during Ganesh Chaturthi and other auspicious occasions. Its availability in PDF format in both English and Sanskrit makes it accessible for devotees worldwide to chant and seek blessings. Many websites offer free downloads, ensuring that this sacred text reaches every seeker of prosperity and peace.

Ganapati Atharvashirsha (Ganapati Upanishad)

The Ganapati Atharvashirsha, also known as the Ganapati Upanishad, is a revered sacred text dedicated to Lord Ganesha. It is part of the Atharva Veda and consists of 27 verses that explore the philosophical and spiritual essence of Ganesha. The text is structured as a dialogue between Sage Uddalaka and his son Svetaketu, where Ganesha is described as the ultimate reality and the remover of all obstacles. It emphasizes Ganesha’s role as the supreme deity and the embodiment of the universe. The Atharvashirsha is considered a powerful tool for spiritual growth and self-realization. Its PDF versions, available in both English and Sanskrit, provide devotees with an accessible way to study and chant the text. This Upanishad is widely recited during spiritual practices and is cherished for its profound teachings and divine significance.

Ganesha Stotram in English and Sanskrit

Ganesha Stotram is a devotional hymn dedicated to Lord Ganesha, available in both English and Sanskrit. The stotram consists of 27 verses, each praising Ganesha’s attributes and seeking his blessings. It is a powerful prayer for removing obstacles and ensuring success in endeavors. The English version is ideal for those who prefer understanding the meaning while chanting, while the Sanskrit version retains the traditional Vedic essence. PDF versions of the Ganesha Stotram in both languages are widely available online, allowing devotees to download and recite them conveniently. Many websites, such as ChalisaMantra and Ganesh Strotram, offer free downloads of these texts. Chanting the stotram is believed to bring spiritual harmony and material prosperity, making it a popular choice among devotees worldwide.

Benefits of Chanting Ganpati Stotra

Chanting Ganpati Stotra removes obstacles, ensures prosperity, and fosters spiritual growth. It enhances mental well-being, bringing harmony and success in life.

Removal of Obstacles and Prosperity

Ganpati Stotra is widely revered for its ability to eliminate obstacles and bestow prosperity; By chanting this sacred hymn, devotees seek Lord Ganesha’s blessings to overcome challenges in life. The stotra is believed to create a positive environment, fostering success in endeavors and granting wisdom. Its verses are particularly effective in resolving difficulties, whether personal or professional. Regular recitation is said to attract divine grace, ensuring smooth progress and happiness. Many followers believe that chanting Ganpati Stotra before important tasks invokes Ganesha’s protection and guidance. This ancient prayer not only removes hindrances but also paves the way for achieving goals and living a fulfilling life. Its profound impact on spiritual and material well-being makes it a cornerstone of Hindu devotional practices.

Spiritual and Mental Well-being

Spiritual and Mental Well-being

Chanting Ganpati Stotra is believed to enhance spiritual and mental well-being by fostering inner peace and clarity. The stotra’s verses are known to calm the mind, reducing stress and anxiety. Regular recitation helps devotees connect with Lord Ganesha, promoting a sense of divine protection and balance in life. It is said to purify the heart and intellect, leading to a deeper understanding of life’s purpose. The spiritual energy from the stotra is thought to uplift the soul, fostering positivity and resilience. Many practitioners report feeling mentally refreshed and spiritually rejuvenated after chanting. This ancient hymn serves as a powerful tool for maintaining emotional harmony and mental stability, making it a cherished practice for holistic well-being.

Downloading Ganpati Stotra PDF

Ganpati Stotra PDFs are easily accessible online, available on platforms like stotranidhi.com and other devotional sites, offering both English and Sanskrit versions for download.

Free PDF Resources and Websites

Several websites offer free Ganpati Stotra PDF downloads, making it easily accessible for devotees. Stotra Nidhi provides a comprehensive collection of Ganpati stotras, including the Sankata Nashana Ganesh Stotram. The Internet Archive is another reliable source, featuring works like SHRI GANESH STOTRANI and Ganpati Stotra By Amarnath Trasal. Additionally, Bhakti Marg offers the Sankat Nashan Ganesh Stotram in English, ideal for those seeking blessings. These resources are widely available and popular among devotees, ensuring easy access to the sacred hymns for spiritual practices and personal devotion.

How to Download Ganpati Stotra in English and Sanskrit

To download Ganpati Stotra in English and Sanskrit, visit reputable websites like Stotra Nidhi or ChalisaMantra. Search for “Ganpati Stotra PDF” and select the desired language version. Websites like InstaPDF also offer Sanskrit versions, including the Ganapati Atharvashirsha. Ensure the source is reliable to maintain authenticity. Once found, click the download link, and the PDF will be saved to your device for offline access. Many sites provide free downloads, making it convenient for devotees to recite and chant the stotra regularly. This accessibility ensures that spiritual seekers can easily obtain and benefit from the sacred hymns.

Ganpati Stotra is a powerful hymn that brings prosperity and removes obstacles. Its PDF versions are easily accessible online, allowing devotees to chant and seek divine blessings effortlessly.

Final Thoughts on the Significance of Ganpati Stotra

Ganpati Stotra holds immense spiritual significance, offering devotees a pathway to seek Lord Ganesha’s blessings for prosperity and obstacle removal. Its verses, rich in devotion and meaning, resonate deeply with those seeking divine guidance. The availability of Ganpati Stotra in PDF formats, both in English and Sanskrit, has made it accessible to a global audience, ensuring its timeless message reaches every corner of the world. Chanting the stotra with sincerity is believed to bring mental clarity, emotional balance, and material success. It is a powerful tool for spiritual growth, fostering a deeper connection with the divine. As a result, Ganpati Stotra remains a cherished devotion for millions, transcending linguistic and cultural barriers.

Encouragement to Explore and Chant the Stotra

Embrace the divine wisdom of Ganpati Stotra by exploring its verses and chanting them with devotion. The stotra’s profound lyrics offer spiritual growth, mental peace, and a connection to Lord Ganesha. With its availability in English and Sanskrit PDF formats, it’s accessible to everyone, allowing devotees worldwide to benefit from its teachings. Chanting Ganpati Stotra daily can bring clarity, positivity, and prosperity into your life. It’s a beautiful way to seek blessings and overcome challenges. Don’t hesitate to download the PDF and immerse yourself in its sacred rhythms. Let the stotra guide you toward a harmonious and fulfilling life, fostering a deeper bond with the remover of obstacles, Lord Ganesha.

Continue Reading

emerson smartset clock radio manual

Welcome to the Emerson SmartSet Clock Radio manual. This guide helps you understand and utilize your device’s features‚ including SmartSet technology‚ dual alarms‚ and PLL radio functionality.

1.1 Overview of the Emerson SmartSet Clock Radio

The Emerson SmartSet Clock Radio is a versatile device designed for convenience and ease of use. It features Emerson’s patented SmartSet technology‚ which automatically sets the time and date‚ eliminating manual adjustments. The clock radio boasts a clear‚ 1.4-inch blue LED display and dual alarms‚ allowing users to set separate wake times. With a PLL AM/FM radio‚ it offers precise tuning and memory for up to 20 stations. Additional features include a 4-level dimmer for display brightness and USB charging ports for modern connectivity. This device combines functionality‚ style‚ and user-friendly design‚ making it a practical addition to any home.

1.2 Importance of the Manual for Proper Usage

The Emerson SmartSet Clock Radio manual is essential for maximizing your device’s potential. It provides detailed instructions for setting up and operating features like SmartSet‚ dual alarms‚ and radio tuning. Without the manual‚ users may miss key functionalities or encounter setup issues. The guide explains troubleshooting steps‚ ensuring optimal performance and resolving common problems. By following the manual‚ you can customize settings‚ such as display brightness and alarm modes‚ to suit your preferences. Referencing the manual ensures you get the most out of your clock radio‚ enhancing your overall user experience and satisfaction.

Key Features of the Emerson SmartSet Clock Radio

The Emerson SmartSet Clock Radio offers advanced features like automatic time setting‚ dual alarms‚ and a PLL AM/FM radio with 20 station memory for enhanced functionality and convenience.

2.1 SmartSet Automatic Time Setting System

The SmartSet Automatic Time Setting System is Emerson’s patented technology that effortlessly sets the clock’s time and date‚ eliminating manual adjustments. It synchronizes with the atomic clock‚ ensuring accuracy. This feature automatically updates for daylight saving time and maintains the correct time during power outages. Users appreciate its convenience and reliability‚ making it a standout feature of the Emerson SmartSet Clock Radio. The system operates seamlessly‚ providing precise timekeeping without user intervention‚ enhancing overall usability for a worry-free experience. This innovative technology ensures your clock stays accurate and up-to-date effortlessly.

2.2 Dual Alarm Clock Functionality

The Emerson SmartSet Clock Radio features a dual alarm system‚ allowing two separate wake-up times for different users or schedules. Each alarm can be set independently‚ offering flexibility for weekdays‚ weekends‚ or specific days. The alarms can be tailored to wake you with your favorite FM station or a traditional buzzer. This functionality ensures that multiple users can set their preferred wake-up times without conflict. The dual alarm system is easy to program and provides a reliable way to start your day‚ catering to diverse routines and preferences with precision and convenience. It’s designed to accommodate various lifestyle needs efficiently.

2.3 PLL AM/FM Radio with 20 Station Memory

The Emerson SmartSet Clock Radio includes a PLL (Phase-Locked Loop) AM/FM radio‚ ensuring stable and high-quality reception. With a memory capacity for up to 20 stations‚ you can easily save and access your favorite channels. The PLL technology minimizes frequency drift‚ providing clear and consistent sound. This feature allows for seamless switching between saved stations‚ enhancing your listening experience. The combination of advanced tuning and ample memory makes it ideal for users who enjoy a wide range of radio content without the hassle of manual adjustments. This functionality ensures a user-friendly and enjoyable experience for radio enthusiasts.

Setting Up Your Emerson SmartSet Clock Radio

Welcome to the setup guide for your Emerson SmartSet Clock Radio. This section will help you easily configure your device‚ ensuring optimal performance and ease of use. Key features include the SmartSet system and antenna installation for superior reception.

3.1 Initial Setup and First-Time Configuration

Start by plugging your Emerson SmartSet Clock Radio into a power outlet. The device will automatically update the time using its patented SmartSet system. Ensure the correct time zone is selected for accurate timekeeping. Next‚ set the date manually if required. Familiarize yourself with the controls‚ such as the alarm buttons and radio dials. Refer to the manual for guidance on first-time configuration‚ including setting alarms and tuning stations. Proper setup ensures seamless functionality and optimal performance of your clock radio.

3.2 Installing the Antenna for Optimal Reception

For optimal radio reception‚ attach the provided antenna to the back of your Emerson SmartSet Clock Radio. Extend the antenna fully and position it vertically for the best signal strength. Place the device near a window or elevated area to improve reception. If using an external antenna‚ connect it to the designated port. Avoid obstructions like walls or metal objects. Adjust the antenna angle to minimize static and enhance clarity. Proper installation ensures strong signal reception for your favorite AM/FM stations.

Operating Your Emerson SmartSet Clock Radio

Operating your Emerson SmartSet Clock Radio is straightforward. Use the buttons to set alarms‚ adjust the dimmer‚ tune stations‚ and manage playback with ease.

4.1 Understanding Alarm Modes (Everyday‚ Weekends Only‚ etc.)

Your Emerson SmartSet Clock Radio offers versatile alarm modes to suit your lifestyle. Choose from Everyday mode for consistent wake-up times‚ Weekends Only for a break‚ or customize individual alarms for different days. The alarm modes ensure you wake up to your preferred schedule without unnecessary disruptions. Use the intuitive controls to select the mode that fits your routine‚ ensuring your mornings start smoothly every day.

4.2 Tuning and Saving Radio Stations

Tuning and saving radio stations on your Emerson SmartSet Clock Radio is straightforward. Use the digital PLL AM/FM tuner to find your favorite stations with clarity. To save a station‚ tune to the desired frequency‚ then press and hold the memory button until the display confirms the station is stored. Assign the station to one of the 20 available presets for quick access. Once saved‚ you can easily recall your preferred stations without retuning. This feature enhances your listening experience‚ ensuring your favorite shows and music are always just a button press away.

Advanced Features and Customization

Explore advanced features like the 4-Level Dimmer for display brightness‚ USB charging‚ and AUX input connectivity. Customize settings to enhance your user experience with ease and convenience.

5.1 Using the 4-Level Dimmer for Display Brightness

The Emerson SmartSet Clock Radio features a 4-Level Dimmer to adjust the display brightness. This feature allows you to customize the LED display’s intensity to suit your environment. Press the Dimmer button to cycle through four brightness levels: high‚ medium‚ low‚ and off. The dimmer function ensures optimal visibility in both bright and dark settings. Adjusting the brightness is simple and convenient‚ enhancing your overall experience. The dimmer does not affect the radio’s audio volume‚ allowing you to maintain your preferred sound levels while tailoring the display to your preferences. This feature is energy-efficient and designed for user comfort.

5.2 USB Charging and AUX Input Connectivity

The Emerson SmartSet Clock Radio includes a USB charging port and an AUX input for enhanced connectivity. The USB port allows you to charge your smartphone‚ tablet‚ or other USB-compatible devices while the clock radio is plugged into a power source. The AUX input enables you to connect external audio devices‚ such as MP3 players or smartphones‚ to play music through the clock radio’s speakers. These features provide convenience and versatility‚ making the device a practical addition to your home. The USB charging function operates independently of the radio’s playback‚ ensuring your devices stay charged even when the radio is off.

Troubleshooting Common Issues

This section addresses common issues with the Emerson SmartSet Clock Radio‚ such as time inaccuracies‚ alarm malfunctions‚ and radio reception problems‚ providing easy solutions.

6.1 Resolving Time Setting Problems

If the SmartSet feature isn’t working‚ ensure the clock is plugged directly into an AC outlet without a timer or surge protector. Verify the time zone is set correctly. Reset the clock by unplugging it for 30 seconds and replugging it. If issues persist‚ check for daylight saving time settings or manual override. Consult the manual for detailed troubleshooting steps to restore accurate time functionality.

6.2 Fixing Poor Radio Reception

Poor radio reception can be resolved by adjusting the antenna for optimal signal strength. Ensure the antenna is fully extended and positioned away from obstructions; Move the radio to a location with better signal reception‚ avoiding areas with interference from other electronic devices. If stations are not clear‚ reset the station memory by unplugging the radio‚ waiting 30 seconds‚ and replugging it. This clears stored frequencies and allows the radio to rediscover strong signals. Refer to the manual for additional troubleshooting steps to enhance your listening experience.

Continue Reading

vtech dect 6 manual

Welcome to the VTech DECT 6 manual‚ your comprehensive guide for setting up‚ using‚ and troubleshooting your cordless telephone system. This manual provides essential instructions to ensure optimal functionality and safety‚ covering installation‚ features‚ and advanced settings. Reading this guide thoroughly will help you maximize your phone’s capabilities while adhering to important safety precautions.

1.1 Overview of the VTech DECT 6 Cordless Telephone System

The VTech DECT 6 cordless telephone system is a cutting-edge communication solution designed for reliability and convenience. Built on DECT 6.0 technology‚ it offers improved range‚ security‚ and clarity compared to older cordless systems. This system integrates seamlessly with Bluetooth wireless technology‚ enabling users to connect their mobile devices and enjoy hands-free calling. The telephone features a sleek design‚ with both a base unit and handset‚ ensuring ease of use and portability. It supports essential functions like caller ID‚ call waiting‚ and a built-in answering machine. The system is also expandable‚ allowing users to add multiple handsets for whole-house coverage. Safety features include warnings against use near water or in wet environments‚ ensuring safe operation. This system is ideal for both residential and small office settings‚ providing a robust and versatile communication experience.

1.2 Importance of Reading the Manual

Reading the VTech DECT 6 manual is crucial for ensuring safe and effective use of your cordless telephone system. The manual provides essential safety precautions‚ such as avoiding use near water or in wet environments‚ to prevent accidents and damage. It also guides you through proper installation‚ feature activation‚ and troubleshooting common issues. By understanding the manual‚ you can unlock the full potential of your phone’s features‚ including DECT 6.0 technology and Bluetooth integration. Additionally‚ it helps you avoid potential hazards and ensures compliance with safety standards. Taking the time to review the manual will enhance your overall experience and help you maintain your device’s performance and longevity.

Safety Precautions and Important Instructions

Always follow safety guidelines to prevent accidents. Avoid using the phone near water or in wet environments. Adhere to all instructions to ensure safe and proper functionality.

2.1 General Safety Guidelines

Always follow the general safety guidelines to ensure safe and proper use of your VTech DECT 6 phone. Avoid using the device near water‚ such as bathtubs‚ sinks‚ or swimming pools‚ as this may pose a risk of electrical shock. Additionally‚ do not expose the product to extreme temperatures‚ humidity‚ or wet environments. Handle the phone and its accessories with care to prevent damage. Ensure the product is placed on a stable surface to avoid accidental falls. By adhering to these guidelines‚ you can ensure safe operation and maintain the reliability of your VTech DECT 6 cordless telephone system.

2.2 Usage Restrictions (e.g.‚ near water‚ wet environments)

Do not use the VTech DECT 6 phone near water or in wet environments‚ as this may pose a risk of electrical shock or damage. Avoid placing or using the device in areas such as bathtubs‚ sinks‚ swimming pools‚ or wet basements. Keep the phone away from direct exposure to moisture‚ humidity‚ or extreme temperatures. Using the product in such conditions could compromise its performance and safety. Ensure the telephone base and handset are placed on stable‚ dry surfaces to prevent accidents. Adhering to these usage restrictions will help maintain the reliability and longevity of your VTech DECT 6 cordless telephone system.

Setting Up Your VTech DECT 6 Phone

Setting up your VTech DECT 6 phone involves unboxing‚ installing the base station‚ charging the handset‚ and pairing it with the base for seamless communication. Follow the manual for correct configuration to ensure optimal performance and functionality.

3.1 Unboxing and Parts Checklist

When you unbox your VTech DECT 6 phone‚ ensure all components are included: the telephone base‚ handset‚ AC power cord‚ phone line cord‚ rechargeable battery‚ battery compartment‚ and user manual. Verify the parts checklist to confirm nothing is missing. The base station connects to both power and your phone line‚ while the handset requires charging before use. Familiarize yourself with the manual for installation and operation instructions. Safety guidelines emphasize keeping the phone away from water and wet environments. Properly dispose of packaging materials and recycle where possible. This setup ensures your DECT 6 phone is ready for registration and pairing‚ providing reliable communication.

3.2 Installation Steps for the Telephone Base and Handset

Start by connecting the telephone base to a power source using the provided AC power cord. Plug the base into a wall outlet‚ ensuring it’s placed on a stable‚ dry surface. Next‚ connect the phone line cord to the base and your telephone jack. Insert the rechargeable battery into the handset and charge it fully before first use. Once charged‚ place the handset on the base to complete the pairing process. Ensure the base is away from water and wet environments to prevent damage. Follow the manual’s instructions carefully to avoid connectivity issues and ensure proper functionality. Proper installation ensures reliable performance and clear communication.

3.3 Registration/Pairing of Handset with Base

To pair the handset with the base‚ start by ensuring both devices are powered on. Locate the “Pager” button on the base and press and hold it until the indicator lights flash rapidly‚ indicating pairing mode is active.

On the handset‚ navigate to the settings menu and select the “Register Handset” or “Pair Handset” option. The handset will search for available bases. Once the base is detected‚ enter the default code (usually 0000) to complete the pairing process.

If pairing fails‚ reset the base using a pin to restore factory settings and try again. Ensure the handset battery is fully charged before attempting to pair. Consult the manual’s troubleshooting section if issues persist. Successful pairing ensures reliable connectivity for optimal phone performance.

Features and Specifications of the VTech DECT 6

The VTech DECT 6 features advanced DECT 6.0 technology‚ ensuring crystal-clear calls and enhanced security. It supports Bluetooth integration‚ allowing seamless connection to mobile devices‚ and includes a built-in answering system. The system offers superior range‚ multiple handset support‚ and eco-friendly power management. Additional features include caller ID‚ call waiting‚ and a convenient intercom function‚ making it a versatile and reliable cordless telephone solution for home and office use.

4.1 DECT 6.0 Technology Overview

DECT 6.0 technology offers a secure‚ interference-free‚ and high-quality digital communication experience. It operates on a 1.9 GHz frequency band‚ minimizing interference from other devices. This technology ensures clear voice clarity‚ extended range‚ and enhanced security features. DECT 6.0 supports multiple handsets‚ making it ideal for homes and offices. It also provides low power consumption‚ extending battery life. With DECT 6.0‚ users can enjoy reliable performance‚ advanced call management‚ and seamless integration with other devices‚ such as cell phones via Bluetooth. This technology is designed to deliver superior cordless telephone functionality‚ making it a trusted choice for modern communication needs.

4.2 Bluetooth Wireless Technology Integration

The VTech DECT 6 system integrates Bluetooth wireless technology‚ enabling seamless connectivity with compatible devices like cell phones and headsets. This feature allows users to make and receive calls from their mobile phone using the cordless handset. Bluetooth technology also supports audio streaming and call transfer between devices. The pairing process is straightforward‚ ensuring a secure and stable connection. This integration enhances the system’s versatility‚ allowing users to manage both landline and mobile communications effortlessly. With Bluetooth‚ the VTech DECT 6 offers a convenient and modern solution for handling multiple communication needs under one system‚ ensuring a seamless and efficient user experience.

Using the Answering System

The VTech DECT 6 answering system allows you to record and play back messages with ease. It features a built-in digital recorder with ample message storage capacity. Users can set up custom greetings and access messages remotely for added convenience. The system also supports message retrieval and notification options‚ ensuring you never miss important calls. This feature enhances your communication experience by providing a reliable way to manage voicemails and missed calls efficiently.

5.1 Setting Up the Answering Machine

To set up the answering machine on your VTech DECT 6 phone‚ begin by ensuring the base unit is properly installed and powered on. Plug in the power cord and place the base in a convenient location. Next‚ press the “Menu” button on the base or handset and navigate to the “Answering System” settings. Select “Set Up” to configure the date and time‚ as these are required for message timestamping. Record a custom greeting or use the default one‚ then set the number of rings before the machine answers. Finally‚ review the manual for additional tips and ensure the system is active. This ensures your answering machine is ready to capture messages effectively.

5.2 Accessing and Playing Back Messages

To access and play back messages on your VTech DECT 6 phone‚ press the “Play” button on the base unit or select “Play Messages” from the handset menu. Messages are stored chronologically‚ and the date and time of each call are displayed. Use the “Skip” button to move to the next message or the “Delete” button to remove unwanted messages. You can also adjust the volume during playback using the volume control. For remote access‚ ensure the remote access code is set up in the answering machine settings. Saved messages can be replayed by selecting the “Saved Messages” option. Always refer to the manual for additional tips on managing your messages effectively.

Advanced Features and Functionality

Explore advanced features such as Bluetooth integration for hands-free calls‚ intercom with paired devices‚ and conference calling to manage multiple conversations seamlessly and efficiently.

6.1 Using the Intercom Feature

The intercom feature allows you to communicate between the handset and base or with other paired DECT 6.0 devices. To use this feature‚ ensure the handset is registered to the base. Press the Intercom button on the handset or base to initiate a call. Select the desired device from the list of paired units. The intercom function is ideal for household communication‚ enabling quick conversations without additional call charges. This feature is particularly useful in multi-room environments‚ ensuring seamless connectivity and convenience. Proper setup and pairing are essential for optimal performance. Refer to the manual for detailed pairing instructions and troubleshooting tips.

6.2 Setting Up and Using Conference Calling

To set up and use conference calling on your VTech DECT 6 phone‚ access the Menu on the handset and navigate to the Conference Call option. Select Conference Call Setup and follow the on-screen instructions to enable this feature. Once activated‚ you can initiate a conference call by dialing the first participant’s number. After the call is connected‚ press the Options key and select Add Participant. Enter the next number or select it from your phonebook. Repeat this process for additional participants‚ up to the maximum number supported (typically three parties). This feature is ideal for group discussions‚ allowing seamless communication between multiple individuals. Ensure all participants are within range of the base for optimal call quality.

Troubleshooting Common Issues

Identify common issues like connectivity problems or poor sound quality. Check base station placement‚ ensure proper handset registration‚ and reset the system if problems persist.

7.1 Resolving Connectivity Problems

To resolve connectivity issues with your VTech DECT 6 phone‚ ensure the base station is placed in a central location away from physical obstructions. Check for nearby electronic devices that may cause interference‚ such as microwaves or Wi-Fi routers. Verify that the handset is properly registered to the base by following the pairing process outlined in the manual. If connection problems persist‚ restart both the base and handset. Ensure the base is powered on and the handset has a full charge. If issues remain‚ perform a factory reset by pressing and holding the reset button on the base for 10 seconds. This will restore default settings and often resolve connectivity problems. For further assistance‚ refer to the troubleshooting section in the manual.

7.2 Addressing Sound Quality Issues

If you experience poor sound quality on your VTech DECT 6 phone‚ start by ensuring the base station is placed away from physical obstructions and electronic devices that may cause interference. Move the handset closer to the base to improve signal strength. Check for nearby devices emitting radio frequencies‚ such as microwaves or Wi-Fi routers‚ and relocate them if possible. Adjust the volume settings on both the base and handset to ensure they are at an optimal level. If static or distortion persists‚ charge the handset fully‚ as low battery can affect sound quality. If issues remain‚ reset the system by unplugging the base‚ waiting 30 seconds‚ and plugging it back in. For further troubleshooting‚ refer to the manual.

By following the guidelines and instructions outlined in this manual‚ you should now be fully equipped to set up‚ operate‚ and maintain your VTech DECT 6 cordless telephone system. Proper setup‚ regular maintenance‚ and adherence to safety precautions will ensure optimal performance and longevity of your device. If you encounter any issues‚ refer to the troubleshooting section for quick resolutions. The VTech DECT 6 system offers advanced features like DECT 6.0 technology and Bluetooth integration‚ designed to enhance your communication experience. For further assistance‚ visit manuals.plus for detailed resources and updates.

Continue Reading

bible study catholic guide

Catholic Bible study is a vital practice for deepening faith and understanding God’s Word. It offers a rich, transformative experience, connecting believers with Scripture and Church teachings. Study guides and resources provide comprehensive support for both personal and group study, fostering spiritual growth and community engagement;

1.1 The Importance of Bible Study in Catholicism

Bible study holds a central place in Catholicism, serving as a powerful means to deepen faith and strengthen spiritual life. It allows Catholics to encounter God’s Word, fostering a deeper understanding of divine truths and Church teachings. Through Scripture, believers gain insights into their purpose, moral guidance, and the richness of Catholic tradition. Regular Bible study also cultivates a personal relationship with Christ, enabling Catholics to live out their faith more authentically. The Church emphasizes that Scripture is not just a historical text but a living Word that transforms lives. Engaging with the Bible, often through guided study materials, helps believers grow in holiness and fulfill their mission as disciples of Christ.

Choosing the Right Catholic Bible

Selecting the right Catholic Bible involves considering translations, study notes, and additional resources. Popular choices include the RSV-CE and NABRE, known for accuracy and Catholic context. Ensure the Bible includes Apocrypha and study aids like commentary and footnotes to deepen understanding. Some editions offer concordances, maps, and devotional content, enhancing the study experience. Choosing a Bible that aligns with Catholic teachings and provides helpful resources is essential for meaningful Scripture engagement.

2.1 Understanding Different Catholic Bible Translations

Understanding Catholic Bible translations is crucial for effective study. The Revised Standard Version, Catholic Edition (RSV-CE) is a popular choice, balancing accuracy and readability. The New American Bible, Revised Edition (NABRE) is known for its clear language and extensive study materials. Other translations, like the King James Version (KJV), are less common in Catholic circles but still valued for their poetic style. The Douay-Rheims Bible is a traditional option, reflecting older Catholic interpretations. Each translation offers unique insights, so choosing one that aligns with personal study needs and theological understanding is essential for a meaningful experience. Familiarizing oneself with these versions helps in selecting the most suitable Bible for deepening faith and comprehension of Scripture.

Setting Up Your Bible Study Space

Create a quiet, distraction-free area for Bible study. Gather essential materials like a Catholic Bible, study guides, and highlighters. Include prayer resources and a journal for reflection.

3.1 Creating a Conducive Environment for Prayer and Study

Creating a conducive environment for prayer and study is essential for fostering focus and devotion. Begin by selecting a quiet, distraction-free space where you can immerse yourself in Scripture. Consider adding elements like a crucifix, icons, or candles to inspire reverence. Incorporate prayer resources, such as a rosary or devotional books, to enrich your spiritual practice. Ensure good lighting and a comfortable seating arrangement to support extended study sessions. Finally, keep your Bible, study guides, and journal nearby to facilitate reflection and note-taking. This intentional setup will help you cultivate a deeper connection with God’s Word and embrace the Catholic tradition of prayerful Scripture study.

3.2 Essential Materials for Effective Bible Study

To engage effectively in Catholic Bible study, gather essential materials that enhance understanding and reflection. A Catholic Bible, such as the Ignatius Catholic Study Bible, is foundational, offering annotations and commentary aligned with Church teachings. Study guides, like those from the St. Paul Center, provide structured lessons and insights for deeper exploration. Supplementary resources, including concordances and commentaries, aid in interpreting complex passages. Prayer aids, such as a rosary or devotional books, foster a spiritual mindset. Note-taking materials, like a journal, help record reflections and insights. Digital tools, such as Bible study apps, offer convenience and access to additional resources. These materials collectively support a comprehensive and enriching study experience, rooted in Catholic tradition and faith.

Methods for Effective Bible Study

Effective Catholic Bible study involves prayerful reading, guided reflection, and applying the four senses of Scripture. Prayer opens the heart to God’s Word, while study guides provide structured insights. Digital tools and commentaries enhance understanding, fostering a deeper connection with faith and tradition.

4.1 The Role of Prayer in Bible Study

Prayer is the foundation of Catholic Bible study, fostering a spiritual encounter with God’s Word. Begin with a prayer to the Holy Spirit, seeking guidance and openness. Lectio Divina, an ancient method, combines prayerful reading, reflection, and contemplation, helping believers discern God’s message. Prayerful reading slows down the process, allowing Scripture to resonate deeply. Incorporating traditional prayers, such as the Our Father, enhances the sacred nature of study. Prayer also nurtures humility and receptivity, essential for understanding Scripture within the Church’s tradition. By integrating prayer, Catholics transform Bible study into a profound act of faith, connecting their hearts and minds to God’s revealed truth.

4.2 Using Catholic Study Guides and Resources

Catholic study guides and resources are invaluable for deepening biblical understanding. These tools, such as the USCCB study materials, provide historical context, theological insights, and reflections on Scripture. Many guides, like those from the St. Paul Center, offer detailed commentary and discussion questions to enhance personal or group study. Resources like Jeff Cavins’ Bible studies and Edward Sri’s teachings present Scripture in a way that aligns with Catholic traditions. Additionally, online platforms and study plans help structure learning, making it accessible for everyone. These resources ensure that Catholics can engage with the Bible in a way that is both informative and spiritually enriching, fostering a deeper connection to faith and community.

4.3 Applying the Four Senses of Scripture

The Catholic Church teaches that Scripture can be understood through the four senses of Scripture: literal, allegorical, moral, and anagogical. The literal sense focuses on the historical and cultural context of the text. The allegorical sense reveals how events prefigure Christ or the Church. The moral sense applies Scripture to personal virtue and spiritual growth. Finally, the anagogical sense looks to eternal realities and the ultimate fulfillment of God’s plan. By applying these senses, Catholics can uncover the richness of Scripture, deepening their faith and understanding of God’s Word; This method, rooted in tradition, ensures a holistic and transformative approach to Bible study.

Understanding Catholic Tradition in Scripture

Catholic Tradition plays a vital role in interpreting Scripture, serving as the living faith of the Church. It complements the Bible, providing essential context for understanding God’s Word.

5.1 The Role of the Magisterium in Interpreting Scripture

The Magisterium, the teaching authority of the Catholic Church, plays a central role in interpreting Scripture. It ensures that biblical interpretations align with Catholic doctrine and tradition, providing clarity and consistency. The Magisterium, guided by the Holy Spirit, offers official teachings and resources, such as study guides and commentaries, to aid Catholics in understanding Scripture deeply; This authority helps avoid misinterpretations and maintains unity in faith. By relying on the Magisterium, Catholics can confidently explore the Bible, knowing they are guided by the Church’s wisdom and tradition. This approach fosters a balanced and faithful understanding of God’s Word, enriched by centuries of theological insight.

5.2 The Influence of Early Church Fathers

The Early Church Fathers significantly shaped Catholic Bible study by providing rich theological insights and interpretations. Their writings, steeped in faith and tradition, serve as invaluable resources for understanding Scripture. Fathers like Augustine, Jerome, and Origen offered commentaries that align with the Magisterium’s teachings, ensuring a unified interpretation of biblical texts. Their works emphasize the four senses of Scripture, a method encouraged by the Church for deeper understanding. Study guides often incorporate their teachings, helping modern Catholics connect with the apostolic tradition. By studying the Fathers’ works, believers gain a profound appreciation for the historical and spiritual context of the Bible, enriching their faith journey and fostering a deeper connection to the Church’s heritage.

Engaging with the Catholic Community

Engaging with the Catholic community enriches Bible study through group discussions, shared reflections, and collaborative learning. Participating in parish groups or online forums deepens faith and understanding.

6.1 Participating in Group Bible Studies

Participating in group Bible studies fosters a sense of community and accountability, enriching your spiritual journey. These gatherings provide structured learning, often using study guides and resources like video series or online materials. Group discussions allow participants to share insights, ask questions, and learn from one another’s perspectives. Many parishes and organizations offer Bible study programs led by experienced facilitators, ensuring a deep dive into Scripture. Resources from reputable sources, such as the St. Paul Center or scholars like Jeff Cavins and Edward Sri, are often utilized to enhance understanding. Group studies also encourage application of Catholic teachings to daily life, promoting spiritual growth and a stronger connection to the faith community.

6.2 Discussing Scripture with Priests and Scholars

Drawing from the expertise of priests and scholars enriches your understanding of Scripture. Their insights provide a deeper connection to the teachings of the Church, offering a well-rounded perspective. Priests, as spiritual leaders, can offer guidance on applying biblical teachings to daily life, while scholars provide historical and theological context. Resources like the USCCB Study Materials and works from prominent Catholic scholars, such as Fr. Mitch Pacwa, S.J., are valuable tools for these discussions. Engaging with these knowledgeable individuals ensures a faithful interpretation of Scripture, aligning with Catholic traditions and doctrines. This collaborative approach to Bible study not only enhances personal faith but also strengthens the community’s understanding of God’s Word.

Applying Scripture to Daily Life

Applying Scripture to daily life involves reflecting on its teachings and integrating them into actions. Study guides and resources help Catholics live according to God’s Word faithfully.

7.1 Reflecting on Scripture in Everyday Life

Reflecting on Scripture in everyday life helps Catholics apply its teachings practically. Through personal meditation and group discussions, believers can find guidance for daily decisions and challenges. Study guides offer structured approaches to connect biblical lessons with modern life, fostering a deeper understanding of faith. Resources like those from the St. Paul Center provide tools for integrating Scripture into routines, emphasizing prayer and reflection. The Church’s emphasis on the four senses of Scripture—literal, allegorical, moral, and anagogical—enriches personal reflection, enabling believers to see God’s plan unfolding in their lives. This practice nurtures spiritual growth and helps Catholics live according to divine will, bridging faith and daily experiences.

7.2 Living According to Catholic Teachings

Living according to Catholic teachings involves integrating biblical values into daily life. Through prayer, sacraments, and moral decisions, Catholics embody Christ’s lessons. The four senses of Scripture provide a framework for understanding and applying God’s will. Study guides and resources like those from the St. Paul Center offer practical tools for aligning actions with faith. Reflecting on Scripture helps believers navigate modern challenges while staying rooted in tradition. This way of life fosters a commitment to serving others, upholding moral integrity, and living as disciples of Christ in a secular world. By following Catholic teachings, individuals grow in holiness and fulfill their mission to spread God’s love.

Continue Reading

superfood guide lwspeakcare

Superfoods are highly nutritious foods known for their high vitamin, mineral, and antioxidant content, essential for supporting immune function and overall health, making them a popular dietary choice.

What Are Superfoods?

Superfoods are nutrient-dense foods packed with vitamins, minerals, antioxidants, and other beneficial compounds. They are typically rich in essential nutrients and have been linked to various health benefits, such as improving heart health, boosting immunity, and reducing inflammation. Superfoods can come from fruits, vegetables, whole grains, proteins, and even certain fats. Unlike ordinary foods, superfoods are often characterized by their exceptionally high nutritional value and potential to promote overall well-being. They are not a formal scientific category but are widely recognized for their ability to support health and prevent chronic diseases. Examples include berries, leafy greens, nuts, seeds, and fatty fish. Incorporating superfoods into your diet can enhance its quality and provide long-term health advantages.

Benefits of Superfoods

Superfoods offer a wide range of health benefits due to their high concentration of essential nutrients. They are rich in vitamins, minerals, antioxidants, and bioactive compounds that help protect the body from oxidative stress and inflammation. Incorporating superfoods into your diet can improve heart health by lowering cholesterol and blood pressure, enhance immune function, and support mental clarity. Many superfoods also contain anti-inflammatory properties, which may reduce the risk of chronic diseases like diabetes, arthritis, and certain cancers. Additionally, they can aid in weight management, improve digestion, and promote healthy skin. The antioxidants in superfoods help combat free radicals, which can slow down aging and support healthy aging. Overall, superfoods provide a natural way to enhance overall well-being and reduce the risk of various health conditions, making them a valuable addition to a balanced diet.

Why Superfoods Are Important

Superfoods play a vital role in modern health and wellness due to their exceptional nutritional value and potential to prevent chronic diseases. They are packed with essential vitamins, minerals, and antioxidants that help maintain optimal health. Incorporating superfoods into your diet can strengthen your immune system, improve energy levels, and enhance mental clarity. These foods are also crucial for reducing inflammation, which is a key factor in many chronic conditions like heart disease, diabetes, and arthritis. Superfoods support healthy aging, promote better digestion, and may even help manage weight effectively. Their high nutrient density makes them a cost-effective and sustainable way to improve overall well-being. By prioritizing superfoods, individuals can take a proactive approach to their health, reducing the risk of illnesses and maintaining a balanced lifestyle. They are a simple yet powerful way to invest in long-term health and vitality.

Top Superfoods for Overall Health

Superfoods like berries, leafy greens, nuts, seeds, fatty fish, and whole grains are rich in nutrients, offering exceptional health benefits that support vitality and overall well-being naturally.

Berries

Berries are among the most nutrient-dense superfoods, packed with antioxidants, vitamins, and minerals. They support heart health, improve cognitive function, and protect against chronic diseases like diabetes and cancer. Blueberries, strawberries, raspberries, and goji berries are particularly renowned for their high antioxidant content, which helps combat free radicals and reduce inflammation. Berries are also low in calories and rich in dietary fiber, making them an excellent choice for weight management and digestive health. Incorporating berries into your diet can be simple—add them to smoothies, salads, or enjoy as a healthy snack. Their versatility and nutritional benefits make them a cornerstone of a balanced diet, promoting overall well-being and longevity. Regular consumption can enhance energy levels and support immune function, making berries a must-have in any superfood regimen.

Leafy Greens

Leafy greens are a cornerstone of a healthy diet, offering exceptional nutritional value. Packed with vitamins A, C, and K, as well as minerals like calcium and iron, they are essential for maintaining strong bones, healthy vision, and immune function. Spinach, kale, broccoli, and collard greens are among the most popular, each providing unique benefits; These greens are rich in antioxidants, which help combat inflammation and protect against chronic diseases. Incorporating leafy greens into meals is simple—add them to salads, blend into smoothies, or sauté as a side dish. Their versatility makes them a great addition to any diet. Regular consumption supports digestive health and energy levels, while their low calorie and high fiber content aids in weight management. Leafy greens are a powerful superfood that promotes overall well-being and longevity, making them a must-include in daily meals.

Nuts and Seeds

Nuts and seeds are nutrient-dense superfoods, offering a wealth of health benefits. Rich in healthy fats, proteins, and fiber, they provide sustained energy and support heart health. Almonds, walnuts, chia seeds, and flaxseeds are among the most popular, each packed with unique nutrients. Walnuts are high in omega-3 fatty acids, which promote brain function, while chia seeds are an excellent source of fiber, aiding digestion. Nuts and seeds are also rich in antioxidants, protecting against oxidative stress and inflammation. They can be enjoyed as snacks, added to oatmeal or yogurt, or incorporated into baked goods. Moderation is key due to their calorie content. Storing them in a cool, dry place preserves their nutritional value. Including a variety of nuts and seeds in your diet enhances overall nutrition and supports long-term health, making them a versatile and essential superfood for daily consumption.

Fatty Fish

Fatty fish are among the most nutrient-rich superfoods, renowned for their high omega-3 fatty acid content. Salmon, mackerel, sardines, and tuna are popular choices, offering exceptional health benefits. Omega-3s, particularly EPA and DHA, support heart health by lowering triglycerides and reducing inflammation. They also play a crucial role in brain function, improving cognitive performance and mental clarity. Fatty fish are additionally rich in vitamin D, selenium, and protein, making them a well-rounded dietary choice. Incorporating fatty fish into meals can be done through grilling, baking, or adding them to salads. For optimal benefits, it’s recommended to consume fatty fish 2-3 times a week. Their ability to combat chronic diseases and enhance overall well-being makes them a cornerstone of a healthy diet. Ensuring sustainable and mercury-safe sources is key for long-term health benefits and environmental sustainability.

Whole Grains

Whole grains are powerful superfoods packed with fiber, vitamins, and minerals, offering numerous health benefits. They include quinoa, brown rice, oats, barley, and whole wheat, providing sustained energy and improved digestion. Unlike refined grains, whole grains retain their bran, germ, and endosperm, preserving their nutritional integrity. They are rich in antioxidants and phytonutrients, which help protect against chronic diseases like diabetes and heart disease. Incorporating whole grains into meals supports weight management and reduces inflammation. To maximize their benefits, opt for variety, such as choosing whole grain bread over white bread or substituting white rice with brown rice. Pairing whole grains with lean proteins or vegetables enhances their nutritional value, making them a foundational component of a balanced diet. Their versatility in recipes ensures they can be easily integrated into breakfast, lunch, and dinner, promoting long-term health and well-being.

Incorporating Superfoods into Daily Meals

Superfoods can be effortlessly added to meals for enhanced nutrition. Try blending berries into smoothies, sprinkling chia seeds on salads, or adding spinach to omelets for a health boost.

Breakfast Ideas

Starting your day with nutrient-packed breakfasts is easy with superfoods. Try a berry smoothie with chia seeds or a green smoothie with spinach and avocado. Chia pudding with coconut milk and fresh fruit is another delicious option. Overnight oats with nuts, seeds, and whole grains provide sustained energy. For a savory start, consider an omelet with salmon, asparagus, and whole-grain toast. Adding a handful of spinach or kale to scrambled eggs boosts their nutritional value. Whole-grain bowls topped with roasted sweet potatoes, quinoa, and a drizzle of tahini are also a hearty choice. Incorporating these superfood-packed breakfast ideas ensures a nutritious and energizing start to your day.

Snacking Options

Healthy snacking is easier with superfoods. Nuts like almonds and walnuts provide essential nutrients and healthy fats. Seeds, such as chia and flax, are rich in omega-3s and fiber. Fresh berries, like blueberries and strawberries, are packed with antioxidants and vitamins. Trail mix made with nuts, seeds, and dark chocolate is a convenient option. Veggie sticks with hummus offer a crunchy, protein-rich snack. Avocado slices on whole-grain crackers provide healthy fats and fiber. Air-popped popcorn seasoned with herbs is a light, satisfying choice. Incorporating these superfood snacks supports energy levels and overall health, making them ideal for quick, nutritious bites throughout the day.

Dinner Recipes

Incorporating superfoods into dinner can enhance both flavor and nutrition. Grilled salmon with a quinoa and kale salad is a balanced option, as salmon provides omega-3s and quinoa offers complete proteins. Stir-fries with spinach, broccoli, and lean chicken are packed with vitamins and minerals. Lentil soup with leafy greens like spinach and kale is a hearty, fiber-rich choice. Roasted sweet potatoes paired with black beans and avocado offer complex carbs and healthy fats. For a seafood option, try baked cod with steamed asparagus and brown rice. These recipes not only showcase superfoods but also provide a variety of textures and flavors, making meals satisfying and nutritious. By integrating these ingredients, dinners can become a cornerstone of a healthy, superfood-enriched diet.

Tips for Maximizing Benefits

Tips for Maximizing Benefits

Proper storage and preparation methods enhance nutrient retention. Consume superfoods consistently for optimal benefits, and pair them with complementary foods to boost absorption and overall nutritional value effectively.

Storage Tips

Proper storage is key to maintaining the nutritional value of superfoods. Store berries in airtight containers in the refrigerator to prevent mold and spoilage. Leafy greens like kale and spinach should be kept dry in sealed bags to retain crispiness. Nuts and seeds are best stored in cool, dark places or refrigerated to avoid rancidity. Whole grains should be kept in airtight containers in a dry, cool environment to preserve their nutrients. Freezing is an excellent way to extend the shelf life of many superfoods while maintaining their quality. Avoid exposing superfoods to direct sunlight or moisture, as this can degrade their nutrients. By following these storage tips, you can ensure your superfoods remain fresh and nutritious for a longer period.

Preparation Methods

Preparation methods play a crucial role in maximizing the nutritional benefits of superfoods. Berries can be enjoyed raw, added to oatmeal, or blended into smoothies. Leafy greens like spinach and kale are versatile—enjoy them raw in salads, sautéed with garlic, or steamed for a tender texture. Nuts and seeds can be lightly roasted to enhance flavor or ground into nut butter. Fatty fish such as salmon are best baked or grilled to retain omega-3 fatty acids. Whole grains like quinoa and brown rice should be cooked according to package instructions for optimal texture. To preserve nutrients, opt for gentle cooking methods like steaming or stir-frying. Avoid overcooking, as it can reduce vitamin content. Experiment with seasonings and herbs to enhance flavor without adding excess salt or sugar. Proper preparation ensures superfoods remain nutritious and delicious, making them a great addition to any meal.

Continue Reading

nccco test questions and answers pdf

The NCCCO certification is a nationally recognized credential for crane operators, ensuring safety and competence in crane operations. It involves written and practical exams, with study materials like PDF guides and practice questions providing essential preparation tools to assess knowledge and improve skills effectively.

Overview of the NCCCO Program

The NCCCO program certifies crane operators nationwide, ensuring they meet safety and operational standards. It includes written and practical exams, covering topics like load charts, safety protocols, and equipment operation. The certification process involves core knowledge and specialized exams for specific crane types. Resources like PDF guides and practice questions are widely used for preparation, offering simulated exam environments and verified answers to help candidates assess their readiness and improve their skills effectively.

Importance of Certification for Crane Operators

Certification is crucial for crane operators, as it ensures they possess the necessary knowledge and skills to operate equipment safely and efficiently. The NCCCO certification verifies an operator’s understanding of regulations, safety practices, and proper crane operation, reducing workplace accidents. It is often mandated by employers and regulatory bodies, making it essential for career advancement in the construction and heavy machinery industries. Operators with certification demonstrate enhanced competence and commitment to safety, which are critical for protecting lives and equipment on job sites.

NCCCO Test Format and Structure

The NCCCO certification exam consists of a written test and a practical exam. The written test evaluates knowledge of safety protocols, regulations, and crane operations, while the practical test assesses hands-on skills, ensuring operators can safely perform tasks like load handling and equipment setup. Both exams are designed to verify competence and adherence to industry standards, with preparation materials like PDF guides and practice questions aiding in effective study.

Written Exam: Key Topics and Content

The NCCCO written exam assesses knowledge of critical topics, including safety protocols, load chart interpretation, and crane setup and configuration. It covers regulations, equipment inspection, and operational best practices. Questions focus on understanding OSHA standards, proper signaling techniques, and hazard avoidance. Additionally, the exam tests knowledge of crane components, such as boom lengths and counterweights, ensuring operators can safely and effectively manage crane operations. Mastery of these topics is essential for passing the certification exam and demonstrating competence.

Practical Exam: Skills Assessment and Evaluation

The practical exam evaluates crane operators’ hands-on skills, ensuring they can safely perform tasks like hoisting, swinging, and placement of loads. Operators demonstrate proficiency in setting up outriggers, using load charts, and complying with safety protocols. Evaluators assess accuracy, control, and adherence to procedures. Successful completion confirms the operator’s ability to handle real-world scenarios competently, aligning with industry standards for crane operation. This exam is a critical component of the NCCCO certification process, ensuring practical mastery alongside theoretical knowledge.

Sample NCCCO Test Questions and Answers

Sample NCCCO test questions and answers provide insights into exam formats, covering core topics like load charts and specialized crane operations, aiding effective preparation strategies.

Core Exam Practice Questions

Core exam practice questions focus on foundational knowledge, such as crane setup, load charts, and safety protocols. These questions mimic actual test scenarios, ensuring operators understand critical operations. Topics include determining swing clearances, proper outrigger extension, and wire rope replacement procedures. Correct answers are provided to reinforce learning. Regular practice with these questions helps build confidence and ensures operators are well-prepared for the certification exam, covering essential competencies required for safe crane operation.

Specialized Exam Questions (e.g., Tower Crane, Mobile Crane)

Specialized exam questions target specific crane types, like tower and mobile cranes, assessing expertise in their unique operations. Tower crane questions cover assembly/disassembly and jib adjustments, while mobile crane questions focus on boom deflection and load stability. Practice tests include scenarios on power line safety and ground conditions. Answers are provided to clarify correct procedures, helping operators master type-specific challenges and ensuring they meet certification standards for safe and efficient crane operation in specialized roles.

Study Materials and Resources

Study materials include PDF guides, online courses, and practice tests, offering sample questions, solutions, and expert advice to aid in comprehensive exam preparation and mastery of topics.

Recommended PDF Guides for Preparation

Recommended PDF guides for NCCCO preparation include comprehensive study materials such as NCCCO Core Exam Practice Questions and Specialized Exam Guides. These resources provide detailed explanations, sample questions, and verified answers to help candidates master topics like load chart interpretation, safety protocols, and crane configuration. Additionally, Rigging Exam Review Questions and Tower Crane Operator Guides are available, offering focused preparation for specific crane types. These guides simulate real exam conditions, ensuring thorough readiness for both written and practical assessments.

Online Courses and Practice Tests

Online courses and practice tests are invaluable tools for NCCCO preparation. Platforms like Crane Tech and NCCCO offer interactive modules, video tutorials, and progress tracking. Practice tests simulate real exam conditions, featuring timed sessions and instant feedback. These resources cover core and specialized exams, with questions mirroring actual test content. Additionally, mobile-friendly access allows candidates to study anytime, ensuring flexibility and convenience in their preparation journey. These tools enhance understanding and confidence, helping candidates achieve certification success.

Preparation Tips and Strategies

Focus on consistent study, practice with sample questions, and review load charts. Utilize online courses, flashcards, and timed drills to enhance retention and exam readiness effectively.

Effective Study Techniques for NCCCO Exams

Effective study techniques for NCCCO exams involve a structured approach. Start by thoroughly understanding the exam format and content. Utilize official study guides and practice tests to familiarize yourself with the question types. Dedicate time to review load charts, safety protocols, and operational procedures. Engage in active learning by taking notes and summarizing key concepts. Practice under timed conditions to improve speed and accuracy. Regularly review and analyze practice test results to identify and address weak areas. Incorporate real-world scenarios to apply theoretical knowledge, enhancing retention and practical understanding. Consistency and thorough preparation are essential for success in the NCCCO certification exams.

Supplement your studies with online resources, such as video tutorials and forums, to gain additional insights and tips from experienced operators. Active participation in study groups can also provide valuable perspectives and support. By combining these strategies, candidates can build a strong foundation and confidently approach the NCCCO exams.

Time Management and Exam-Day Tips

Effective time management is crucial for success in NCCCO exams. Allocate specific study periods for each topic, focusing on weak areas. Practice with timed tests to simulate exam conditions. On exam day, arrive early, stay calm, and carefully read instructions. Prioritize questions you know well to secure initial points. Manage your time evenly across all questions, avoiding spending too long on a single one. Skim through the exam to identify easier questions first. Stay focused and maintain a steady pace to ensure completion within the allotted time.

Remember, thorough preparation and confidence are key to performing well. Avoid last-minute cramming and ensure a good night’s sleep before the exam. By following these strategies, you can approach the NCCCO certification exams with confidence and achieve optimal results.

Importance of NCCCO Certification

The NCCCO certification ensures crane operators meet safety and competency standards, making it a critical requirement for employers and a benchmark of professionalism in the industry.

Industry Recognition and Job Opportunities

NCCCO certification significantly enhances industry recognition and job prospects for crane operators. Employers widely trust the credential, ensuring compliance with safety standards and regulations. Certified operators are highly sought after, benefiting from increased employability and higher wages. The certification opens doors to advanced roles and specialized crane operations, demonstrating a commitment to professional excellence. It is often a mandatory requirement for large construction projects, making it a crucial asset for career advancement in the crane operation field.

Enhanced Safety and Operational Competence

NCCCO certification ensures crane operators demonstrate heightened safety awareness and operational proficiency. The rigorous testing process, including both written and practical exams, verifies an operator’s ability to adhere to safety protocols and manage complex crane functions effectively. By mastering load charts, signaling practices, and equipment inspections, certified operators minimize workplace hazards and contribute to incident-free operations. This expertise not only protects personnel and equipment but also elevates overall job performance, ensuring compliance with industry standards and best practices.

Common Mistakes to Avoid

Common mistakes include misreading load charts, leading to incorrect load calculations. Operators must understand crane configurations and environmental factors to avoid such errors and ensure safe operations.

Errors in Load Chart Interpretation

One of the most common mistakes during NCCCO certification involves misinterpreting load charts. Operators often overlook critical details such as crane configurations, boom lengths, and counterweight requirements. Misreading these charts can lead to incorrect load calculations, posing significant safety risks. Additionally, neglecting to account for environmental factors like wind speed or ground conditions can exacerbate errors. To avoid these issues, operators must thoroughly understand load chart terminology and double-check all calculations before operation. Proper training and practice with sample questions can help mitigate these errors and ensure compliance with safety standards.

Neglecting Safety Protocols During Practice

Neglecting safety protocols during practice is a critical mistake that can lead to accidents and certification failure. Many operators overlook essential procedures like pre-operational inspections, proper signaling, and load monitoring. Ignoring these steps can result in equipment damage or personal injury. To avoid this, Operators must strictly adhere to safety guidelines, ensure proper communication with the signal person, and maintain situational awareness. Regular review of safety protocols and practice exams, such as those in the NCCCO CORE PRACTICE QUIZ QUESTIONS & ANSWERS, can help reinforce safe operating habits and prevent costly errors.

Additional Resources for Further Study

Official NCCCO study guides and manuals provide comprehensive preparation material. Online forums and expert advice offer additional insights, helping candidates refine their knowledge and exam strategies effectively.

Official NCCCO Study Guides and Manuals

The official NCCCO study guides and manuals are essential resources for exam preparation. They include detailed content outlines, practice questions, and answers verified by industry experts. These materials cover all aspects of crane operation, safety protocols, and regulatory requirements. Additionally, they provide insights into the exam format, helping candidates understand what to expect. Regular updates ensure the information remains current with industry standards and certification requirements. Utilizing these resources enhances comprehension and readiness for both written and practical exams effectively.

Community Forums and Expert Advice

Community forums and expert advice provide valuable support for NCCCO exam preparation. Platforms like Quizlet and specialized forums offer interactive discussions, shared resources, and real-world insights. Experienced operators and instructors often contribute practical tips, such as effective study techniques and common pitfalls to avoid. These forums also allow candidates to ask specific questions and receive personalized guidance. Additionally, expert advice can clarify complex topics, such as load chart interpretation or crane safety protocols, enhancing overall understanding and exam readiness effectively.

Continue Reading