stockings size guide

Discover the importance of finding your perfect fit with our comprehensive stockings size guide. Learn how to measure, choose the right size, and maintain your stockings for ultimate comfort and style.

How to Measure for Stockings

Accurately measure your hips and thighs using a flexible tape measure while standing to ensure a perfect fit. Proper measurements guarantee comfort and durability for the best fit.

Measuring Your Hips

Wrap a flexible tape measure around the widest part of your hips, keeping it level and parallel to the floor. Stand upright and ensure the tape isn’t too tight or loose. This measurement is crucial for determining your stocking size, as it ensures proper fit and comfort. For accurate results, measure without clothing or with a thin garment. Different brands may vary slightly, so always refer to their specific size charts for the best fit.

Measuring Your Thighs

Measure the circumference of your thigh while standing, using a flexible tape measure. Wrap it around the widest part of your thigh, mid-way between the knee and groin. Ensure the tape is level and not too tight or loose. This measurement helps determine the correct compression level and fit for your stockings. Accurate thigh measurement is essential for comfort and proper support, especially for thigh-high styles. Different brands may have slightly varying size charts, so always check their specific guidelines for the best fit.

Stockings Size Chart

A stockings size chart provides measurements based on height, weight, and hip circumference. Sizes range from XS to XL, ensuring a perfect fit for every body type. Always refer to specific brand guides, like ASOS or SPANX, for accurate sizing, as charts may vary slightly between brands. Proper fit ensures comfort and durability;

Standard Size Chart

The standard size chart for stockings typically ranges from XS to XL, based on height, weight, and hip measurements. Sizes are determined by specific metrics, ensuring a snug yet comfortable fit. For example, XS fits heights 4’9″-5’2″ with hips 32-34 inches, while XL accommodates heights 5’6″-5’9″ with hips 40-42 inches. Always refer to the chart for accurate sizing, as measurements may vary slightly between brands. Proper fit enhances comfort and durability.
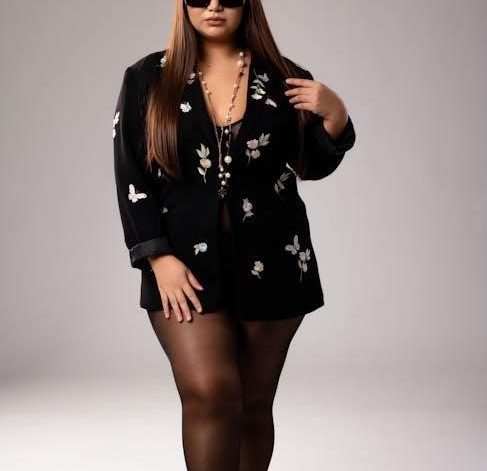
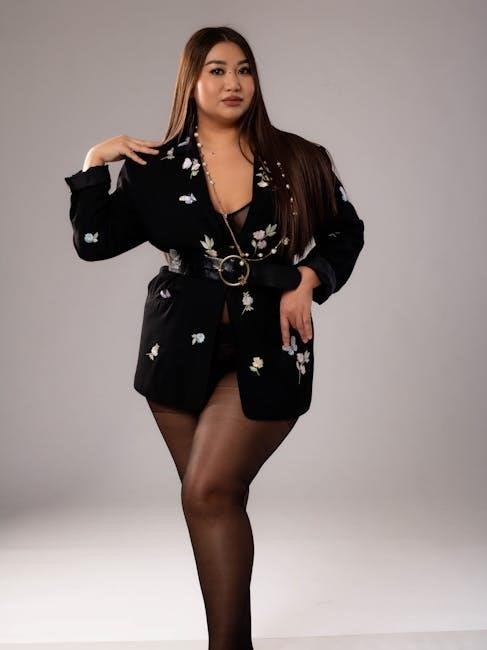
Plus-Size Chart

The plus-size chart offers extended sizing options for stockings, catering to curvier figures. Sizes typically range from 1X to 4X or 2X to 5X, depending on the brand. Hip measurements and height are key factors, with 1X often fitting hips up to 42 inches and heights around 5’6″-5’9″. Each size ensures a comfortable, flattering fit without compromising on style or quality, making it easier for all body types to find their perfect pair.

Factors Affecting Stockings Fit

Fabric type, compression levels, and activity significantly impact stockings fit. The right fabric ensures comfort, while compression levels provide support. Activity levels determine durability and stretch needed for optimal performance.

Fabric Type and Stretch

The fabric type and its stretch play a crucial role in stockings fit. Nylon and spandex blends offer elasticity, while cotton provides breathability. Wool ensures warmth, and silk offers luxury. High-stretch fabrics adapt to your body, ensuring comfort and flexibility; The right fabric choice impacts durability and how well stockings maintain their shape. Consider your lifestyle and needs when selecting fabric to ensure optimal fit, comfort, and performance throughout the day.

Compression Levels

Compression levels in stockings are measured in mmHg (millimeters of mercury) and vary to suit different needs. Light compression (8-15 mmHg) offers mild support, while medium (15-20 mmHg) provides firmer support. High compression (20-30 mmHg) is for medical conditions like varicose veins. The right level ensures comfort and effectiveness. Always consult a professional for medical-grade compression to ensure proper fit and health benefits. Proper compression enhances circulation and reduces discomfort throughout the day.

Activity and Usage

Your lifestyle and activity level significantly impact your choice of stockings. For everyday wear, opt for breathable, moisture-wicking fabrics. If you’re active or athletic, consider high-compression stockings for support. Formal events may require sleek, seamless designs. Stockings for medical purposes often feature graduated compression. Always match your stockings to your activity to ensure comfort, durability, and the right level of support throughout the day. Proper fit enhances performance and satisfaction.

How to Choose the Right Size

Use size charts effectively by matching your measurements to the guide. Consider fabric stretch, activity level, and personal comfort preferences for the best fit.

Using Size Charts Effectively

Accurately measure your hips, thighs, and height to align with size charts. Refer to specific guides like ASOS or SPANX, which base sizes on hip circumference and height. Ensure fabric type and stretch are considered for comfort. Use shoe size as a reference for certain styles. If between sizes, opt for the larger one. Double-check weight and height recommendations for compression tights to ensure a proportional fit.

Considering Fabric Stretch

Fabric stretch plays a crucial role in stockings fit. Choose stretchier materials like spandex or elastane for better comfort and flexibility. Thicker fabrics, such as 40 denier, offer less stretch, while thinner ones, like 10 denier, provide more. Consider your weight, height, and activity level when selecting fabric type. For larger sizes, opt for fabrics with higher elasticity. Always check the size guide for specific fabric stretch recommendations to ensure the best fit.

Tips for a Perfect Fit

Tips for a Perfect Fit

Ensure a perfect fit by measuring key areas, selecting fabric based on activity, and trying stockings on for comfort and style. Proper fit enhances durability and comfort.

Trying Them On

When trying on stockings, ensure a smooth fit by standing up and checking for evenness. The fabric should feel snug but not restrictive. Pay attention to the gusset placement for comfort. If the stockings sag or dig into your skin, they may be the wrong size. Try them on in the morning for the most accurate fit, as legs can swell slightly throughout the day.

Shoe Size Consideration

While shoe size isn’t the primary factor in choosing stockings, it can influence fit, especially for knee-high styles. ASOS, for example, designs their one-size hosiery to fit UK shoe sizes 3-8. However, shoe size alone doesn’t determine stocking size, as leg length and circumference play a larger role. Always combine shoe size with thigh and hip measurements for the best fit and comfort.

Types of Stockings

Stockings come in various styles, including thigh-high, knee-high, hold-ups, and over-the-knee options, catering to different preferences, outfits, and occasions for a perfect blend of comfort and style.

Thigh-High Stockings

Thigh-high stockings are a popular choice, offering both style and comfort. They typically reach just above the thigh and are secured with garters or silicone bands. Available in various materials like lace, fishnet, or opaque fabrics, they suit different outfits and occasions. Sizing is based on thigh circumference and height, ensuring a snug fit. To choose the right size, measure your thigh and refer to the size chart for the best comfort and appearance.

Knee-High Stockings

Knee-high stockings are a versatile and practical choice, designed to reach just above the knee. They are ideal for everyday wear and can complement both casual and formal outfits. Sizing is typically determined by thigh circumference and height, ensuring a comfortable fit. To ensure accuracy, measure the widest part of your thigh and refer to the size chart. Proper fit prevents tightness or sagging, guaranteeing all-day comfort and style.

Popular Stockings Brands and Their Size Guides

Leading brands like ASOS and SPANX offer detailed size charts, ensuring a perfect fit. Their guides consider factors like height, weight, and hip measurements for ultimate comfort and style.

ASOS Size Guide

ASOS offers a one-size hosiery option designed to fit a wide range of body types. Their stockings cater to hips measuring up to 101cm and heights up to 57cm. ASOS ensures comfort and style by providing detailed size charts that consider both height and hip measurements. This guide helps customers find the perfect fit effortlessly, making ASOS a trusted choice for stocking shoppers seeking quality and convenience.

SPANX Size Guide

SPANX offers a comprehensive size guide to ensure a perfect fit for all body types. Their stockings are designed to cater to various sizes, with a focus on comfort and style. SPANX recommends choosing a size based on height and weight, with detailed charts provided for accuracy. If between sizes, opting for the larger size is advised. This ensures optimal comfort and a seamless fit, making SPANX a trusted choice for hosiery enthusiasts.

Maintenance Tips

Proper care ensures longevity. Wash stockings gently in cold water, avoid fabric softeners, and store in a cool, dry place to maintain quality and fit.

Washing Instructions

For optimal care, wash stockings in cold water using a mild detergent. Avoid fabric softeners and bleach, as they can damage fabrics. Gently hand wash or use a delicate cycle. Do not wring or twist, as this can stretch or tear the material. Air-dry away from direct sunlight to maintain shape and color. Avoid machine drying, as heat can shrink or weaken elastic. Proper washing ensures durability and retains the stocking’s original fit and quality.

Storage Advice

Store stockings in a cool, dry place to maintain their quality. Fold or roll them gently to avoid creases and damage. Use a drawer organizer or breathable fabric pouches to keep them separate and prevent tangling. Avoid direct sunlight, as it can fade colors. Do not leave stockings bunched or folded for extended periods, as this can cause permanent wrinkles. Proper storage ensures your stockings remain soft, elastic, and in excellent condition for longer.

Continue Reading

laura mulvey visual pleasure and narrative cinema pdf

Laura Mulvey’s 1975 essay Visual Pleasure and Narrative Cinema is a foundational text in feminist film theory‚ exploring how cinema structures visual pleasure through the male gaze‚ significantly influencing film studies and psychoanalytic analysis.

Overview of the Essay’s Key Arguments

Laura Mulvey’s essay Visual Pleasure and Narrative Cinema critiques Hollywood cinema’s structure‚ arguing it perpetuates patriarchal ideologies by objectifying women. She introduces the concept of the “male gaze‚” where films are designed to satisfy male visual pleasure‚ positioning women as passive objects of desire. Mulvey contends that narrative cinema aligns the audience’s perspective with the male protagonist‚ reinforcing gender hierarchies. Drawing on psychoanalytic theory‚ she explores scopophilia (pleasure in looking) and fetishism‚ suggesting these mechanisms uphold patriarchal control. The essay calls for a radical rethinking of cinematic practices to challenge these power dynamics and liberate women from their traditional roles as objects of male desire.

Historical Context of the Essay’s Publication in 1975

Laura Mulvey’s essay Visual Pleasure and Narrative Cinema was published in 1975‚ a pivotal moment for feminist and film theory discourse. The early 1970s saw rising feminist movements challenging patriarchal structures‚ while film studies were evolving with new critical approaches. Published in the British journal Screen‚ the essay emerged within a climate of academic and political ferment‚ drawing on psychoanalysis and semiotics to critique Hollywood’s visual language. Its release coincided with a growing interest in ideology and representation‚ making it a landmark in feminist scholarship and a catalyst for reevaluating cinema’s role in perpetuating gender inequality.

The Concept of the “Male Gaze”

The “male gaze” refers to how cinema structures visual pleasure‚ positioning women as passive objects for male spectators’ voyeuristic gratification‚ reinforcing patriarchal power dynamics.

Definition and Explanation of the Male Gaze

The “male gaze” is a term coined by Laura Mulvey to describe how visual culture‚ particularly cinema‚ is structured to satisfy male visual pleasure. It refers to the way women are depicted as objects of desire for the male spectator‚ often passively and fetishized. This concept emphasizes the power dynamics inherent in patriarchal societies‚ where the gaze is actively male and the female is the passive object of that gaze. Mulvey argues that this structure reinforces gender roles and perpetuates the objectification of women in media. The male gaze is not just about looking but about the power to define and control the visual narrative.

The Role of the Male Gaze in Hollywood Cinema

Hollywood cinema‚ according to Laura Mulvey‚ is structured around the male gaze‚ which positions women as objects of desire and spectacle. This cinematic apparatus reinforces patriarchal power dynamics by aligning the audience’s viewpoint with that of the male protagonist. Women are often framed to emphasize their physical appearance‚ serving as fetishistic objects to satisfy male visual pleasure. The male gaze in Hollywood narratives frequently marginalizes female agency‚ reducing women to passive roles that cater to male fantasies. This visual strategy not only perpetuates gender inequality but also influences how audiences perceive and interact with gender roles in society. The male gaze thus becomes a critical tool for analyzing the gendered dynamics of mainstream cinema.

Psychoanalytic Theory in Mulvey’s Work

Mulvey’s analysis is rooted in Freudian psychoanalysis‚ exploring scopophilia and fetishism as mechanisms of visual pleasure. She examines how cinema satisfies the male unconscious through objectification.

Freudian Concepts of Scopophilia and Fetishism

Mulvey incorporates Freudian psychoanalysis to explore scopophilia and fetishism as key mechanisms of visual pleasure in cinema. Scopophilia‚ the pleasure derived from looking‚ is linked to voyeurism and control‚ often embedded in narrative structures. Fetishism‚ as a defense against castration anxiety‚ involves substituting a woman’s body or parts of it for the phallus‚ reducing her to a passive object of desire. In Hollywood cinema‚ these concepts manifest through the male gaze‚ which fetishizes women‚ transforming them into symbols of male fantasy. Mulvey argues that this psychoanalytic framework reinforces patriarchal power dynamics‚ perpetuating gender inequality and objectification. Her analysis challenges these structures‚ offering a critical lens to understand cinema’s role in shaping cultural attitudes toward gender.

The Application of Psychoanalysis to Film Studies

Mulvey’s essay marks a pivotal moment in applying psychoanalytic theory to film studies‚ offering a framework to decode power dynamics within cinematic narratives. By integrating Freudian concepts like scopophilia and fetishism‚ she reveals how films unconsciously structure visual pleasure‚ reinforcing patriarchal ideologies. This approach not only critiques traditional Hollywood storytelling but also provides tools for analyzing gender representation in media. Her work challenges filmmakers and scholars to consider the unconscious motivations behind visual narratives‚ making psychoanalysis a vital method in understanding cinema’s cultural impact. This interdisciplinary approach has significantly influenced feminist film theory and continues to shape contemporary critiques of media representation.

Visual Pleasure and Narrative Structure

Mulvey’s essay examines how traditional Hollywood cinema integrates visual pleasure into narrative structure‚ often objectifying women to satisfy scopophilic desires‚ reinforcing patriarchal norms in storytelling.

The Relationship Between Visual Pleasure and Storytelling in Film

Mulvey argues that visual pleasure in cinema is deeply intertwined with storytelling‚ particularly through scopophilia‚ the pleasure of looking. Traditional Hollywood narratives often center male protagonists‚ positioning women as objects of desire to satisfy the male gaze. This structure reinforces patriarchal norms‚ where women are passive and men are active agents. The narrative is designed to align the audience’s perspective with the male viewpoint‚ creating a voyeuristic experience. This dynamic not only shapes visual pleasure but also influences how stories are constructed‚ often marginalizing female agency. Mulvey’s analysis highlights how cinema’s visual language perpetuates gender hierarchies‚ making it a critical text for understanding the politics of representation in film.

The Objectification of Women in Narrative Cinema

Mulvey’s essay critiques how narrative cinema objectifies women‚ reducing them to passive subjects for male visual pleasure. This objectification is achieved through techniques like camera angles‚ lighting‚ and framing that emphasize women’s physicality over agency. The male gaze‚ embedded in both the narrative structure and cinematic apparatus‚ fetishizes women‚ turning them into commodities for spectatorship. This process reinforces patriarchal power dynamics‚ where women are seen as objects of desire rather than active participants in the story. Mulvey argues that this objectification is not incidental but systemic‚ deeply rooted in the visual and narrative conventions of Hollywood cinema‚ which cater primarily to a male audience’s unconscious desires.

The Role of Women in Film

Women in film are often objectified‚ serving as passive objects of male desire‚ reinforcing patriarchal norms and limiting female agency in narrative cinema.

Women as Objects of Desire in Hollywood Cinema

In Hollywood cinema‚ women are frequently positioned as objects of male desire‚ reinforcing patriarchal structures. Laura Mulvey’s essay highlights how the male gaze reduces women to passive objects for visual pleasure‚ often fetishized or idealized. This objectification is deeply rooted in psychoanalytic concepts‚ where women are framed as lacking agency‚ existing solely to satisfy male scopophilic desires. The narrative often centers on male protagonists‚ with female characters serving as prizes or spectators’ fantasies. This dynamic perpetuates gender inequality‚ limiting women’s roles to mere spectacle rather than active participants in the story. Mulvey critiques this tradition‚ arguing it reflects and reinforces societal power dynamics‚ where women are commodified for male pleasure. This critique remains central to feminist film theory‚ challenging the dominance of the male gaze in cinema.

The Femme Fatale Archetype and Its Implications

The femme fatale archetype‚ as analyzed by Laura Mulvey‚ embodies a complex representation of female sexuality in cinema. These characters are often depicted as mysterious‚ alluring‚ and dangerous‚ challenging male authority while simultaneously reinforcing patriarchal control. The femme fatale’s dual role as both desirable and threatening underscores the male psyche’s fear of female power. This archetype serves as a means to contain female sexuality within narrative structures‚ ensuring it does not disrupt the dominant order. Mulvey argues that while the femme fatale appears powerful‚ her eventual subjugation or punishment reaffirms patriarchal norms. This analysis highlights how cinema uses such archetypes to navigate and maintain gender hierarchies‚ offering both fascination and control over the female form. The implications of this archetype remain significant in understanding gender dynamics in film.

Critical Reception and Legacy of the Essay

Laura Mulvey’s essay has had a profound impact on feminist film theory‚ sparking debates on gender representation. Its controversial ideas remain a foundational text in cinema studies‚ influencing contemporary analyses of visual culture and power dynamics.

Impact on Feminist Film Theory

Laura Mulvey’s essay revolutionized feminist film theory by introducing the concept of the “male gaze‚” which critiques how women are objectified in cinema. Her analysis‚ grounded in psychoanalytic theory‚ revealed how patriarchal structures shape visual narratives‚ positioning women as passive objects of male desire. This idea challenged traditional representations and inspired scholars to explore gendered spectatorship. The essay’s influence extends beyond academia‚ influencing filmmakers to reconsider how women are depicted on screen. By highlighting the political dimensions of visual pleasure‚ Mulvey’s work remains a cornerstone for understanding gender dynamics in media‚ sparking ongoing debates about representation and power in film.

Contemporary Relevance and Critiques of Mulvey’s Arguments

Despite its enduring influence‚ Mulvey’s theory faces contemporary critiques for its perceived binary focus on male/female dynamics‚ neglecting diverse identities. Modern scholars argue her framework overlooks intersectionality‚ queer perspectives‚ and evolving representations of gender. Additionally‚ critics suggest her rigid psychoanalytic approach may not fully capture the complexity of today’s media landscape. However‚ her core ideas remain relevant in analyzing visual power structures‚ inspiring new generations to adapt her theories to current cinematic trends. Mulvey’s work continues to spark dialogue on representation‚ making it a vital reference for understanding visual politics in modern cinema.

Laura Mulvey’s essay introduced the concept of the male gaze‚ profoundly influencing feminist film theory and remaining a cornerstone in modern discussions of visual representation.

Mulvey’s essay revolutionized film theory by introducing the concept of the male gaze‚ reshaping how scholars analyze gender dynamics in cinema. It remains a cornerstone in feminist film criticism‚ offering a psychoanalytic framework to understand how Hollywood cinema objectifies women. The essay’s arguments have inspired extensive academic discourse‚ challenging traditional narrative structures and encouraging a reevaluation of visual representation. Its influence extends beyond film studies‚ impacting cultural and media analysis. As a seminal work‚ it continues to be widely referenced‚ ensuring its enduring relevance in contemporary discussions of gender and visual culture. Its impact is undeniable‚ shaping the trajectory of feminist theory and film scholarship.

The Ongoing Importance of Mulvey’s Ideas in Modern Cinema

Mulvey’s concepts remain vital in modern cinema‚ as they provide a critical lens for analyzing gender representation and visual power dynamics. Her ideas continue to inspire contemporary filmmakers and scholars‚ particularly in exploring diverse perspectives and challenging traditional narratives. The male gaze theory is frequently revisited to critique modern media‚ from blockbuster films to streaming content; Mulvey’s work also influences feminist filmmaking practices‚ encouraging creators to subvert patriarchal norms. As cinema evolves‚ her theories adapt‚ offering a framework for understanding issues like objectification and spectatorship in digital and globalized contexts. Her influence ensures ongoing relevance in both academic and creative spheres‚ shaping conversations about representation and identity in film.

Continue Reading

ferber method pdf

The Ferber Method, developed by Dr. Richard Ferber, is a systematic sleep training approach that helps babies learn to self-soothe and fall asleep independently. It is detailed in his book and widely discussed in the Ferber Method PDF, offering practical guidance for parents seeking effective sleep solutions.

Definition and Overview

The Ferber Method is a sleep training technique developed by Dr. Richard Ferber to help babies learn to self-soothe and fall asleep independently. It is detailed in his book, Solve Your Child’s Sleep Problems, and widely discussed in the Ferber Method PDF. This approach focuses on gradual withdrawal of parental presence at bedtime, allowing the child to develop self-soothing skills. It is a behavioral method that emphasizes consistency and timed intervals, making it a popular choice for parents seeking structured sleep solutions. The method is designed to address sleep associations and promote healthy sleep habits in infants and young children.

Key Principles of the Ferber Method

The Ferber Method is built on the principle of progressive waiting, where parents gradually increase the time between checking on their baby. This approach encourages self-soothing by allowing the baby to learn to fall asleep independently. Consistency is a cornerstone, as it helps establish a predictable bedtime routine. The method also emphasizes timed interval check-ins, where parents return to comfort their baby at set intervals, reducing over time. These principles aim to break sleep associations and help the baby learn to fall asleep without reliance on external cues, promoting healthier sleep patterns and long-term benefits.

Dr. Richard Ferber and His Contributions

Dr. Richard Ferber, a renowned pediatrician, developed the Ferber Method to address children’s sleep issues. As the director of the Center for Pediatric Sleep Disorders at Children’s Hospital Boston, he pioneered this approach. His 1985 book, Solve Your Child’s Sleep Problems, introduced the method, which has since become a trusted resource for parents. Ferber’s work emphasizes the importance of self-soothing and independent sleep skills, supported by research and clinical experience. His contributions have revolutionized sleep training, offering families a structured and effective way to improve their children’s sleep patterns.

How the Ferber Method Works

The Ferber Method involves a structured approach to sleep training, focusing on progressive waiting and timed interval check-ins. It helps babies learn to self-soothe and fall asleep independently, as detailed in the Ferber Method PDF.

The Progressive Waiting Technique is a key component of the Ferber Method, designed to help babies learn to self-soothe by gradually increasing the time parents wait before comforting them. This method, detailed in the Ferber Method PDF, begins with short intervals and extends them as the baby becomes more comfortable sleeping independently. It emphasizes consistency and adaptability, allowing parents to adjust the waiting periods based on their baby’s needs and their own comfort level. The goal is to reduce the baby’s dependence on external comfort, fostering healthy sleep habits and independence.

The Ferber Method’s Timed Interval Check-Ins involve parents returning to their baby’s room at specific intervals to offer comfort, gradually increasing the time between visits. This approach, detailed in the Ferber Method PDF, helps babies learn to self-soothe by reducing reliance on external comfort. The intervals are adjusted based on the baby’s temperament and the parents’ comfort level, ensuring a balanced and flexible sleep training process. This technique is designed to create a predictable routine, helping babies transition to independent sleep while providing reassurance through consistent check-ins.

The Role of Consistency in Sleep Training

Consistency plays a vital role in the Ferber Method, as outlined in the Ferber Method PDF. Establishing a predictable sleep routine helps babies adapt to the training process, reducing confusion and anxiety. The method emphasizes maintaining the same schedule and techniques each night, ensuring the baby learns to self-soothe effectively. Consistency also builds trust, as the baby comes to rely on the familiar patterns. The Ferber Method PDF provides guidance on creating and sticking to a structured plan, which is essential for achieving long-term success in sleep training. This approach helps parents stay committed and avoids mixed signals that could hinder progress.

Benefits and Effectiveness of the Ferber Method

The Ferber Method is highly effective in promoting healthy sleep habits, as detailed in the Ferber Method PDF. It helps babies learn to self-soothe, leading to improved sleep quality and duration. By reducing reliance on external aids, the method fosters independence and consistency, resulting in better long-term sleep outcomes for children; The approach is evidence-based and widely recommended for addressing common sleep challenges in infants and toddlers.

Teaching Self-Soothing Skills

The Ferber Method emphasizes teaching self-soothing skills, enabling babies to calm themselves and fall asleep independently. By using progressive waiting and timed intervals, parents help their child learn to settle without external aids. This approach breaks sleep associations, allowing the baby to develop the ability to transition to sleep naturally. Over time, the child becomes more comfortable self-soothing, leading to improved sleep quality and duration. The method’s focus on consistency ensures lasting results, fostering healthier sleep habits and reducing nighttime disturbances. The Ferber Method PDF provides detailed guidance on implementing these techniques effectively.

Preventing Sleep Associations

The Ferber Method is designed to prevent sleep associations, which are conditions or objects a baby relies on to fall asleep, such as rocking or feeding. By establishing a consistent bedtime routine and allowing the baby to settle independently, the method helps break these associations. The progressive waiting technique encourages the baby to learn self-soothing, reducing reliance on external cues. This approach ensures the baby can fall asleep without needing specific conditions, promoting healthier sleep patterns. The Ferber Method PDF provides clear strategies to avoid creating such associations, helping parents establish a foundation for long-term sleep success.

Empirical Evidence Supporting the Method

Research supports the Ferber Method’s effectiveness in improving sleep outcomes for children. Studies, such as those by Henderson, Blampied, and France (2020), demonstrate that graduated extinction methods like Ferber’s significantly reduce sleep problems. The method’s emphasis on consistency and self-soothing aligns with empirical findings on healthy sleep development. The Ferber Method PDF outlines these evidence-based strategies, providing parents with a scientifically validated approach to address sleep challenges. This method is widely recognized for its structured, research-backed techniques that promote long-term sleep independence in children.

Criticism and Controversies

The Ferber Method faces criticism for its “cry-it-out” approach, with concerns it may cause emotional distress. Critics argue it could harm parent-child bonding and lacks flexibility.

Concerns About the Cry-It-Out Approach

The Ferber Method’s “cry-it-out” approach has sparked controversy, with critics arguing it may cause emotional distress for babies. Some experts worry it could negatively impact parent-child bonding and potentially lead to long-term psychological effects. Parents are concerned that leaving a baby to cry for extended periods might undermine trust and security. While the method emphasizes gradual withdrawal, critics argue it lacks flexibility for sensitive or high-needs children. Despite its popularity, concerns persist about its emotional toll, leading some to seek alternative sleep-training methods that prioritize comfort and connection over strict schedules.

Comparison With Other Sleep Training Methods

The Ferber Method stands out among sleep training techniques for its structured approach, differing from methods like the “No Tears” approach or the “Chair Method.” While Ferber advocates for timed intervals, others focus on gradual withdrawal without strict schedules; Some methods prioritize emotional comfort, allowing parents to stay in the room until the baby sleeps. The Ferber Method is more rigid, emphasizing consistency, whereas alternatives like the “Pick-Up-Put-Down” technique offer more flexibility. Each method suits different parental preferences, but Ferber remains popular for its clear, systematic framework, making it a go-to for families seeking predictable routines.

Common Criticisms and Misconceptions

The Ferber Method faces criticism for its “cry-it-out” approach, with some arguing it can cause emotional distress for babies. Critics claim it may not suit all temperaments and can lead to anxiety. Others misunderstand the method, believing it involves leaving a child to cry indefinitely, when in fact it includes timed check-ins. Some parents find the rigid intervals too impersonal, while others appreciate its structure. Despite its popularity, debates persist about its long-term effects, with some studies suggesting limited evidence for its superiority over other methods. These criticisms highlight the need for careful consideration of individual child needs.

Practical Guidance for Parents

Parents can start by establishing a consistent bedtime routine and gradually implementing timed check-ins. The Ferber Method PDF offers detailed charts and step-by-step advice to help parents stay on track, ensuring their baby learns to self-soothe effectively while maintaining emotional support.

Preparing for the Ferber Method

Before starting the Ferber Method, parents should establish a consistent bedtime routine and create a sleep-friendly environment. Ensure the baby is tired but awake when placed in the crib. Set clear expectations for timed intervals, starting with shorter periods for younger infants. Parents should also mentally prepare for the process and review the Ferber Method PDF to understand the approach fully. A calm and patient mindset is essential for successful implementation. By laying this groundwork, parents can help their baby transition smoothly to independent sleep.

Step-by-Step Implementation

Begin by placing your baby in their crib when they are tired but still awake. Start with short check-in intervals, such as 2-3 minutes, gradually increasing the time each night. On the first night, return after 2-3 minutes, comfort your baby briefly, and leave. The next interval might be 5-7 minutes, continuing this pattern. Each subsequent night, extend the intervals further. Consistency is key, and the Ferber Method PDF provides detailed charts to guide the process. Adjust the intervals based on your baby’s responses, ensuring a structured yet flexible approach to sleep training.

Handling Setbacks and Challenges

Setbacks, such as increased crying or resistance, are common during the Ferber Method. Stay calm and consistent, as inconsistency can confuse your baby. If progress stalls, reassess the intervals and adjust them slightly. The Ferber Method PDF suggests maintaining a predictable routine and avoiding deviations. If your baby resists, briefly comfort them without picking them up. Remember, occasional regressions are normal, especially during developmental milestones. Patience and persistence are key to overcoming challenges and achieving long-term sleep success.

Additional Resources

The Ferber Method PDF offers a comprehensive guide, while supplementary materials and success stories provide additional support for parents implementing the method.

Where to Find the Ferber Method PDF

The Ferber Method PDF can be easily accessed online through various sources, including Dr. Richard Ferber’s book, Solve Your Child’s Sleep Problems, available on platforms like Amazon and Barnes & Noble. Additionally, parenting websites such as BabyCenter and Healthline offer detailed guides and summaries of the method. Some resources provide free downloadable PDFs, while others may require purchase. Parents can also find supplementary materials, charts, and step-by-step guides to aid in implementing the method effectively. These resources are invaluable for those seeking structured sleep training solutions.

Supplementary Materials and Guides

Beyond the Ferber Method PDF, numerous supplementary materials are available to support parents in implementing the technique. Websites like BabyCenter and Healthline offer detailed guides, charts, and checklists to help track progress. Additionally, step-by-step implementation plans and troubleshooting tips can be found in online forums and parenting blogs. Many resources include testimonials from parents who have successfully used the method, providing real-life insights and encouragement. These materials are designed to complement Dr. Ferber’s book, offering practical tools and reassurance for families navigating sleep training.

Success Stories and Parent Testimonials

Many parents have shared positive experiences with the Ferber Method, highlighting its effectiveness in improving their babies’ sleep patterns. Testimonials often describe reduced crying times and faster independence at bedtime. Parents appreciate the structured approach, which provides clear guidance and reassurance. Success stories frequently mention how the method helped their children learn to self-soothe, leading to better rest for the whole family. These real-life accounts, available in forums and reviews, offer encouragement and proof of the method’s practical benefits, making it a trusted choice for many families seeking sleep solutions.

Continue Reading

necromancer leveling guide gw2

Embark on a journey mastering the Necromancer, a versatile profession wielding dark magic, summoning minions, and utilizing wells for both offense and survivability, making them a formidable force in Tyria.

1.1 Overview of the Necromancer Profession

The Necromancer is a versatile profession in Guild Wars 2 that excels at both dealing damage and providing utility through dark magic. Known for summoning minions and casting powerful wells, Necromancers can adapt to various playstyles, making them a popular choice for both new and experienced players. Their ability to manipulate life force and death makes them highly effective in open-world exploration, PvE, and PvP. With a focus on survivability and crowd control, Necromancers are well-suited for solo play and group content alike. This profession offers a unique blend of mobility, sustain, and burst damage, making it a compelling option for players who enjoy mastering complex mechanics and strategies.

1.2 Importance of Leveling Builds for Necromancers

Leveling builds are crucial for Necromancers to ensure efficient progression and adaptability in early-game content. A well-structured build enhances survivability, damage output, and utility, allowing players to tackle challenges effectively. Necromancers benefit from focusing on specific traits and skills that synergize with their playstyle, such as minion mastery or well usage. A proper leveling build helps manage resource consumption and optimizes skill rotations, making the journey to max level smoother. Additionally, it enables players to experiment with different playstyles while maintaining strong performance in open-world activities and story content. Investing time in crafting a solid leveling build ensures a strong foundation for endgame success and enhances overall enjoyment of the game.

Primary Skills for Necromancer Leveling

Necromancers rely on minions and wells for offense, while defensive skills like Spectral Walk enhance survivability. Mastering these abilities ensures versatility and efficiency during the leveling process.

2.1 Offensive Skills: Minions and Wells

Necromancers excel at dealing damage through minions and wells, which provide sustained offense and area control. Summoning minions like Skeletons, Zombies, and Spectral Minions offers versatility in combat, with each type fulfilling unique roles. Wells, such as Well of Darkness and Well of Blood, create zones of damage and apply debilitating conditions to enemies. These skills synergize well with weapons like the Staff and Dagger, enhancing your ability to manage groups of foes. Properly timing minion summons and well placements ensures consistent damage output, making them core components of an effective leveling build.

2.2 Defensive Skills: Survivability and Utility

Necromancers possess a range of defensive skills to enhance survivability and provide utility in combat. Spectral Walk allows teleportation, evading attacks and repositioning quickly, while Plague Signet deals damage over time and heals the Necromancer. The Death Magic trait line offers skills like Blood is Power, converting life force into healing. These abilities, combined with minion summons, create a balance of offense and defense, ensuring durability during leveling. Proper use of these skills enables Necromancers to withstand prolonged fights and maintain momentum in open-world content.

2.3 Key Skill Unlock Progression

Unlocking key skills and traits is crucial for a Necromancer’s effectiveness. Begin by acquiring Spectral Walk early for mobility and survivability. Wells of Suffering and Wells of Darkness provide sustained damage and crowd control, while Minion Mastery enhances minion performance. At higher levels, prioritize traits like Spite, Soul Reaping, and Death Magic to amplify damage and survivability. Key skill unlocks include Blood Wave for healing and damage, and Signet of Spite for utility. Progression should focus on balancing offense and defense, ensuring the Necromancer remains versatile and resilient throughout the leveling process. Proper skill and trait progression ensures a smooth journey from early levels to endgame readiness.

Best Leveling Build for Necromancer

The optimal leveling build focuses on Staff for open-world efficiency, paired with Dagger for condition damage and Axe for cleave. Traits like Spite, Soul Reaping, and Death Magic maximize damage and minion support, ensuring a versatile and powerful progression through Tyria.

3.1 Core Traits: Spite, Soul Reaping, and Death Magic

The Spite trait line enhances your damage output against weakened foes, making it ideal for aggressive playstyles. Soul Reaping focuses on minion mastery, boosting their effectiveness and survivability, while also granting you life force generation. Lastly, Death Magic improves your survivability by increasing health and offering healing opportunities through corpse consumption. Together, these traits create a balanced build that excels at both dealing damage and managing minion armies. Prioritizing Spite and Soul Reaping early ensures strong minion synergy, while Death Magic provides the sustain needed for open-world leveling. This combination is versatile and powerful, making it the cornerstone of any efficient Necromancer leveling build in Guild Wars 2.

3.2 Weapon Choices: Axe, Dagger, and Staff

The Axe offers high damage and mobility, making it ideal for aggressive playstyles, while the Dagger excels in close combat, applying conditions like bleeding and poison. The Staff provides ranged attacks and utility, perfect for managing groups with Wells. Each weapon complements the Necromancer’s dark magic, whether focusing on minion control or direct damage. For leveling, the Axe is often recommended for its raw power, while the Dagger offers versatility in applying conditions; The Staff shines in open-world scenarios, allowing you to maintain distance while utilizing area effects. Experimenting with these weapons helps tailor your playstyle, ensuring a smooth leveling experience in Guild Wars 2.

3.3 Gear Progression: Leveling to Endgame

When leveling your Necromancer, focus on equipping gear that balances Power, Precision, and Toughness for optimal damage and survivability. Early on, use crafted or dropped equipment with appropriate stats. As you progress, upgrade to exotic gear around levels 60-70, which provides significant boosts. For endgame content, transition to ascended gear, ensuring higher stat totals and bonus effects. Accessories like runes and sigils can further enhance your build, with options like the Superior Rune of the Necromancer for improved minion synergy. Always prioritize gear with condition damage if focusing on a bleed or poison build. Regularly updating your equipment ensures a smooth transition from leveling to challenging endgame activities.

Gameplay Strategies for Efficient Leveling

Focus on map completion and open-world activities, utilizing minions and wells effectively, and mastering traits and weapon choices for optimal progression.

4.1 Mastering Minion Builds for Open World

Minion builds are a cornerstone of Necromancer leveling, offering sustained damage and survivability in open-world content. Focus on unlocking and upgrading minions like the Lich and Bone Minions early, as they provide consistent DPS and crowd control. Pair these with Blood Magic traits to enhance your healing and minion survivability. Always prioritize corpse generation through skills like Death’s Charge to maintain minion numbers. In open-world combat, position your minions strategically to avoid unnecessary damage while focusing on your own attacks. Experiment with weapon choices like the staff or axe to complement your minion build. By mastering minion management, you’ll create a formidable force capable of dominating Tyria’s challenges with ease.

4.2 Effective Use of Wells in Combat

Wells are a powerful tool for Necromancers, providing area effects that can damage, condition, or support allies. Start by using Well of Suffering to apply consistent damage and Well of Darkness for crowd control and protection. Position wells strategically in combat zones to maximize their impact, ensuring they affect multiple enemies. Combine wells with minion builds for enhanced synergy, as minions can draw enemy attention while wells deal damage. Unlock traits like Dark Magic to increase well duration and damage. Experiment with different well rotations to adapt to various combat scenarios, making them a cornerstone of your open-world leveling strategy. Mastery of wells will elevate your Necromancer’s efficiency in both solo and group play.

4.3 Open World Leveling Tips and Tricks

Mastering open-world leveling as a Necromancer involves efficient map exploration and strategic skill usage. Focus on completing hero challenges, hearts, and dynamic events for rapid experience gain. Use minions to tank enemies while you deal damage from a safe distance. Position wells like Well of Suffering and Well of Darkness in high-traffic enemy areas to maximize their impact. Unlock Spectral Walk early for improved mobility and repositioning. Experiment with weapon swaps to adapt to combat situations, and prioritize area-of-effect skills for clearing clustered enemies. Keep your summoning skills refreshed and use crowd control to manage tougher foes. Remember to explore thoroughly, as discovery rewards significant XP. Adapt your build and strategies as you level to maintain efficiency and enjoyment in Tyria’s vast open world.

Transitioning to Endgame Builds

Transitioning to endgame builds requires refining your traits, optimizing gear, and mastering advanced strategies. Focus on maximizing damage output while maintaining survivability for challenging content like raids and dungeons.

5.1 Preparing for Endgame Content

Preparing for endgame content as a Necromancer involves optimizing your build for maximum efficiency. Focus on acquiring high-tier gear, such as exotic weapons and armor, to ensure survivability and damage output. Refine your traits to emphasize either damage or survivability, depending on your role. Practice advanced techniques like proper minion management and well placement to maximize your effectiveness in raids and dungeons. Additionally, familiarize yourself with endgame-specific skills and rotations to adapt to the increased difficulty. Finally, experiment with different builds to find the one that suits your playstyle best, ensuring you’re ready to tackle challenging content like fractals and world bosses.

5.2 Adjusting Traits and Skills for Max Damage

Maximizing damage as a Necromancer requires careful adjustment of traits and skills. Focus on traits like Spite, Soul Reaping, and Death Magic, which enhance your offensive capabilities. Prioritize skills that deal direct damage or amplify your minions’ effectiveness, such as Wells of Power and Blood is Power. Experiment with weapon combinations, as the staff, axe, or dagger can significantly impact your damage output. Ensure your skill bar includes high-damage abilities like Dark Frenzy or Corrupt Burst for burst damage. Finally, optimize your gear to favor power and precision, and consider swapping to a more aggressive build once comfortable with your rotation. This setup will ensure you deliver maximum damage in endgame content.

5.3 Gear Optimization for Endgame Performance

Optimizing your gear is crucial for peak endgame performance as a Necromancer. Focus on acquiring Exotic or Legendary weapons and armor with stat combinations like Power, Precision, and Vitality for raw damage and survivability. Ensure your gear is infused with the appropriate runes and sigils to enhance your abilities, such as the Rune of the Necromancer for improved minion damage or the Sigil of Draining for better energy management. Additionally, consider upgrading to high-tier trinkets and backpieces to maximize your damage output. Crafting or raiding for ascended gear is highly recommended for endgame content; Finally, experiment with infusions to further enhance your build’s effectiveness in challenging encounters.

Continue Reading

instant vortex plus manual

Welcome to the Instant Vortex Plus Manual‚ your comprehensive guide to mastering this versatile 5․7L air fryer․ Designed for easy navigation‚ this manual covers safety‚ installation‚ features‚ and recipes to enhance your cooking experience․ Discover how to optimize performance‚ troubleshoot common issues‚ and explore advanced functionalities․ Whether you’re a beginner or an experienced user‚ this manual ensures you unlock the full potential of your Instant Vortex Plus Air Fryer․

Overview of the Instant Vortex Plus Air Fryer

The Instant Vortex Plus Air Fryer is a versatile kitchen appliance designed to deliver crispy‚ flavorful results with minimal oil․ With a 5․7-liter capacity‚ it’s ideal for cooking for small to medium-sized groups․ Featuring advanced cooking modes and a user-friendly interface‚ this air fryer allows for precise temperature control and even cooking․ Its compact design and innovative ClearCook feature provide visibility during cooking‚ making it a convenient addition to any kitchen․ Perfect for frying‚ roasting‚ baking‚ and dehydrating‚ the Vortex Plus offers endless possibilities for creative and healthy meal preparation․

Safety Guidelines and Precautions

Always read the Instant Vortex Plus Manual before use․ Place the air fryer on a stable surface‚ away from heat sources and flammable materials․ Ensure adequate space around the appliance for proper airflow and never use it for deep frying․ Follow all safety precautions to avoid accidents and ensure optimal performance․

Installation and Setup Instructions

Place the Instant Vortex Plus on a stable‚ level surface‚ away from combustible materials and heat sources․ Ensure at least 13 cm of clearance around the appliance for proper airflow․ Avoid positioning it on top of another appliance․ Plug the air fryer into a dedicated electrical outlet to prevent overloading․ Before first use‚ thoroughly read the manual to understand all features and safety guidelines․ This setup ensures safe and efficient operation of your Instant Vortex Plus Air Fryer․

Important Safety Tips for Operation

Always place the Instant Vortex Plus on a stable‚ heat-resistant surface‚ ensuring it is level and away from flammable materials․ Never leave the appliance unattended during operation․ Keep children away from the air fryer while it is in use․ Avoid touching hot surfaces‚ such as the basket or pan‚ during or after cooking․ Use oven mitts or tongs to handle hot components․ Do not submerge the base unit in water or expose it to excessive moisture․ Follow all instructions carefully to prevent accidents and ensure safe operation of your Instant Vortex Plus Air Fryer․

Operating Features of the Instant Vortex Plus

The Instant Vortex Plus features advanced air frying technology‚ a digital touchscreen‚ and customizable settings for temperature and time․ Its 5․7L capacity accommodates large meals‚ while the ClearCook window allows easy monitoring of food․ With smart programs and precise controls‚ it offers versatility for various recipes‚ ensuring crispy results with minimal oil․ Designed for convenience‚ this air fryer simplifies cooking while delivering professional-quality outcomes․

Understanding the Control Panel and Functions

The Instant Vortex Plus control panel features a user-friendly digital touchscreen with preset programs for common cooking tasks․ Key functions include temperature adjustment (ranging from 120°F to 400°F)‚ a timer (up to 60 minutes)‚ and a start/stop button․ The LED display provides clear visibility of settings‚ while the rotating dial offers precise control․ Additional functions like manual mode and smart programs allow customization for specific recipes․ The control panel also includes indicators for preheating‚ cooking progress‚ and completion‚ ensuring a seamless and intuitive cooking experience․ Refer to the manual for detailed guidance on utilizing these features effectively․

Customizing Cooking Settings for Different Recipes

The Instant Vortex Plus allows for precise customization of cooking settings to suit various recipes․ Adjust the temperature between 120°F and 400°F and set the timer up to 60 minutes for tailored results․ Use the smart programs for specific tasks like frying‚ baking‚ or dehydrating‚ or switch to manual mode for full control․ Experiment with different settings to achieve crispy textures or evenly cooked dishes․ Refer to the manual for troubleshooting and optimizing your cooking experience‚ ensuring perfect results for every recipe you try․

Accessories and Compatible Parts

The Instant Vortex Plus comes with essential accessories‚ including a non-stick basket‚ drip tray‚ and multi-use pan․ Optional add-ons like racks and utensils enhance functionality for diverse cooking needs․

Standard Accessories Included with the Vortex Plus

The Instant Vortex Plus comes with a non-stick basket‚ drip tray‚ and multi-use pan‚ designed for versatile cooking․ Additional accessories like a recipe booklet guide users in exploring various dishes․ These standard parts ensure optimal performance and ease of use‚ making it easy to prepare meals efficiently․ The included components are durable and dishwasher-safe‚ simplifying cleanup․ For enhanced functionality‚ optional accessories are available separately‚ allowing users to customize their cooking experience further․

Optional Accessories for Enhanced Functionality

To elevate your cooking experience‚ optional accessories for the Instant Vortex Plus include a rotisserie basket‚ grill tray‚ and pizza pan․ These additions allow for more diverse meal preparations‚ such as rotisserie-style meats‚ grilled vegetables‚ and homemade pizzas․ Additional racks and trays can also be purchased to maximize cooking capacity․ These accessories are designed to fit seamlessly with the Vortex Plus‚ ensuring compatibility and performance․ They are available through Instant Brands or authorized retailers‚ offering users the flexibility to expand their culinary possibilities beyond the standard setup․

Cooking Techniques and Recipes

Explore a variety of cooking techniques and delicious recipes tailored for the Instant Vortex Plus․ From crispy snacks to healthy meals‚ this section helps you create flavorful dishes effortlessly․

Basic Cooking Methods for Beginners

Master essential cooking techniques with your Instant Vortex Plus․ Start by preheating the air fryer for optimal results․ Season foods evenly‚ ensuring proper air circulation․ Place items in a single layer in the basket for uniform cooking․ Use preset settings for common dishes like fries or chicken․ Adjust temperature and time based on recipe requirements․ Shake the basket halfway through cooking for even browning․ Experiment with marinades and spices to enhance flavors․ Follow recommended cooking times to achieve crispy textures without overcooking․

Advanced Recipes to Maximize Your Vortex Plus

Elevate your cooking with advanced techniques using your Instant Vortex Plus․ Try dual-zone cooking for perfectly balanced meals or dehydrate fruits and veggies for healthy snacks․ For gourmet dishes‚ layer flavors by marinating meats or veggies before cooking․ Experiment with smart programming to customize time and temperature for intricate recipes․ Create crispy stuffed chicken breasts or tender fish fillets with precise control․ Enhance results by tossing ingredients midway for even browning․ Explore the full potential of your air fryer with creative‚ flavorful recipes tailored to your preferences․

Maintenance and Cleaning Tips

Regularly clean the basket and pan with soap and water․ Wipe the exterior with a damp cloth․ Avoid abrasive cleaners to prevent damage․ Dry thoroughly after cleaning for optimal performance and longevity․

Regular Cleaning Procedures for Optimal Performance

To maintain your Instant Vortex Plus‚ clean the basket and pan after each use with mild soap and warm water․ Use a soft sponge to avoid scratching the surfaces․ Dry thoroughly to prevent rust; Wipe the exterior with a damp cloth‚ ensuring no moisture enters electrical components․ Regular deep cleaning every 1-2 months by soaking parts in soapy water can remove stubborn residue․ Avoid abrasive cleaners or scourers‚ as they may damage the non-stick coating․ Proper cleaning ensures consistent performance and longevity of your air fryer․

Troubleshooting Common Maintenance Issues

If your Instant Vortex Plus encounters issues‚ start by restarting the device․ Check for error messages on the display and refer to the manual for solutions․ For power issues‚ ensure the unit is properly plugged in and the outlet is functioning․ If food residue builds up‚ soak the basket and pan in warm‚ soapy water․ Strange noises may indicate debris in the fan; clean it gently with a soft brush․ For uneven cooking‚ ensure the basket is not overcrowded and temperatures are set correctly․ Consult the manual or contact support for persistent problems․

Downloading the Instant Vortex Plus Manual

Visit the official Instant Brands website or authorized distributors to download the Instant Vortex Plus Manual․ Search for the 5․7L model‚ and select the PDF version․ Ensure compatibility with your device for easy access and reference․ Contact customer support if assistance is needed during the download process․

Steps to Download the Official User Manual

  1. Visit the official Instant Brands website or authorized distributor sites;
  2. Search for “Instant Vortex Plus Manual” in the support section․
  3. Select the correct model (e;g․‚ 5․7L or 8․5L) from the results․
  4. Click the Download button to access the PDF manual․
  5. Choose your preferred language (English is available)․
  6. Save the file to your device for easy reference․

The manual is available in PDF format‚ ensuring easy access on any device․ Print or save it for future use and troubleshooting․

Additional Resources for Further Assistance

For further support‚ visit the official Instant Brands website or check their support page for FAQs‚ troubleshooting guides‚ and video tutorials․ Additionally‚ explore the Instant Vortex Plus community forums where users share tips‚ recipes‚ and solutions․ You can also contact customer support directly via email or phone for personalized assistance․ The manual is available in multiple languages‚ ensuring accessibility for all users․ Print or save the PDF for easy reference‚ and enjoy exploring advanced features and recipes with confidence․

Continue Reading

kings 25a dcdc charger manual

Overview of the Kings 25A DC-DC Charger

The Kings 25A DC-DC Charger is a high-performance battery charger designed for 12V systems, ideal for cars, caravans, and boats. Its compact, rugged design suits harsh environments and automatically operates based on vehicle or solar input voltages without manual adjustments.

1.1 Key Features and Applications

The Kings 25A DC-DC Charger is designed for efficient battery charging in various applications, including automotive, caravan, and marine systems. It features automatic lithium wake functionality, ensuring charging resumes when a battery is detected. The charger supports both solar and vehicle input voltages, with a range of 9-25V for solar and 11.9-25V for vehicle inputs. Its compact, rugged design makes it suitable for harsh environments. Ideal for secondary battery charging, it prioritizes alternator charging and switches to solar when input exceeds 200 watts. This charger is perfect for maintaining 12V batteries in off-grid and mobile power systems, ensuring reliable performance.

1.2 Technical Specifications and Design

The Kings 25A DC-DC Charger is a high-performance battery charging solution designed for 12V systems. It features a maximum charging current of 25A, making it suitable for automotive, caravan, and marine applications. The charger boasts a compact and rugged design, ensuring durability in harsh environments. It supports a solar input voltage range of 9-25V and a vehicle input range of 11.9-25V. The charger is designed for efficient operation, with built-in safety features such as overcharge protection and thermal management. Its efficient design ensures reliable charging performance, making it an essential component for off-grid and mobile power systems.

Key Features of the Charger

The Kings 25A DC-DC Charger features automatic lithium wake functionality, solar and vehicle input voltage management, and robust safety features for reliable battery charging in various applications.

2.1 Automatic Lithium Wake Feature

The Kings 25A DC-DC Charger features an automatic lithium wake functionality, designed to enhance battery charging efficiency. When connected, the charger sends a power pulse every minute to detect the presence of a lithium battery. If a battery is detected, charging resumes; otherwise, the charger switches to standby mode. This feature prevents unnecessary power consumption and ensures the battery is only charged when needed. It also helps maintain battery health by avoiding prolonged charging cycles. The lithium wake feature is particularly useful for applications where the battery may frequently disconnect or remain inactive for extended periods. This ensures a safe and efficient charging process.

2.2 Solar and Vehicle Input Voltage Ranges

The Kings 25A DC-DC Charger supports a wide range of input voltages, ensuring compatibility with both solar panels and vehicle alternators. For solar inputs, the charger operates within a voltage range of 9-25V, with a minimum startup voltage of 14.5V. Vehicle inputs are supported within a range of 11.9-25V, starting at a minimum of 12.2V. This broad voltage range allows the charger to function efficiently in various environments and applications. The charger automatically adjusts its operation based on the input type, prioritizing vehicle charging until solar input exceeds 200 watts, ensuring a seamless and efficient charging experience for both power sources.

Safety Precautions and Warnings

The Kings 25A DC-DC Charger manual emphasizes safety as a top priority, providing detailed instructions and warnings for proper handling and operation to ensure reliability and user protection.

3.1 Handling and Safety Guidelines

Proper handling and adherence to safety precautions are essential for safe and reliable operation of the Kings 25A DC-DC Charger. Users should avoid overcharging batteries and ensure all connections are secure to prevent short circuits. The charger is designed for 12V systems, and improper voltage application can damage the unit or cause hazards. Always disconnect the battery before servicing and avoid exposure to extreme temperatures or moisture. Follow the manual’s guidelines for installation and operation to ensure optimal performance and safety. Regular inspections of wiring and connections are recommended to maintain reliability and prevent potential risks.

3.2 Critical Safety Warnings for Proper Operation

The Kings 25A DC-DC Charger requires strict adherence to safety warnings to prevent hazards. Ensure correct polarity when connecting batteries to avoid risk of explosion or damage. Never touch electrical terminals with wet hands or while standing on conductive surfaces. Disconnect the battery before servicing the charger to prevent accidental short circuits. Avoid exposing the charger to water or extreme temperatures, as this can lead to malfunction or fire. Use appropriate fuses and wiring to prevent overloading circuits. Always follow the manual’s guidelines for voltage settings to avoid overheating or irreversible damage. Professional installation is recommended for complex setups.

Installation and Setup Guide

The Kings 25A DC-DC Charger installation involves mounting the unit securely, ensuring proper ventilation. Connect the battery first, followed by solar and vehicle inputs. Use fuses as specified.

4.1 Step-by-Step Installation Process

To install the Kings 25A DC-DC Charger, begin by selecting a well-ventilated, dry location away from flammable materials. Mount the charger securely using the provided brackets. Connect the battery terminals first, ensuring correct polarity (positive to positive, negative to negative). Next, attach the solar input, followed by the vehicle input. Use appropriate fuses for each connection to protect against overcurrent. Double-check all wiring for tight connections and proper routing. Finally, power on the charger and test its operation by monitoring the charging status of your battery. Always refer to the manual for specific torque and voltage recommendations.

4.2 Wiring Instructions and Recommendations

Proper wiring is essential for safe and efficient operation of the Kings 25A DC-DC Charger. Use appropriately sized cables to handle the maximum current rating, ensuring minimal voltage drop. Connect the battery terminals first, observing correct polarity (positive to positive, negative to negative). Install fuses on both input and output lines, rating them according to the charger’s specifications. Secure all wires neatly to avoid damage or abrasion. Avoid overloading circuits, and ensure connections are tight and free from corrosion. Always double-check wiring for short circuits before powering up. Follow the manual’s diagrams for correct terminal identification and wiring configuration.

Troubleshooting Common Issues

Common issues include error lights, charging problems, or unexpected shutdowns. Check connections, ensure proper voltage, and consult the manual for detailed diagnostic steps and solutions.

5.1 Diagnosing Charging Problems

To diagnose charging issues with the Kings 25A DC-DC Charger, start by checking the error lights or indicators on the unit. Ensure all connections are tight and free from corrosion. Use a multimeter to verify input and output voltages, ensuring they match the specified ranges. If the charger fails to start, check the input voltage and ensure it meets the minimum startup requirements. For no-output issues, inspect the output terminals and wiring for short circuits or overloads. Monitor the charger’s behavior under load and compare it with the manual’s troubleshooting guide. Always disconnect power before performing internal inspections.

5.2 Solutions for Common Faults and Errors

For common faults like error lights or low output, reset the charger by disconnecting and reconnecting power. Check for loose or corroded connections and clean or tighten them as needed. If output voltage is low, ensure the input voltage meets specifications. For no-output issues, verify the battery is connected correctly and not deeply discharged. If the charger overheats, reduce the load or ensure proper ventilation. Replace blown fuses or faulty wiring to resolve charging interruptions. Always refer to the manual for specific error codes and follow the recommended troubleshooting steps to restore functionality and ensure safe operation.

Manufacturer Support and Resources

Adventure Kings provides downloadable PDF manuals for the 25A DC-DC charger, offering detailed diagrams and troubleshooting guides. Contact their customer support directly for assistance with any issues.

6.1 Accessing the User Manual and Guides

The Kings 25A DC-DC Charger user manual is available for download in PDF format from the official Adventure Kings website. It provides detailed diagrams, wiring instructions, and troubleshooting guides to ensure proper installation and operation. The manual covers technical specifications, safety precautions, and step-by-step installation processes. Users can access it by visiting the support section of the manufacturer’s website or by contacting customer support directly. The guide is essential for understanding the charger’s features and ensuring safe, efficient use. It is recommended to consult the manual before installing or operating the charger to avoid any potential issues.

6.2 Contacting Customer Support for Assistance

For any questions or issues with the Kings 25A DC-DC Charger, customers can contact Adventure Kings’ customer support team directly. The support section on their official website provides contact details and resources to assist with troubleshooting, installation, or general inquiries. Users can reach out for help with specific charger models, including the 25A version, ensuring they receive accurate and reliable guidance. The support team is available to address concerns beyond what is covered in the user manual, making it a valuable resource for resolving complex issues or clarifying installation processes. Reaching out to support is highly recommended for optimal performance and safety.

Continue Reading

emerson alarm clock manual

Emerson alarm clocks combine reliability, innovative features, and user-friendly designs. With advanced SmartSet technology, dual alarms, and USB charging, they offer convenience and modern functionality for everyday use.

Overview of Emerson SmartSet Technology

Emerson SmartSet Technology is a patented system designed to simplify timekeeping and alarm management. It automatically sets the clock’s time, date, and daylight saving adjustments, eliminating manual input. This innovative feature ensures accuracy and convenience, especially during time changes. SmartSet also supports dual alarms, allowing users to set independent wake-up times for different days, such as weekdays and weekends. The technology integrates seamlessly with other features like USB charging and Bluetooth connectivity, enhancing overall functionality. By combining automation with user-friendly controls, SmartSet makes Emerson alarm clocks both practical and efficient for everyday use. This technology is a hallmark of Emerson’s commitment to innovation, providing a hassle-free experience for users.

Importance of the Manual

The manual is essential for understanding and maximizing the functionality of Emerson alarm clocks. It provides detailed instructions for setting up SmartSet technology, configuring dual alarms, and utilizing advanced features like USB charging and Bluetooth connectivity. The manual also offers troubleshooting tips for common issues, ensuring optimal performance. By following the guide, users can avoid potential errors and ensure their clock operates as intended. Additionally, the manual includes safety precautions and maintenance advice to prolong the product’s lifespan. It serves as a comprehensive resource for both initial setup and ongoing use, helping users fully benefit from their Emerson alarm clock’s features. Referencing the manual ensures a smooth and hassle-free experience, making it an indispensable companion for owners.

Setting Up the Clock

Setting up your Emerson alarm clock involves adjusting the time zone, selecting manual or auto time settings, and using the buttons to navigate through options. Press the buttons to cycle through time zones until the correct one appears, then adjust the time and date as needed. The display will show the correct time once setup is complete. This process ensures your clock is accurately configured for reliable performance.

Time Zone Adjustment

Adjusting the time zone on your Emerson alarm clock ensures accurate timekeeping according to your location. To set the time zone, press and hold the appropriate button until “TZ” appears on the display. Use the navigation buttons to cycle through the available time zones, such as Pacific, Mountain, Central, or Eastern Time. Once the correct time zone is displayed, release the button to confirm the selection. The clock will automatically update the time based on the selected time zone. This feature is essential for maintaining the correct time, especially for users in different regions or those traveling across time zones. After setting, the clock will display the local time accurately, ensuring reliability for alarms and time-based functions. Proper time zone adjustment is crucial for the clock’s overall performance and functionality.

Manual vs. Auto Time Setting

Emerson alarm clocks offer two convenient time-setting options: manual and automatic. The SmartSet technology enables automatic time setting, syncing with a radio signal for accurate timekeeping. This feature eliminates manual adjustments, updating for daylight saving changes and maintaining precision. For manual setting, users can input the time directly using the clock’s buttons, ideal for custom preferences or regions without signal coverage. Both options ensure reliability, with automatic mode offering hands-free convenience and manual mode providing flexibility. This dual functionality caters to diverse user needs, ensuring accurate timekeeping in any situation. The choice depends on personal preference and location, making Emerson clocks versatile for various lifestyles and settings.

Configuring Alarms

Emerson alarm clocks feature dual alarms for customizable wake-up settings. Users can set separate times for weekdays, weekends, or all days, choosing between a buzzer or radio alarm mode.

Dual Alarms Setup

Emerson alarm clocks offer a convenient dual alarm feature, allowing users to set two independent wake-up times. This feature is ideal for individuals who need different wake-up times on weekdays versus weekends. To set the first alarm, press and hold the ALARM 1 button until the display shows the wake-up time. Adjust the time using the SKIP buttons, then release to save. Repeat the process for the second alarm using the ALARM 2 button. Users can customize each alarm mode, choosing between a buzzer or radio wake-up. The alarms can be programmed for specific days, such as weekdays only, weekends only, or all seven days. This flexibility ensures that users can tailor their wake-up routine to fit their lifestyle seamlessly. The dual alarm setup is straightforward, making it easy to manage multiple wake-up times without confusion.

Customizing Alarm Modes

Emerson alarm clocks allow users to customize their alarm modes for a personalized wake-up experience. You can set each alarm to wake you up to a buzzer, radio, or even a gentle, gradual tone. The alarms can be programmed to activate on specific days, such as weekdays, weekends, or all seven days. Additionally, the volume of the alarm can be adjusted to suit your preference. For added convenience, the Snooze button enables you to temporarily silence the alarm, giving you a few extra minutes of rest. Models like the CKS1900 and CKS1521 also offer advanced features, such as waking up to your favorite FM radio station or a soothing nature sound. This flexibility ensures your alarm clock adapts to your lifestyle, providing a seamless and enjoyable experience.

Advanced Features

Emerson alarm clocks offer advanced features like USB charging ports, Bluetooth connectivity, and wireless charging for modern convenience. These features enhance functionality while maintaining a user-friendly experience, perfect for today’s lifestyle demands.

USB Charging

Emerson alarm clocks are equipped with USB charging ports, allowing users to charge their smartphones, tablets, or other devices conveniently while they sleep. This feature ensures your devices are always powered and ready for use. The USB port is typically located on the back or side of the clock, making it easily accessible. With this built-in functionality, you can eliminate clutter from multiple chargers and keep your bedside area organized. The charging function operates independently of the clock’s alarm settings, providing a reliable power source. This innovative addition caters to modern lifestyles, blending practicality with everyday convenience. By integrating USB charging, Emerson alarm clocks enhance user experience without compromising on their core timekeeping and alarm functionalities.

Bluetooth Connectivity

Emerson alarm clocks with Bluetooth connectivity offer a seamless way to stream music, podcasts, or audiobooks from your smartphone or tablet. This feature enhances your morning routine by allowing you to wake up to your favorite tunes or fall asleep to soothing sounds. Pairing your device is straightforward—simply enable Bluetooth on your phone, search for the clock’s Bluetooth signal, and connect. Once linked, you can enjoy high-quality audio through the clock’s built-in speakers. This feature also provides a convenient way to keep your phone charged and within reach while maintaining a clutter-free bedside setup. Emerson’s Bluetooth-enabled alarm clocks combine modern connectivity with traditional timekeeping, ensuring a versatile and user-friendly experience. This integration of wireless technology makes Emerson alarm clocks a practical choice for those who appreciate both functionality and entertainment.

Maintenance and Troubleshooting

Regularly clean the clock’s exterior with a soft cloth and ensure proper power supply. For troubleshooting, refer to the manual for solutions to common issues like time inaccuracies or alarm malfunctions.

Cleaning the Device

Regular cleaning ensures your Emerson alarm clock functions optimally and maintains its appearance; Use a soft, dry cloth to wipe the exterior, gently removing dust and fingerprints. For stubborn stains, lightly dampen the cloth with water, but avoid harsh chemicals or abrasive cleaners, as they may damage the finish or harm the display. Never submerge the device in water or expose it to excessive moisture, as this can cause internal damage. Clean the display screen with a microfiber cloth to prevent smudges and maintain clarity. Avoid touching the screen excessively, as oils from your skin can leave marks. For buttons and controls, use a slightly dampened cloth, ensuring no moisture seeps into the device. Allow the clock to dry completely before turning it back on. Proper cleaning helps preserve performance and longevity, ensuring your Emerson alarm clock remains reliable and visually appealing.

Troubleshooting Common Issues

Troubleshooting your Emerson alarm clock helps resolve common problems efficiently. If the clock doesn’t turn on, check the power source or batteries. For alarms not sounding, ensure the alarm is enabled and the volume is adequate. If the time is incorrect, verify the time zone settings or reset the SmartSet feature. Connectivity issues with Bluetooth or USB can often be resolved by restarting the device or ensuring proper connections. Display dimming may be due to auto-dimmer settings; adjust brightness if needed. For persistent issues, refer to the manual or reset the clock to factory settings. Regular maintenance and updates can prevent many problems. Always ensure the device is clean and free from dust to maintain optimal performance. Troubleshooting ensures your Emerson alarm clock operates smoothly, providing reliable wake-up alerts and accurate timekeeping.

Continue Reading

farberware air fryer instruction book

Welcome to the comprehensive guide for your Farberware Air Fryer! This manual is designed to help you master your appliance, explore its features, and unlock delicious, healthy cooking possibilities. Discover essential safety tips, cooking techniques, and maintenance advice to get the most out of your air fryer; With this book, you’ll be equipped to create crispy, flavorful meals effortlessly while maintaining your appliance’s performance. Let’s dive in and start your air frying journey!

1.1 Understanding the Importance of the Instruction Book

The Farberware Air Fryer instruction book is your essential guide to mastering your appliance; It provides critical safety information, operational tips, and troubleshooting solutions. This manual ensures you understand the appliance’s features, optimal cooking techniques, and maintenance practices. By following the instructions, you can maximize performance, safety, and creativity in the kitchen, making it an indispensable resource for both beginners and experienced users alike.

1.2 Key Features of the Farberware Air Fryer

The Farberware Air Fryer features rapid hot air technology for crispy results without oil. With multiple preset functions and a digital touchscreen, it offers versatility. Its compact design saves space while allowing for various cooking methods, making it a must-have for any kitchen. A user-friendly experience and healthy cooking options.

Safety Precautions and Essential Tips

Always prioritize safety when using your Farberware Air Fryer. Handle hot parts with care, avoid overheating, and keep children away. Regular cleaning prevents food residue buildup. Refer to the manual for detailed guidelines to ensure safe and effective operation.

2.1 Important Safety Guidelines for First-Time Users

Safety is crucial when using your Farberware Air Fryer. Always read the manual thoroughly before first use. Keep children away from hot surfaces and moving parts. Ensure the appliance is placed on a stable, heat-resistant surface. Avoid touching hot elements and never leave the air fryer unattended while in operation. Follow recommended cooking times and temperatures to prevent overheating and ensure safe, effective cooking.

2.2 Avoiding Common Mistakes While Operating the Air Fryer

Avoid overcrowding the basket, as it prevents even cooking. Don’t forget to preheat the air fryer for optimal results. Using too much oil can defeat the purpose of healthy frying. Always pat food dry before cooking to ensure crispiness. Never leave the appliance unattended, especially when cooking at high temperatures. Regularly clean the basket and pan to prevent food residue buildup and maintain performance. Follow these tips for safe and effective air frying.

Getting Familiar with Your Farberware Air Fryer

Familiarize yourself with the air fryer’s components, such as the control panel, basket, and release button. Understanding these parts ensures smooth operation and enhances your cooking experience.

3.1 Identifying Key Components and Parts

Take a moment to identify the key components of your Farberware Air Fryer, such as the control panel, basket, release button, and pan. The control panel features settings for temperature, time, and preset functions. The basket and pan are designed for even cooking and easy food removal. Understanding these parts will help you operate the appliance efficiently and safely. Familiarize yourself with each component to maximize your cooking experience.

3.2 Navigating the Control Panel and Settings

Familiarize yourself with the control panel, featuring intuitive buttons for temperature, timer, and preset functions like AIR FRY, BAKE, and BROIL. Use the digital display to monitor settings. Adjust the temperature and timer based on your recipe or food type. Preset functions simplify cooking, while manual adjustments allow customization. Explore these settings to achieve perfect results for various dishes, ensuring a seamless and efficient cooking experience every time.

Operating the Farberware Air Fryer

Operating your Farberware Air Fryer is simple and efficient. Use the digital interface to set temperature and timer, ensuring perfect results every time. Effortlessly cook a variety of dishes with preset functions and customizable settings, making it easy to achieve crispy, delicious meals while exploring your culinary creativity with this versatile appliance.

4.1 Step-by-Step Guide to Assembling and Preparing the Appliance

Begin by carefully unboxing and washing all components with mild soap. Dry thoroughly before first use. Place the air fryer on a stable, heat-resistant surface. Insert the basket into the pan, ensuring it clicks securely. Plug in the appliance and allow it to preheat for 5-10 minutes before cooking. Always refer to the manual for specific model instructions.


– Key Components: Basket, pan, and control panel.
– Essential Tip: Preheating ensures even cooking and crispy results.

4.2 Cooking Techniques and Recommended Settings for Different Foods

Master various cooking techniques with your Farberware Air Fryer! For fries, use 400°F (200°C) for 15-20 minutes. Chicken breasts cook perfectly at 375°F (190°C) for 12-15 minutes. Fish requires 350°F (175°C) for 8-12 minutes. Vegetables like broccoli or cauliflower thrive at 300°F (150°C) for 10-15 minutes. Adjust settings based on food thickness and desired crispiness for optimal results. Experiment with presets for consistent outcomes.

Cooking Times and Temperatures

Cooking times and temperatures vary by food type. Refer to the chart for precise settings, adjusting based on food thickness and quantity. Achieve perfect results!

5.1 Understanding the Cooking Time Chart for Various Foods

The cooking time chart provides precise guidelines for different foods, ensuring optimal results. From crispy fries to tender chicken, adjust times based on thickness and quantity. Use the chart as a starting point, then fine-tune based on personal preference. Remember, denser foods may require longer cooking times. Always monitor progress to achieve your desired texture and flavor.

5.2 Adjusting Temperature and Time for Optimal Results

Adjusting temperature and time is key to achieving perfect results. Thicker foods may need higher temps, while delicate items benefit from lower settings. Monitor progress and fine-tune based on crispiness and doneness. For extra crispy results, increase temp slightly. Always refer to the chart for specific food guidelines to ensure ideal cooking conditions and desired outcomes.

Maintenance and Cleaning

Regular cleaning is essential for maintaining your Farberware Air Fryer. Wash the basket and pan with warm soapy water, dry thoroughly, and avoid abrasive cleaners.

Let me know if you need further adjustments!

6.1 Best Practices for Cleaning the Air Fryer After Use

After each use, unplug the air fryer and let it cool. Wash the basket and pan with warm, soapy water using a soft sponge. Avoid abrasive cleaners or scourers. Dry thoroughly to prevent rust. Regular cleaning ensures optimal performance and hygiene. For tough food residue, soak components before washing. Cleaning regularly prevents food buildup and maintains your air fryer’s efficiency and longevity.

6.2 Tips for Long-Term Maintenance and Performance

For long-term maintenance, regularly clean the air fryer and ensure all parts are dry; Store it in a cool, dry place to prevent rust. Check for food residue and wash baskets thoroughly after use. Lubricate moving parts if necessary. Avoid using metal utensils to prevent scratching. Follow manufacturer guidelines for optimal performance and longevity. Proper care ensures consistent results and extends your air fryer’s lifespan.

Troubleshooting Common Issues

Address common issues like uneven cooking or malfunctioning parts by consulting the manual. Check power connections, clean filters, and ensure proper food loading. Contact customer support if problems persist for expert assistance.

7.1 Diagnosing and Resolving Common Problems

Identify issues like uneven cooking or malfunctioning parts by checking power connections, ensuring proper basket placement, and cleaning debris. Refer to the manual for solutions. If problems persist, such as the air fryer not turning on or overheating, reset the appliance or contact customer support for assistance. Regular maintenance can prevent many common issues.

7.2 When to Contact Customer Support

If issues persist despite troubleshooting, contact Farberware customer support at 1-855-451-2897 for assistance. Reach out for damaged parts, complex malfunctions, or concerns not addressed in the manual. Provide your model number for efficient support. Their team is available to resolve technical difficulties and ensure your air fryer operates optimally.

Accessories and Additional Resources

Enhance your cooking experience with must-have accessories like silicone baking cups and trivets. Download the PDF manual from trusted sources for quick reference and troubleshooting guides.

8.1 Must-Have Accessories for Enhanced Cooking

Elevate your air frying experience with essential accessories like silicone baking cups and trivets for easy food release and cleanup. Additional items such as non-stick liners and tongs can streamline your cooking process; These tools are designed to optimize performance and make cooking with your Farberware Air Fryer more convenient and enjoyable. Explore these accessories to enhance your culinary creativity and efficiency.

8.2 Downloading the PDF Manual for Quick Reference

The Farberware Air Fryer manual is available for free PDF download, ensuring quick access to instructions and guides. Visit websites like manualsbooks.com or search for models like FW-AF-GRY to find your specific manual. Downloading the PDF allows for easy reference, helping you maximize your air fryer’s potential and troubleshoot with ease.

Thank you for exploring the Farberware Air Fryer guide! Embrace creativity, experiment with recipes, and refer to your manual for tips. Happy cooking and enjoy your culinary journey!

9.1 Maximizing Your Culinary Creativity with the Farberware Air Fryer

Unleash your creativity with the Farberware Air Fryer! Experiment with diverse recipes, from crispy snacks to hearty meals, using its versatile cooking settings. Try new twists on classic dishes, explore global cuisines, and innovate with healthy, oil-free options. The rapid hot air technology ensures evenly cooked results, allowing you to achieve restaurant-quality flavors at home. Don’t be afraid to explore and create your own signature dishes!

9.2 Encouragement to Experiment and Explore New Recipes

Don’t hesitate to explore new recipes and cooking techniques with your Farberware Air Fryer! Its versatility allows you to try everything from crispy snacks to gourmet meals. Experiment with different seasonings, marinate meats, or recreate your favorite fried foods in a healthier way. The air fryer’s ease of use and quick results make it perfect for culinary adventures. Try new recipes today and enjoy the journey of discovering flavorful possibilities!

Continue Reading

vampire the masquerade rpg pdf

Vampire: The Masquerade RPG PDF offers a classic storytelling experience, blending personal and political horror․ It provides a comprehensive guide, updated errata, and bonus content for players seeking immersive vampire lore․

1․1 Overview of the Game and Its Significance

Vampire: The Masquerade is a groundbreaking RPG that immerses players in a world of personal and political horror․ As vampires, players navigate survival, supremacy, and the erosion of their humanity, set against a backdrop of intricate conspiracies․ The game’s significance lies in its deep storytelling, moral complexity, and the ability to explore dark themes through a vampire lens․ Its enduring popularity has made it a cornerstone of the World of Darkness, influencing countless adaptations and inspiring a dedicated global community for decades․

Key Features of the Vampire: The Masquerade 5th Edition PDF

Streamlined character creation, cinematic rules, and a focus on storytelling define the 5th Edition․ It offers balanced gameplay, immersive lore, and tools for both newcomers and veterans alike․

2․1 Streamlined Character Creation System

The 5th Edition introduces a streamlined character creation system, making it quick and intuitive while maintaining depth․ Players can craft unique vampires with balanced attributes, skills, and disciplines, ensuring a personalized experience․ The system emphasizes storytelling, allowing newcomers to easily join while offering depth for veterans․ It adaptability ensures that characters can evolve dynamically, fitting diverse narratives and playstyles seamlessly․

2․2 Cinematic and Balanced Rules

The 5th Edition features cinematic and balanced rules, designed to enhance storytelling and immersion․ The system combines fluid mechanics with narrative focus, ensuring dynamic gameplay․ Rules are mathematically balanced to support character actions and story progression seamlessly․ This approach fosters a blend of personal horror and political intrigue, allowing players to navigate the complexities of vampire existence․ The ruleset is tailored for both new and experienced players, ensuring a captivating experience rooted in the World of Darkness․

The Vampire: The Masquerade 20th Anniversary Edition PDF

Celebrating two decades of gaming, this edition offers a complete World of Darkness experience, honoring the legacy of the original game while welcoming new players․

3․1 Celebrating Two Decades of Gaming

The 20th Anniversary Edition of Vampire: The Masquerade honors the game’s rich history, offering a nostalgic journey through two decades of immersive storytelling and roleplay․ This edition encapsulates the essence of the original game while introducing updated mechanics and content, making it accessible to both veteran players and newcomers․ It serves as a tribute to the enduring legacy of the World of Darkness, ensuring that the iconic vampire lore continues to captivate audiences․ The anniversary edition is a celebration of the game’s impact and its loyal fan base․

3․2 Complete World of Darkness Experience

The Vampire: The Masquerade 20th Anniversary Edition PDF delivers a comprehensive World of Darkness experience, offering detailed lore, updated rules, and expanded content․ It includes everything needed to immerse players in the vampire universe, from character creation to storytelling․ The PDF features errata updates and bonus sections, enriching the gameplay experience․ This edition is a testament to the game’s legacy, providing a rich, engaging environment for both new and veteran players to explore the depths of vampire existence and the intricate conspiracies within the shadows․

Availability and Purchase Options

The Vampire: The Masquerade RPG PDF is readily available on platforms like DriveThruRPG, offering both digital and print-on-demand versions for convenience and accessibility to fans worldwide․

4․1 DriveThruRPG and Other Online Retailers

DriveThruRPG is a primary platform for purchasing the Vampire: The Masquerade RPG PDF, offering both the 5th Edition corebook and the 20th Anniversary Edition․ The site frequently features discounts, such as during the GMs Day Sale, making it an ideal destination for cost-conscious buyers․ Additional retailers like Renegade Game Studios also provide digital and print-on-demand versions, ensuring accessibility for fans worldwide․ These platforms allow players to easily download or ship their preferred format, catering to both digital and physical enthusiasts․

4․2 Print-on-Demand and Digital Versions

The Vampire: The Masquerade RPG PDF is available in both digital and print-on-demand formats, offering flexibility for players․ Digital versions include the core rulebook with implemented errata and bonus sections, while print-on-demand options range from premium color hardcovers to standard and black & white softcovers․ Prices vary, with hardcovers starting at $49․99 for black & white and $123․99 for premium color․ Print-on-demand ensures high-quality physical copies, though some users have noted binding issues, which are promptly addressed by customer service․ This dual availability caters to both digital and physical preferences seamlessly․

Supplementary Materials and Expansions

Vampire: The Masquerade expands with clanbooks, like Clanbook: Ventrue, and adventure modules, offering deeper dives into lore and gameplay․ These supplements enrich storytelling and character development․

5․1 Clanbook: Ventrue and Other Clan-Specific Content

Clanbook: Ventrue delves into the intricate world of the Ventrue, exploring their noble lineage, capitalist ambitions, and leadership roles․ This supplement reveals their proud history and dark secrets, exposing the duality of their noble facade and hidden greed․ Players gain access to unique disciplines, bloodlines, and character options tailored to the Ventrue’s political and manipulative nature․ Additional clanbooks provide similar in-depth explorations of other vampire clans, offering rich lore and customizable content for enhanced storytelling and character development in Vampire: The Masquerade RPG․

5․2 Storyteller Resources and Adventure Modules

Storyteller resources and adventure modules enrich the Vampire: The Masquerade experience, offering detailed settings, NPCs, and plot hooks․ Modules like Midnight Siege and Archons and Templars provide narratives centered on sect wars and leadership roles, while Last Dance at Renaulds delivers a compelling story of neonates navigating political intrigue․ These resources empower storytellers to craft immersive tales, ensuring endless variety and depth for players exploring the World of Darkness․

Community and Player Engagement

Vampire: The Masquerade fosters a vibrant community through online forums, LARP events, and player-driven content, creating a dynamic and immersive experience for fans worldwide․

6․1 Live-Action Roleplay (LARP) Adaptations

The Vampire: The Masquerade RPG PDF includes a dedicated section for Live-Action Roleplay (LARP), offering streamlined rules and scenarios designed specifically for immersive, real-world gameplay․ Players can embody their characters in physical settings, enhancing the storytelling experience․ The PDF provides detailed guides for creating LARP-specific chronicles, character builds, and interactive plots․ It also includes tips for organizing events and managing large groups, ensuring a seamless transition from tabletop to live-action․ This adaptation makes the game accessible to new players while enriching the experience for veterans․

6․2 Online Forums and Player-Driven Content

The Vampire: The Masquerade RPG PDF has fostered a vibrant online community, with players and Storytellers sharing custom content, strategies, and chronicles․ Platforms like DriveThruRPG host forums where fans discuss the game, exchange ideas, and collaborate on new material․ The PDF’s digital format makes it easy to share and reference, enabling players to create and distribute homebrew adventures, character builds, and storytelling tips․ This collective creativity enriches the game, offering endless inspiration for both new and experienced players․

Reviews and Ratings

Vampire: The Masquerade RPG PDF has received widespread acclaim for its engaging storytelling and updated rules․ Players and critics praise its depth, immersiveness, and faithful adaptation of the original game․

7․1 Player and Critic Feedback

Players and critics have praised the Vampire: The Masquerade RPG PDF for its immersive storytelling and updated mechanics․ Many highlight the streamlined character creation and balanced rules, which enhance gameplay․ Critics appreciate the faithful adaptation of the original game’s essence, making it accessible to both newcomers and veterans․ The PDF’s inclusion of errata and bonus content has been particularly well-received, ensuring a polished and engaging experience for all players․

7․2 Comparisons with Other Editions

The Vampire: The Masquerade RPG PDF is often compared to its earlier editions, with the 20th Anniversary Edition praised for its comprehensive content and faithful adaptation of the original game․ The V5 core book is noted for its streamlined mechanics and modernized rules, appealing to both veteran players and newcomers․ The PDF format enhances accessibility, offering a portable and searchable version of the game․ Fans of LARP adaptations also appreciate the tailored rules for live-action play, making this edition a versatile choice for diverse gaming preferences․

Tips for Using the PDF Effectively

Use bookmarks for quick navigation, search keywords for specific rules, and ensure compatibility with your preferred devices for seamless tabletop or LARP experiences․

8․1 Navigating the Digital Format

Mastering the digital format enhances your Vampire: The Masquerade experience․ Use bookmarks and hyperlinks to quickly access rules, disciplines, and character creation sections․ The PDF’s search function allows rapid retrieval of specific keywords, ensuring smooth gameplay․ For devices, adjust font sizes and brightness for readability․ Regularly update your PDF viewer to maintain compatibility and performance․ Organize annotations and highlights to track key mechanics and story elements, making your sessions more efficient and immersive․

8․2 Compatibility with Devices and Platforms

The Vampire: The Masquerade RPG PDF is optimized for various devices, ensuring seamless gameplay across platforms․ It works flawlessly on iPads, smartphones, and desktops, with clear formatting for readability․ The PDF and EPUB formats are compatible with popular e-readers and apps like Adobe Acrobat․ For optimal performance, use a reliable PDF viewer with zoom and search functions․ The file is also accessible on both iOS and Android, making it versatile for modern gamers․ Ensure your device has sufficient storage and updated software for the best experience․

Vampire: The Masquerade RPG PDF remains a timeless gem in the world of tabletop gaming․ Its rich narrative, updated mechanics, and digital accessibility make it a must-have for both newcomers and veterans․ The 5th Edition and 20th Anniversary versions offer comprehensive experiences, while supplementary materials and online communities enhance gameplay․ Whether you prefer physical copies or digital formats, the game’s depth and versatility ensure endless hours of immersive storytelling․ Embrace the night and dive into the shadows with this iconic RPG․

Continue Reading

barber hairstyle guide

Barber hairstyles are a cornerstone of men’s grooming, blending classic cuts with modern trends. From fades to undercuts, these styles offer versatility, personalization, and timeless appeal;

1.1 Understanding the Basics of Barbering

Barbering begins with mastering essential tools like clippers, scissors, and razors. Fundamental techniques include fades, undercuts, and blunt cuts, requiring precision and adaptability to suit various hairstyles and hair types, forming the foundation for creating versatile and stylish looks.

1.2 The Importance of Choosing the Right Hairstyle

Selecting the right hairstyle enhances confidence, complements face shape, and suits hair type. It reflects personal style, boosts first impressions, and offers versatility for different occasions, ensuring a fresh, polished look tailored to individual preferences and lifestyle needs.

Popular Barber Hairstyles for Men

From sleek fades to stylish undercuts, modern barber styles offer a wide variety of options, blending classic cuts with contemporary trends for a fresh, personalized look.

2.1 Fade Hairstyles: From Low Taper to High Fade

Fade hairstyles are a popular choice, offering versatility and a clean look; The low taper fade transitions subtly, while the high fade creates a bold, modern aesthetic. Both styles can be paired with undercuts or pompadours, making them suitable for various face shapes and personal preferences. Regular maintenance ensures a sharp, fresh appearance.

2.2 Undercut and Its Variations (Classic, Skin Fade, Textured)

The undercut is a versatile style, offering classic, skin fade, and textured variations. The classic undercut pairs longer top hair with shaved sides, while the skin fade blends seamlessly into the skin. Textured undercuts add volume and dimension, making them ideal for various hair types and face shapes, ensuring a fresh, stylish look with minimal upkeep.

2.3 Pompadour and Quiff: Modern Takes on Classic Styles

The pompadour and quiff are timeless styles reimagined for modern men. The pompadour features voluminous, swept-up hair, while the quiff combines a side part with a textured finish. Both styles offer versatility, blending classic elegance with contemporary flair. They suit various face shapes and hair types, making them popular choices for those seeking a sophisticated yet trendy look with minimal effort.

Tools and Techniques for Barber Hairstyles

Essential tools like clippers, scissors, and razors are vital for crafting precise barber styles. Techniques such as fades and undercuts require skill and attention to detail.

3.1 Essential Tools: Clippers, Scissors, and Razors

Clippers are crucial for creating fades and undercuts, while scissors allow for precise trimming and styling. Razors add definition with clean lines, enabling barbers to craft modern and classic looks effortlessly.

3.2 Mastering Cutting Techniques (Blunt, Fade, and Textured Cuts)

Blunt cuts create sharp, clean lines, ideal for a neat look. Fade techniques offer precision, blending hair lengths seamlessly. Textured cuts add volume, enhancing hair’s natural movement. These methods require skill and attention to detail, allowing barbers to craft personalized, modern styles with versatility and expertise.

Maintenance and Care for Barber Hairstyles

Regular trims and proper grooming are essential to maintain barber hairstyles. Use styling products like pomades and gels to keep your look fresh and polished daily.

Touch-ups every 2-3 weeks prevent overgrowth, ensuring your style stays sharp. Pair with a consistent skincare routine for a complete, well-groomed appearance.

4.1 Tips for Keeping Your Hairstyle Fresh and Neat

Regular trims and touch-ups are crucial for maintaining a polished look. Use styling products like pomades or gels to define your style daily. Keep your scalp clean and moisturized to prevent dandruff. For fades, ensure consistent upkeep to avoid uneven growth. Brush or comb your hair regularly to maintain texture and prevent tangles. These simple habits will keep your barber hairstyle sharp and fresh.

4.2 Product Guide: Gels, Pomades, and Oils for Different Styles

Gels provide strong hold for sleek, defined looks, ideal for fades and undercut styles. Pomades add texture and shine, perfect for pompadours or quiffs. Oils moisturize and enhance natural texture, great for wavy or medium-length cuts. Choose products based on your hairstyle and desired finish to maintain a fresh, polished appearance every day.

Barber Shop Experience

A professional barbershop offers a unique, personalized experience. Skilled barbers provide tailored cuts and grooming, ensuring a fresh, stylish look that meets your individual preferences and needs.

5.1 What to Expect at a Professional Barbershop

At a professional barbershop, expect a welcoming atmosphere and skilled barbers who listen to your preferences. Services often include consultations, precise cuts, shaves, and styling. Many barbers use high-quality tools and techniques to ensure a polished look. Some shops offer additional touches like hot towels or neck trims for a premium experience.

5.2 How to Communicate with Your Barber for the Best Results

Clear communication is key to achieving your desired hairstyle. Be specific about the style, length, and any modifications. Bring reference images if helpful. Discuss your hair type, face shape, and lifestyle to ensure a personalized look. Asking questions and seeking maintenance tips can also enhance your experience and satisfaction with the final result.

Trends in Barber Hairstyles

Fades, undercuts, and mullets are dominating 2023, while modern twists like the mullet and mohawk fade are expected to trend in 2025, offering edgy, stylish options.

6.1 Latest Hairstyle Trends for 2023 and Beyond

In 2023, fades, undercuts, and textured crops are popular, while 2025 sees a rise in bold styles like the modern mullet and mohawk fade. These trends blend classic barber techniques with contemporary aesthetics, offering men versatile and edgy looks that stand out. Whether sleek or rugged, these styles cater to diverse preferences and face shapes.

6.2 Creative Variations: Mullet, Mohawk, and Box Braids

The modern mullet and mohawk fade offer edgy, bold looks, while box braids provide a unique, cultural-inspired style. These creative variations allow men to express individuality, blending traditional barber techniques with modern flair. Perfect for those seeking standout styles, these trends cater to adventurous personalities and diverse fashion tastes, adding a fresh twist to classic barbering.

Choosing the Right Hairstyle for Your Face Shape

Choosing the right hairstyle involves considering face shape and hair type. Round faces suit fades, while oval faces complement textured cuts. Square faces benefit from longer styles to balance features.

7.1 Hairstyles for Round, Oval, Square, and Triangular Faces

Hairstyles should complement face shapes. Round faces benefit from fades or undercuts to elongate. Oval faces suit most styles, like textured cuts with side parts. Square faces balance with softer styles, such as pompadours or quiffs. Triangular faces work well with volume on top and subtle undercuts for harmony.

7.2 Considering Hair Type: Thick, Thin, Wavy, and Straight Hair

Thick hair thrives with undercuts or fades to reduce bulk, while thin hair benefits from side parts or sleek styles for the illusion of thickness. Wavy hair shines with textured cuts and sea salt sprays, enhancing natural movement. Straight hair looks sharp with undercuts or fades, while lightweight products add definition without weight.

DIY Barbering Tips

Mastering DIY barbering involves investing in quality tools and practicing precision cuts. Start with small trims, use mirrors for visibility, and maintain clean, hygienic equipment for professional results.

8.1 How to Achieve Salon-Quality Cuts at Home

Achieving salon-quality cuts at home requires precision and the right tools. Start by sectioning your hair and using a comb guide for evenness. Use clippers for fades and scissors for detailing. Maintain clean lines, trim neckline neatly, and blend layers smoothly. Regular practice and patience will help refine your technique for professional-looking results without a trip to the barbershop.

8.2 Common Mistakes to Avoid While Cutting Your Own Hair

Common mistakes include uneven cuts from improper sectioning, insufficient mirror visibility, and cutting too much hair at once. Avoid applying too much tension, which can lead to pulling or unevenness. Not following natural hairlines can result in an unbalanced look. Use guides or consult tutorials to minimize errors and achieve a polished finish without professional assistance.

Barber Hairstyles for Different Occasions

Barber hairstyles offer versatility for every event, from sleek, formal looks to casual, party-ready styles. Choose a cut that matches your occasion, ensuring confidence and timeless appeal.

9.1 Formal and Business-Appropriate Hairstyles

For formal events, sleek side parts and polished undercuts are ideal. These styles exude professionalism and sophistication, perfect for business meetings or weddings. Pair with a trim beard for a refined look.

9.2 Casual and Party-Ready Barber Styles

Casual styles like fades and undercuts are perfect for relaxed outings. For parties, try bold options like mullets or mohawks. Add texture with styling products for a vibrant look that’s easy to maintain and turns heads at any event.

The Evolution of Barber Hairstyles

Barber hairstyles have transformed from classic cuts to modern innovations, reflecting cultural shifts and personalization trends. Today, they blend tradition with creativity, shaping men’s grooming culture globally.

10.1 Classic Cuts vs. Modern Innovations

Classic barber cuts, like the timeless side part and slicked-back styles, have evolved into modern innovations such as fades, undercuts, and textured designs. These updates blend traditional techniques with contemporary flair, offering men fresh looks while maintaining the essence of barbering’s heritage.

10.2 How Barbering Has Influenced Men’s Grooming Culture

Barbering has transformed men’s grooming by blending tradition with modern flair, fostering a culture of precision and style. Barbershops now serve as community hubs, offering more than just cuts—they provide shaves, beard styling, and personalized advice. This shift has elevated grooming standards, making barbering a cornerstone of men’s identity and confidence.

Barber Hairstyles for Different Hair Lengths

Barber hairstyles cater to all hair lengths, offering sleek fades for short hair, textured undercuts for medium, and stylish man buns or mullets for longer locks.

11.1 Short Hairstyles: Fade, Undercut, and Crop

Short hairstyles like fades, undercuts, and crops are timeless choices for men. Fades offer a clean, modern look with gradual length reduction, while undercuts provide versatility with contrasting lengths. Crops are practical, featuring a uniform cut with a slight texture. These styles suit various face shapes and hair types, making them ideal for those seeking low-maintenance yet stylish options.

11.2 Medium to Long Hairstyles: Man Bun, Mullet, and More

Medium to long hairstyles offer bold, eye-catching options for men. The man bun is sleek and sophisticated, while the mullet adds a rebellious edge. Other styles include braids and ponytails, perfect for those with thicker hair. These looks require regular maintenance but provide endless styling possibilities, making them great for confident individuals who want to stand out.

Barber hairstyles have evolved into a vibrant blend of classic and modern looks. From fades to mullets, these styles empower men to express their unique identity with confidence.

12.1 Final Tips for Rocking Your Barber Hairstyle

Confidence is key to pulling off any barber hairstyle. Regular trims and proper product use keep your look fresh; Experiment with trends but stay true to your style. Communicate clearly with your barber for a personalized cut that enhances your features. Own your look, and embrace the versatility barber styles offer for every occasion;

12.2 Staying Updated with the Latest Barbering Trends

To stay ahead, follow top barbers and fashion icons for inspiration. Trends evolve, blending classic cuts with modern twists. Regular trims and quality products keep your style fresh. Adapt to seasonal changes and experiment with bold looks like mullets or fades. Stay informed through social media and barbershop trends to embrace the latest innovations in men’s grooming.

Continue Reading
1 5 6 7 8 9 25