bosch classixx 6 washing machine user manual

The Bosch Classixx 6 is a reliable, energy-efficient washing machine designed for everyday use. It offers a 5kg capacity, multiple wash programs, and quiet operation, making it ideal for small households.

1.1 Overview of the Bosch Classixx 6 Model

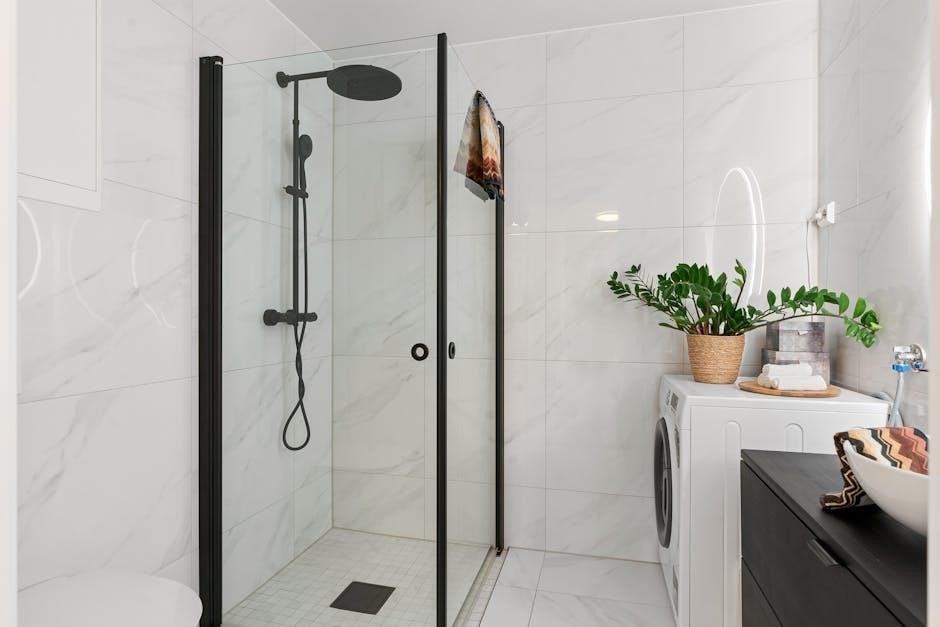
The Bosch Classixx 6 is a front-loading washing machine designed for compact spaces while offering efficient performance. With a capacity of 5kg to 6kg, it suits small to medium-sized households. The machine features a classic, user-friendly design with a durable build and quiet operation. It supports multiple wash programs, including delicate and eco-friendly options, ensuring versatility for various fabric types. The Classixx 6 is energy-efficient, with an A+ energy rating, making it environmentally friendly and cost-effective. Its compact dimensions (85cm height x 60cm width x 56cm depth) allow easy installation in kitchens or laundry areas. The model is known for its reliability and ease of use, with clear controls and a straightforward interface. Ideal for those seeking a practical, no-frills washing machine that delivers consistent results.

1.2 Key Features and Benefits

The Bosch Classixx 6 washing machine offers several key features that enhance its functionality and user experience. One notable feature is its multiple wash programs, including specialized cycles for delicate fabrics, wool, and eco-friendly options. This versatility ensures optimal cleaning for various types of laundry. Additionally, the machine features a direct injection system, which distributes detergent effectively, improving wash quality. The Classixx 6 also includes a child lock for safety, preventing accidental operation by children. Its compact design makes it ideal for smaller spaces without compromising on performance; Furthermore, the machine operates quietly, reducing noise during cycles. These features, combined with its energy efficiency and durable construction, make the Bosch Classixx 6 a practical and reliable choice for everyday laundry needs.

Installation and Setup

Ensure proper space, level the machine, and connect water supply and electrical connections. Secure the washing machine to prevent vibration and ensure stable operation during cycles.

2.1 Pre-Installation Requirements

Before installing the Bosch Classixx 6, ensure the space is well-ventilated and has a flat, stable surface. The area should be clear of obstructions to allow easy access and proper drainage. Check that the water supply lines are compatible with the machine’s connections and that the electrical outlet meets the voltage requirements. Ensure the power cord is undamaged and within reach. Additionally, verify that the machine’s dimensions fit the allocated space, particularly if it’s intended for under-counter installation. Prepare the necessary tools, such as adjustable wrenches, and ensure all parts are included in the packaging. Finally, review the user manual for specific guidelines to avoid installation issues and ensure compliance with safety standards.

2.2 Physical Installation Steps

Begin by carefully unpacking the Bosch Classixx 6 and removing all packaging materials. Place the machine on a level, stable surface to ensure proper balance. Connect the water supply hoses to the designated ports, ensuring they are securely tightened to prevent leaks. Plug the power cord into a nearby electrical outlet, making sure it is easily accessible. If installing under a counter, align the machine with the space and secure it using the provided brackets or anti-vibration pads. Adjust the leveling feet as needed to stabilize the machine and prevent vibration during operation. Once installed, test the machine by running a short cycle to ensure everything functions correctly. Refer to the user manual for specific installation diagrams and safety precautions to complete the process successfully.

Operating the Bosch Classixx 6

Operating the Bosch Classixx 6 is straightforward. Load laundry, select the desired program, and start. It features multiple cycles for cotton, synthetic, and delicate fabrics, ensuring efficient cleaning with minimal noise.

3.1 Starting a Wash Cycle

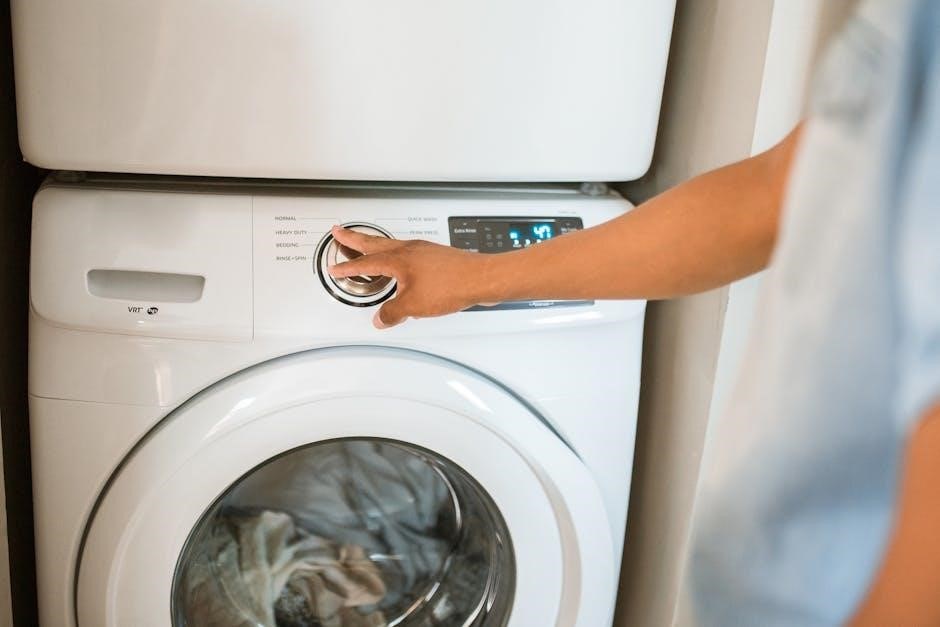
To start a wash cycle on the Bosch Classixx 6, first ensure the machine is properly plugged in and the water supply is turned on. Open the lid and load the laundry, taking care not to exceed the 5kg capacity. Close the lid firmly to ensure a proper seal. Next, select the desired wash program using the control dial, choosing from options like Cotton, Synthetic, or Delicate. Adjust the temperature and spin speed as needed. Add detergent to the designated compartment. If required, activate additional features like the child lock or delayed start. Once all settings are confirmed, press the Start button. The machine will begin the cycle, displaying the remaining time on the control panel. Always refer to the user manual for specific program details and troubleshooting tips.

3.2 Selecting the Right Program for Your Laundry

Selecting the appropriate wash program on the Bosch Classixx 6 ensures optimal cleaning and fabric care. The machine offers various preset programs, including Cotton, Synthetic, and Delicate, each tailored for specific fabric types. For heavily soiled laundry, the Intensive program is ideal, while the Eco mode saves energy and water for lighter loads. The Wool and Silk programs gently clean delicate fabrics, preserving their texture. Additional options like Direct Injection enhance stain removal, and the Reduced Ironing feature minimizes wrinkles. Always check the care labels on your garments to match the program. For mixed loads, the Mixed Fabric program balances cleaning and fabric protection. Customizing the program with temperature, spin speed, and additional rinse options ensures the best results. This versatility makes the Bosch Classixx 6 suitable for a wide range of laundry needs.

3.3 Using Additional Features and Options

The Bosch Classixx 6 washing machine offers a range of additional features and options to enhance your laundry experience. The Delay Start function allows you to schedule wash cycles up to 24 hours in advance, providing flexibility. The Child Lock ensures settings remain unchanged during operation, preventing accidental changes. For delicate fabrics, the Extra Rinse option ensures no detergent residue remains. The Spin Speed Reduction feature protects fragile fabrics, while the Temperature Selection allows customization for different fabric types. The Eco Mode saves energy and water for eco-friendly washing. Additionally, the Direct Injection technology improves stain removal by pre-mixing detergent with water before washing. These features provide convenience, efficiency, and tailored care for your laundry needs, making the Bosch Classixx 6 a versatile and user-friendly appliance.

Maintenance and Care

Regularly clean the detergent drawer and check filters to ensure optimal performance. Leave the door open after use to dry the interior and prevent mold growth.

4.1 Regular Cleaning and Maintenance Tips

Regular maintenance is essential for the longevity and efficiency of your Bosch Classixx 6 washing machine. Start by cleaning the detergent drawer every 1-2 months to remove residue. Use a soft brush or a mixture of water and vinegar to wipe it clean. Check and clean the drain pump filter regularly to prevent blockages. Leave the machine door open after each cycle to allow the interior to dry, reducing mold and mildew growth. Additionally, run a cleaning cycle every 1-2 months using a washing machine cleaner to eliminate odors and detergent buildup. Always refer to the user manual for specific instructions tailored to your model.

Troubleshooting Common Issues

Identify common issues like error codes or machine malfunction. Check power supply, water connections, and drain filters. Refer to the user manual for specific error code solutions and guidance;

5.1 Identifying and Solving Common Problems

The Bosch Classixx 6 washing machine may encounter issues like error codes or operational faults. Common problems include improper water inlet, drain blockages, or faulty sensors. If the machine displays an error code, refer to the user manual for specific solutions. For example, E18 indicates a water inlet issue, while E22 signals a drain problem. Regularly cleaning the filter and checking water supply connections can prevent these issues. If the machine vibrates excessively, ensure it is leveled correctly. For persistent problems, consult the troubleshooting section in the manual or contact Bosch customer support. Always follow safety guidelines when attempting repairs to avoid damage or injury.

5.2 Understanding Error Codes and Solutions

The Bosch Classixx 6 washing machine uses error codes to indicate specific issues. These codes, such as E18 or E22, help diagnose problems like water inlet faults or drain blockages. If an error appears, refer to the manual for its meaning. For instance, E18 suggests checking water supply hoses for kinks or blockages, while E22 indicates a clogged drain pump filter. To resolve these, ensure water flows freely and clean the filter regularly. Vibration issues, often caused by improper leveling, can be fixed by adjusting the machine’s feet. Always consult the manual for a comprehensive list of codes and step-by-step solutions. Addressing errors promptly prevents further damage and ensures optimal performance. Regular maintenance, like cleaning filters, can help minimize these issues and extend the machine’s lifespan.

Continue Reading

bt decor 2600 user manual

Welcome to the BT Decor 2600 User Manual, your guide to understanding and utilizing the features of this advanced corded telephone with an answering machine. Designed to help you navigate setup, call blocking, and message management, this manual ensures you make the most of your device.

1.1 Overview of the BT Decor 2600 Telephone

The BT Decor 2600 is a versatile corded telephone with an integrated answering machine, designed for both residential and small office use. It features trueCall call blocking technology, a large keypad, and a clear display, making it easy to manage calls, block nuisance numbers, and store contacts efficiently.

1.2 Importance of the User Manual

The user manual is essential for maximizing the BT Decor 2600’s potential. It provides clear instructions on setup, advanced features, and troubleshooting, ensuring users can efficiently utilize call blocking, answering machine functions, and customization options to enhance their communication experience.

Key Features of the BT Decor 2600

The BT Decor 2600 offers advanced call blocking, a built-in answering machine, large keypad, call logging, divert options, and trueCall technology for efficient call management and customization.

2.1 Advanced Call Blocking Technology

The BT Decor 2600 incorporates advanced call blocking using trueCall technology, enabling users to block up to 1000 numbers. This feature requires a Caller Display service from your provider, allowing you to screen and block unwanted calls effectively, thereby minimizing disturbances and enhancing your calling experience with tailored settings.

2.2 Answering Machine Functionality

The BT Decor 2600 features a built-in answering machine, allowing you to record and play back messages effortlessly. Users can create a personalized greeting and easily access messages via the menu system. The answering machine integrates seamlessly with call management features, ensuring you never miss important calls and can manage messages efficiently.

2.3 Large Keypad and Display

The BT Decor 2600 features a large, easy-to-use keypad with oversized buttons for simple navigation. The clear, high-contrast display provides excellent readability, making it easy to view caller information, messages, and menu options. The adjustable brightness ensures visibility in any lighting conditions, enhancing overall usability for users of all ages.

2.4 Call Logging and Divert Options

The BT Decor 2600 offers advanced call logging, storing up to 30 missed, answered, and dialled calls. The call divert feature allows you to redirect incoming calls to another number, ensuring you never miss important connections. These features enhance your communication management and provide flexibility in handling calls efficiently.

2.5 trueCall Call Blocking Technology

The BT Decor 2600 features trueCall call blocking technology, which can store up to 1000 blocked numbers, effectively reducing unwanted calls. This advanced system enhances your privacy and security by allowing you to customize call blocking settings. It requires a Caller Display service from your network provider for optimal functionality, providing enhanced control over incoming calls.

Setting Up the BT Decor 2600

Setting up your BT Decor 2600 is straightforward. This section guides you through unboxing, connecting the phone, and initial configuration to get your device up and running efficiently.

3.1 Unboxing and Physical Installation

Unboxing the BT Decor 2600 reveals the handset, base unit, power cable, and quick start guide. Physically install by placing the base on a flat surface and connecting the power. Ensure all components are securely plugged in and the phone is positioned for optimal use and accessibility.

3.2 Connecting the Phone and Power

Connect the BT Decor 2600 by plugging the power cable into the base unit and a nearby power outlet. Ensure the phone is properly seated in the base. Use only the supplied adapter to avoid damage. Once connected, the phone will power on, ready for initial setup and configuration.

3.3 Initial Setup and Configuration

After connecting, turn on the BT Decor 2600 by plugging in the power. Wait for the handset to initialize. Check for a dial tone by lifting the handset. Set the date and time using the menu. Familiarize yourself with the navigation buttons and confirm all features are operational before first use.

Using the Answering Machine

Record a greeting, set up message storage, and playback options. Access messages easily, manage storage, and ensure calls are handled efficiently with the built-in answering machine.

4.1 Recording a Greeting Message

To record a greeting, press the Menu button, navigate to the Answering Machine settings, and select the Record Greeting option. Speak clearly into the handset, ensuring your message is concise and informative for callers. Once done, save the recording to complete the setup process.

4.2 Playing Back Messages

To play back messages, access the answering machine menu, then press the Play button. The most recent message will play first. Use the navigation buttons to skip or delete messages during playback. Ensure the volume is adjusted for clear audio. Messages are stored in chronological order for easy review.

4.3 Managing Message Storage

The BT Decor 2600 stores messages in its built-in answering machine. Messages are saved chronologically and can be deleted individually or in batches. Regularly deleting old messages helps maintain storage space for new recordings. The system stops recording when storage is full, ensuring optimal performance.

Use the menu to manage messages efficiently, keeping your storage organized and accessible. Refer to the manual for detailed instructions on message deletion and storage optimization.

Call Blocking and Filtering

The BT Decor 2600 offers advanced call blocking and filtering features, allowing you to screen and block unwanted calls. Use trueCall technology to manage nuisance calls effectively.

5.1 Enabling Call Blocking Features

To enable call blocking on the BT Decor 2600, press the menu button, scroll to “Call Blocking,” and select the desired mode. Choose from blocking all calls or allowing only contacts. Ensure Caller Display is active with your provider for full functionality. Save settings to activate the chosen mode.

5.2 Adding Numbers to the Block List

To add numbers to the block list, go to the call blocking menu, select “Add Number,” and enter the phone number manually or choose from recent calls. Press “Save” to add the number to your block list. This feature helps you filter unwanted calls effectively and customize your call blocking preferences.

5.3 Managing Blocked Calls and Logs

Access the call blocking menu to view and manage blocked numbers and logs. Use navigation buttons to scroll through blocked calls and select options to delete individual or all entries. This feature allows you to organize and update your block list efficiently, ensuring unwanted calls are filtered effectively.

Navigating the Menu System

Access the menu by pressing the left option button. Use navigation keys to scroll through options and select desired features. Save changes and exit easily.

6.1 Accessing the Main Menu

Press the left option button to open the main menu. Use the navigation keys to scroll through options like call blocking, answering machine, and settings. Select desired features by pressing the left button. This intuitive system allows easy access to customize your phone’s functionality efficiently.

6.2 Navigating Through Sub-Menus

Use the up and down arrow keys to scroll through sub-menu options. Press the left button to select an option or the right button to go back. Navigate easily through features like call blocking, answering machine settings, and display preferences. This menu system is designed for simplicity and ease of use.

6.3 Saving and Exiting Menu Options

After adjusting settings, press the left button to save changes. To exit without saving, press the right button. Use the back button to return to the main menu. Ensure all changes are saved before exiting to maintain your preferences. The menu system is intuitive, allowing easy navigation and adjustments.

Customizing Your BT Decor 2600

Personalize your phone by adjusting ringtones, volume, and display settings. Customize speed dials for quick access to frequently called numbers, enhancing your user experience with tailored preferences.

7.1 Changing Ringtones and Volume

Easily customize your BT Decor 2600 by selecting from three different ringtones and adjusting the volume to suit your preferences. Access the menu, navigate to settings, and choose your desired options for a personalized experience. This feature ensures your phone suits your environment and lifestyle perfectly, enhancing usability and comfort.

7.2 Personalizing Display Settings

Personalize your BT Decor 2600’s display by adjusting brightness and contrast for optimal visibility. Access the menu, select display settings, and choose your preferences. This ensures the screen is comfortable to view in any lighting, enhancing readability and your overall user experience effectively every time you use it.

7.3 Setting Up Speed Dials

Efficiently set up speed dials on your BT Decor 2600 by accessing the menu, selecting the speed dial option, and assigning numbers to specific keys. This feature allows quick access to frequently called contacts, saving time and streamlining communication for a seamless user experience with just a few simple steps.

Troubleshooting Common Issues

Resolve common issues like no dial tone, message playback problems, or call blocking malfunctions by checking connections, restarting the device, and ensuring proper setup as outlined in this guide.

8.1 No Dial Tone or Call Connection

If your BT Decor 2600 has no dial tone or can’t connect calls, check the phone line connection, ensure the handset is properly plugged in, and verify that the volume is not muted. Restarting the device or consulting the user manual for detailed troubleshooting steps may resolve the issue quickly.

8.2 Message Playback Problems

If messages won’t play, ensure the volume is turned up and not muted. Check for corrupted messages and delete them. If issues persist, reset the answering machine or refer to the user manual for detailed troubleshooting steps to resolve playback errors effectively.

8.3 Call Blocking Not Functioning

Check if call blocking is enabled and ensure Caller Display is active. Verify that numbers are correctly added to the block list. If issues persist, restart the device and consult the user manual for further troubleshooting steps to resolve the problem effectively and ensure proper functionality.

Maintenance and Care

Regularly clean the handset and base with a soft cloth to maintain performance. Check for firmware updates and install them to ensure optimal functionality. Replace batteries when necessary to prolong device life and reliability.

9.1 Cleaning the Handset and Base

Regular cleaning ensures optimal performance. Use a soft, dry cloth to wipe the handset and base, avoiding harsh chemicals. For stubborn marks, dampen the cloth slightly but avoid moisture entering openings. Clean the keypad and display gently to maintain functionality and appearance. Regular maintenance prevents dust buildup and ensures longevity.

9.2 Updating Firmware (If Available)

To update the BT Decor 2600 firmware, ensure the phone is connected to power; Access the main menu, navigate to Settings or Updates, and follow on-screen instructions. Use only the original adapter to avoid interruptions. Do not disconnect during the update process. Firmware updates enhance performance and add new features.

9;4 Replacing Batteries

To replace the batteries in your BT Decor 2600, ensure the phone is switched off. Open the battery compartment on the handset and base. Insert the recommended batteries, observing the correct polarity. Close the compartment securely. Avoid using damaged or incorrect battery types to prevent malfunction or damage to the device.

Advanced Features and Tips

Explore advanced features like trueCall technology, call divert, and contact syncing. Discover tips for optimizing settings, managing call logs, and enhancing your overall user experience with the BT Decor 2600.

10.1 Using Call Divert

Call divert allows you to forward incoming calls to another number. Access the menu, select Call Divert, choose the type (e.g., all calls or busy), enter the target number, and save. This feature ensures you never miss important calls, even when unavailable.

10.2 Utilizing the Call Log

The BT Decor 2600 stores up to 30 missed, received, and dialed calls in its call log. Access it via the menu to view call details, including date, time, and number. This feature helps track communications and allows easy call-back functionality, enhancing your phone usage experience with convenience and organization.

10.3 Syncing Contacts

The BT Decor 2600 allows you to store up to 200 name and number memories, enabling easy access to frequently dialed contacts. While it doesn’t sync with external devices, you can manually add contacts to the phone book for quick dialing. This feature streamlines communication and enhances user convenience with organized contact management.

The BT Decor 2600 offers advanced call blocking, an answering machine, and a large keypad, ensuring a seamless and reliable communication experience for home and office use.

11.1 Summary of Key Features

The BT Decor 2600 combines advanced call blocking with trueCall technology, a built-in answering machine, large keypad, and display for easy navigation. It offers call logging, divert options, and three ringtones, ensuring a user-friendly experience for both home and small office environments.

11.2 Final Tips for Optimal Usage

Regularly update your block list to prevent unwanted calls. Use the answering machine to manage messages efficiently. Keep contacts organized for quick access. Explore advanced features like call divert and trueCall for enhanced functionality. Ensure the phone is cleaned and maintained for long-term performance and reliability.

Continue Reading

bosch washing machine series 6 manual pdf

The Bosch Series 6 washing machines offer advanced features, energy efficiency, and durability․ Models like WGA24400ME and WVH28471EP provide superior cleaning with minimal water usage․ The free PDF manual guides users through installation, operation, and troubleshooting, ensuring optimal performance․ With a 4․32 MB download, it’s easily accessible for all users․

1․1 Overview of Bosch Series 6 Models

The Bosch Series 6 washing machines are designed for high performance and efficiency․ Models like WGA24400ME, WVH28471EP, and WAT283L8SN offer advanced features such as EcoSilence Drive and VarioPerfect technology․ These machines cater to various needs, from energy-saving to rapid washing cycles․ The Series 6 models are known for their durability and quiet operation, making them ideal for modern households․ The PDF manual provides detailed specifications, ensuring users can explore all functionalities․ With a focus on user convenience, Bosch Series 6 models are equipped with intuitive controls and customizable settings, enhancing the laundry experience․ The range includes both front-loading and integrated designs, offering flexibility for different spaces and preferences․

1․2 Importance of the Bosch Series 6 Manual PDF

The Bosch Series 6 Manual PDF is essential for optimal use of the washing machine․ It provides detailed instructions for installation, operation, and troubleshooting, ensuring users maximize the appliance’s features․ The manual includes 40 pages of guidance, covering advanced settings like EcoSilence Drive and VarioPerfect technology․ Users can download it for free as a PDF file, making it easily accessible․ The document also outlines safety precautions and explains error codes, helping users resolve issues quickly․ By referring to the manual, users can maintain their machine effectively, ensuring longevity and performance․ It serves as a comprehensive resource for both novice and experienced users, fostering a seamless laundry experience․

Installation and Setup

The Bosch Series 6 manual provides a 4․32 MB PDF guide with detailed installation steps․ It includes a diagram for proper placement and leveling instructions to ensure stability and efficiency during operation․

2․1 Preparing the Site for Installation

Preparing the site for your Bosch Series 6 washing machine is crucial for smooth operation․ Ensure the area is level, dry, and well-ventilated․ The manual recommends a minimum distance of 10 cm from walls to prevent overheating and ensure proper airflow․ Check the floor strength to handle the machine’s weight, especially when loaded․ Disconnect old appliances and ensure water supply lines are accessible․ The PDF guide includes a dimensional diagram to help plan the space accurately․ Proper preparation ensures safe installation and optimal performance of your washing machine․

2․2 Leveling and Balancing the Washing Machine

Leveling and balancing your Bosch Series 6 washing machine is essential for stable operation and reduced vibration; Use a spirit level to ensure the machine is perfectly horizontal․ Adjust the adjustable feet by turning them clockwise or counterclockwise until the machine is level․ Ensure the washing machine is placed on a firm, even surface to prevent movement during cycles․ If the floor is uneven, place anti-vibration pads or adjust the feet further․ Proper leveling prevents noise, damage, and ensures efficient performance․ Refer to the PDF manual for detailed diagrams and instructions to achieve optimal balance and stability for your Bosch Series 6 washing machine․

Operating the Bosch Series 6 Washing Machine

Operating the Bosch Series 6 involves starting a cycle, selecting options via the control panel, and ensuring energy efficiency with models like WGA24400ME․

3․1 Understanding Wash Cycles and Options

Bosch Series 6 washing machines offer a variety of wash cycles tailored to different fabric types and soil levels․ The Cotton cycle is ideal for heavily soiled items, while the Synthetics cycle gently cleans delicate fabrics․ The Delicates cycle ensures fragile garments are protected․ Additional options include Spin Speed, allowing users to customize rinse and spin settings, and Eco Modes for energy efficiency․ The Child Lock feature prevents accidental changes during operation․ Advanced sensors automatically detect load size and optimize water and energy usage․ With these features, users can achieve perfect cleaning results while maintaining fabric integrity․ The Bosch Series 6 manual provides detailed guidance on selecting the right cycle for every load․

3․2 Using the Control Panel and Settings

The Bosch Series 6 washing machine features a user-friendly control panel with intuitive buttons and a clear LCD display․ Users can easily navigate through various settings, including wash cycles, temperature, and spin speed․ The touch-sensitive controls allow for seamless selection of options like Delay Start and Child Lock․ The LED indicators provide clear feedback on the selected settings and current cycle status․ Advanced models, such as the WVH28471EP, include a memory function to save preferred settings․ The control panel is designed for simplicity, ensuring even first-time users can operate the machine effortlessly․ The Bosch Series 6 manual provides detailed explanations of all controls and settings, making it easy to customize wash programs for optimal results․

Safety Precautions and Error Codes

The Bosch Series 6 manual outlines essential safety guidelines to prevent accidents․ It lists common error codes like E01 and E03, offering troubleshooting solutions․

4․1 Essential Safety Guidelines

Safety is crucial when operating the Bosch Series 6 washing machine․ Always ensure the appliance is installed on a stable, level surface to prevent vibration and tipping․ Keep children away from the machine, as the child lock function should be activated when not in use․ Avoid overloading the drum, as this can cause imbalance and potential damage․ Before starting a cycle, check pockets for loose items like coins or keys, which can damage clothing or the machine․ Never attempt to open the door during operation, as this can lead to injury․ Regularly clean the detergent drawer and gasket to prevent mold buildup․ Refer to the manual for specific safety precautions tailored to your model, such as the WGA24400ME or WVH28471EP․

4․2 Common Error Codes and Solutions

The Bosch Series 6 washing machine may display error codes like E01, E02, or E03, indicating issues such as drainage problems or sensor malfunctions․ For E01, check and clean the drain pump filter․ If E02 appears, ensure the detergent drawer is clean and free of blockages․ E03 often relates to imbalanced loads; restart the cycle with a balanced load․ If E04 occurs, verify that the water supply hoses are not kinked or blocked․ Always refer to the PDF manual for specific solutions, as some codes may vary by model, such as the WGA24400ME or WVH28471EP․ Regular maintenance can help prevent these issues and ensure smooth operation․

Maintenance and Troubleshooting

Regularly clean the drain pump filter and check for blockages to prevent errors․ Ensure the machine is balanced to avoid vibrations․ Refer to the PDF manual for detailed troubleshooting guides, such as resolving E01 or E02 error codes related to drainage or sensor issues․ Always check detergent dosage and ensure hoses are clear for optimal performance․

5․1 Cleaning and Maintaining the Washing Machine

Regular maintenance ensures optimal performance and longevity of your Bosch Series 6 washing machine․ Clean the drain pump filter regularly to prevent blockages and unpleasant odors․ Check and clean the washable lint filter after each use to improve drainage․ Run a cleaning cycle or a hot water wash without detergent monthly to remove built-up residue․ Inspect and clean the soap dispenser to ensure proper detergent distribution․ Leave the door open after use to dry the interior and prevent mold growth․ Refer to the Bosch Series 6 manual PDF for detailed instructions on these procedures․ Regular maintenance helps maintain energy efficiency and prevents common issues․

5․2 Troubleshooting Common Issues

The Bosch Series 6 manual PDF provides detailed solutions for common issues․ If the machine displays an error code, refer to the manual for explanations and fixes․ For example, E01 indicates a drain issue, while E03 suggests a door lock problem․ Poor washing results may be due to incorrect detergent dosage or improper loading․ Noise during operation could signal an unbalanced load or blockages in the drain pump filter․ Regularly cleaning the filter and ensuring the machine is level can prevent many issues․ The manual also offers guidance on resolving leaks and odor buildup․ Always consult the manual before attempting repairs to ensure safety and maintain warranty validity․

Continue Reading

toyota sewing machine instruction manual

The Toyota Sewing Machine Instruction Manual is your essential guide to understanding and optimizing your machine’s performance. It covers setup, operation, maintenance, and troubleshooting, ensuring you master every feature. From threading to advanced stitching, this manual provides clear, step-by-step instructions for beginners and experienced users alike. Refer to it for tips on enhancing your sewing experience and resolving common issues efficiently.

1.1 Purpose of the Manual

This manual serves as a comprehensive guide to help users understand the features, operation, and maintenance of their Toyota sewing machine. It provides step-by-step instructions for setup, troubleshooting, and optimizing performance. Designed for both beginners and experienced sewists, the manual ensures safe and effective use of the machine, addressing common issues and enhancing overall sewing efficiency and creativity.

1.2 Overview of the Toyota Sewing Machine

The Toyota sewing machine is a versatile, straight-stitch model designed for both home and light industrial use. It features a reverse stitch function and adjustable stitch length, making it ideal for various fabrics. Known for its durability and reliability, the machine is easy to maintain, with clear instructions provided in the manual for optimal performance and longevity.

1.3 Safety Precautions

Always turn off the main power switch before threading, changing the needle, or cleaning. Ensure all screws, such as the presser foot holder and needle plate, are tightly secured. Regularly clean the machine to prevent dust buildup. Refer to the manual for diagrams and maintenance guidance to ensure safe and efficient operation, avoiding potential mechanical issues or accidents.

Identifying Parts and Accessories

This section guides you through recognizing essential components like the presser foot holder, needle clamp, and hand wheel. It also details the accessory kit, including bobbins and presser feet, to help you understand your machine’s tools and features for optimal use.

2.1 Names of Key Components

The Toyota sewing machine features essential parts such as the presser foot holder, needle clamp, bobbin case, and hand wheel. These components are vital for smooth operation. Familiarizing yourself with their locations and functions ensures efficient use of your machine. Proper identification helps in troubleshooting and maintaining your device effectively, as outlined in the manual.

2.2 Understanding the Accessory Kit

The accessory kit enhances your sewing experience with tools like extra needles, bobbins, and presser feet. It includes a seam ripper for correcting mistakes and a screwdriver for adjustments. These accessories ensure versatility and convenience, allowing you to tackle various projects with ease. Refer to the manual for guidance on using each item effectively.

Setting Up Your Toyota Sewing Machine

Setting up your Toyota sewing machine involves threading, installing the bobbin, and choosing the right needle. These steps ensure smooth operation and proper stitch formation. Follow the manual’s guidance for accurate setup to achieve professional results in your sewing projects.

3.1 Threading the Machine

Threading the Toyota sewing machine requires careful attention to ensure proper stitch formation. Turn off the machine, then thread the upper part as shown in the manual. Gently pull the thread through the tension discs and take-up lever. Insert the bobbin into the bobbin case and pull excess thread. Always refer to the manual for specific threading guides and diagrams to avoid mistakes. Proper threading ensures smooth operation and prevents issues like thread breaking or uneven stitches. For models like the Toyota ESG325 or RS2000, threading techniques may vary slightly, so consult your model’s manual for precise instructions. This step is crucial for achieving consistent stitch quality and optimal machine performance.

3.2 Installing the Bobbin

Installing the bobbin correctly is vital for proper stitch formation; Lift the needle to its highest position and remove the bobbin case. Place the bobbin inside, ensuring the thread unwinds counterclockwise. Gently pull the thread to seat the bobbin securely. Replace the bobbin case and pull the thread to ensure it’s properly engaged. This ensures even tension and smooth stitching. Always refer to your specific model’s manual for any unique steps, as variations may exist between models like the Toyota ESG325 or RS2000. Proper bobbin installation prevents issues like thread tangling or uneven stitches, ensuring your sewing projects turn out perfectly.

3.3 Choosing the Right Needle

Selecting the right needle is crucial for optimal sewing performance. Choose a needle type based on fabric: sharp for woven fabrics, blunt for knits, and universal for general use. Needle size varies; larger needles suit thicker fabrics, while smaller ones are ideal for delicate materials. Regularly inspect and replace the needle to prevent breakage and ensure smooth stitching. Always refer to your Toyota sewing machine manual for specific needle recommendations tailored to your model, such as the Toyota ESG325 or RS2000, to achieve the best results for your sewing projects.

Basic Operations

Mastering basic operations ensures smooth sewing. Start with a straight stitch, use reverse for securing, and adjust stitch length and tension as needed for consistent results.

4.1 Starting with a Straight Stitch

Begin by selecting the straight stitch option on your Toyota sewing machine. Thread the machine correctly and ensure the bobbin is properly installed. Place your fabric under the presser foot, aligning the edge with the machine’s guide. Gently guide the fabric while sewing, maintaining a steady pace. This stitch is ideal for straight seams and provides a solid foundation for more complex techniques.

4.2 Using Reverse Stitch Function

To use the reverse stitch function, locate the reverse lever or button on your Toyota sewing machine. Engage it to sew in reverse, ensuring secure seam starts and ends. Guide the fabric smoothly while reversing, then release the lever to resume forward stitching. This feature is especially useful for reinforcing seams and preventing fraying on straight-stitch projects.

4.3 Adjusting Stitch Length and Tension

Adjust stitch length using the dial or knob, typically ranging from 7-30 stitches per inch. Tension can be fine-tuned using the knob or screw to ensure even stitching. Incorrect tension may cause loose stitches or fabric dragging. Always test adjustments on scrap fabric before sewing your final project to achieve the desired results.

Maintenance and Care

Regular oiling keeps the machine running smoothly. Clean the machine and accessories frequently to prevent dust buildup. Check and tighten all screws regularly. Always refer to the manual for specific care routines.

5.1 Cleaning the Machine

Turn off the machine and unplug it. Use a soft brush or cloth to remove dust and lint from visible areas. Turn the hand wheel to access internal parts and clean thoroughly. Use a cotton swab for tight spaces. Avoid harsh chemicals; they may damage components. Regular cleaning ensures smooth operation and prevents mechanical issues. Refer to the manual for detailed diagrams.

5.2 Oiling the Machine

Regular oiling is crucial for smooth operation. Use high-quality sewing machine oil. Apply a few drops to the bobbin area, hand wheel, and any moving parts. Turn the hand wheel gently to distribute the oil evenly. Avoid over-oiling, as it can attract dust. Oiling ensures longevity and prevents mechanical friction. Refer to the manual for specific oiling points and frequency.

5.3 Troubleshooting Common Issues

Identify common issues like tangled thread or uneven stitching by checking the spool and tension settings. For mechanical problems, clean and lubricate moving parts, ensuring proper alignment. Regular maintenance can prevent many issues, so keep your machine clean and well-oiled. Always refer to the manual’s diagrams for guidance on resolving these issues effectively and safely.

Advanced Features and Techniques

Explore advanced sewing techniques, such as creating professional buttonholes and using special stitches for decorative or heavy-duty projects. Mastering these features enhances your sewing capabilities and versatility.

6.1 Sewing Buttonholes

Creating professional buttonholes is straightforward with your Toyota sewing machine. Use the buttonhole attachment and follow the four-step manual process. Set the stitch type, position the fabric, and sew precisely. For perfect results, stabilize the fabric and ensure proper thread tension. This technique allows you to customize your buttons effortlessly for a polished finish easily.

6.2 Using Special Stitches

Your Toyota sewing machine offers a variety of special stitches for decorative and functional sewing. From zigzag to blind hem, these stitches add versatility to your projects. Adjust stitch length and tension as needed for optimal results. Experiment with different patterns to enhance your creations. Refer to the manual for specific settings and techniques to master these stitches effortlessly.

Accessories and Attachments

Explore the variety of accessories and attachments for your Toyota sewing machine, including presser feet, zipper feet, and blind hem feet. Additional attachments enhance stitching capabilities and simplify tasks like buttonholes. Use the manual to identify and utilize these tools effectively, ensuring optimal performance and versatility in your sewing projects.

7.1 Presser Feet and Their Uses

Presser feet are essential accessories for your Toyota sewing machine, designed to handle specific tasks. The standard presser foot is ideal for straight stitching, while the zipper foot simplifies sewing zippers. Blind hem feet are perfect for invisible hems, and walking feet help manage thick fabrics. Additional feet like the buttonhole foot enhance functionality. Always consult the manual to identify and use the right foot for your project.

7.2 Additional Accessories for Enhanced Sewing

Explore additional accessories to enhance your sewing experience. An extension table provides extra workspace for larger projects, while a carrying case ensures safe transport. Specialized feet, like a quilting guide or embroidery hoop, expand creativity. Extra bobbins and needles are handy for varied fabrics. These accessories optimize performance and versatility, helping you achieve professional results with ease.

Troubleshooting Common Problems

This section addresses frequent issues like thread breaking or machine malfunction. It offers solutions and preventive tips, helping you resolve problems quickly and maintain optimal performance.

8.1 Machine Not Stitching

If your Toyota sewing machine isn’t stitching, check the thread tension, ensure the bobbin is properly seated, and verify the needle is correctly installed. Also, inspect for loose screws and clean any debris. Consult the manual for detailed steps to resolve the issue and restore normal operation.

8.2 Thread Breaking or Tangling

Thread breaking or tangling can occur due to improper tension, incorrect threading, or using the wrong needle size. Check the thread path for knots or twists and ensure the bobbin is correctly seated. Use high-quality thread suitable for your fabric and consult the manual for adjusting tension settings to prevent such issues;

8.3 Mechanical Issues and Solutions

Common mechanical issues include parts misalignment or the bobbin mechanism falling out. Ensure all screws are tightened and components are properly aligned. Regularly oil moving parts to maintain smooth operation. If the machine stops working, check for blockages or jammed gears. Refer to the manual for diagrams and step-by-step solutions to resolve mechanical problems effectively.

Resources for Further Learning

Explore online communities, forums, and repair services for detailed guidance. Manuals like the Toyota ESG325 and RS2000 are available for free, offering diagrams and troubleshooting tips.

9.1 Online Communities and Forums

Online communities and forums offer valuable insights and support for Toyota sewing machine users. Websites like Toyota ESG325 and RS2000 manual hubs provide free access to guides and troubleshooting tips. Engage with sewing enthusiasts to share experiences, learn advanced techniques, and resolve common issues. These platforms are ideal for staying updated on sewing trends and enhancing your skills through collective knowledge.

9.2 Repair Services and Support

For professional assistance, authorized Toyota repair centers offer expert maintenance and repair services. Visit the official Toyota website to locate nearest service providers. Additionally, online forums and sewing communities provide troubleshooting advice and user-generated solutions, ensuring comprehensive support for your sewing machine needs. These resources help maintain your machine’s performance and extend its lifespan effectively.

This manual provides a comprehensive guide to mastering your Toyota sewing machine. From basic setup to advanced techniques, it equips you with the knowledge to enhance your sewing skills and maintain your machine effectively. Refer to online resources and communities for continued learning and troubleshooting support.

10.1 Summary of Key Points

This manual guides you through setting up, operating, and maintaining your Toyota sewing machine. Key topics include threading, stitch adjustment, and troubleshooting common issues. Regular maintenance, like cleaning and oiling, ensures optimal performance. Explore advanced features and accessories to enhance your sewing experience. Refer to online communities and resources for further learning and support.

10.2 Encouragement for Continued Learning

Mastering your Toyota sewing machine opens doors to endless creative possibilities. Continue exploring advanced techniques and projects to refine your skills. Join online sewing communities and forums for inspiration and advice. Engage with tutorials and resources to stay updated on new methods and tools. Embrace challenges and enjoy the journey of becoming a skilled sewer!

Continue Reading

greater trochanteric pain syndrome exercises pdf

Greater Trochanteric Pain Syndrome (GTPS) refers to pain on the outer aspect of the hip‚ often linked to inflammation or irritation of the gluteal area․ It affects both active individuals and those with sedentary lifestyles‚ causing discomfort during activities like walking or sitting․ Exercises play a crucial role in managing symptoms and restoring mobility‚ making physical therapy a cornerstone of treatment․ Early intervention and proper exercise strategies can significantly improve quality of life for those affected․

Definition and Overview

Greater Trochanteric Pain Syndrome (GTPS) is a condition characterized by pain on the outer aspect of the hip‚ near the greater trochanter․ It often involves inflammation or irritation of the gluteal muscles‚ tendons‚ or bursae․ Previously referred to as trochanteric bursitis‚ GTPS encompasses a broader range of pathologies․ It commonly affects both active individuals and those with sedentary lifestyles‚ leading to discomfort during activities like walking‚ sitting‚ or lying on the affected side․ Exercises and physical therapy are central to managing symptoms and improving function․

Importance of Exercise in Managing GTPS

Exercise is a cornerstone in managing Greater Trochanteric Pain Syndrome‚ focusing on reducing pain‚ improving hip function‚ and enhancing quality of life․ Strengthening the gluteal muscles‚ hip abductors‚ and core stabilizers helps alleviate symptoms by addressing muscle imbalances․ Stretching exercises improve flexibility and reduce tightness in the hip flexors and iliotibial band․ Consistent physical therapy‚ including isometric and eccentric exercises‚ can prevent progression of the condition and restore mobility‚ making it essential for long-term recovery and prevention of recurrence․

Causes and Symptoms of GTPS

Greater Trochanteric Pain Syndrome often arises from inflammation or irritation of the gluteal area‚ muscle imbalances‚ or conditions like bursitis․ Symptoms include pain on the outer hip‚ discomfort during activities‚ and tenderness near the trochanter․

Common Causes of GTPS

Greater Trochanteric Pain Syndrome often stems from inflammation of the gluteal tendons or bursae‚ muscle imbalances‚ or repetitive hip movements․ Weak gluteal muscles‚ tight hip flexors‚ and poor posture can contribute․ Activities like running‚ cycling‚ or prolonged sitting may exacerbate symptoms․ Additionally‚ direct trauma or overuse injuries can trigger the condition‚ leading to pain and discomfort on the outer hip․ Addressing these underlying factors is key to effective management and recovery․

Key Symptoms to Identify

Greater Trochanteric Pain Syndrome typically presents with pain on the outer hip‚ tenderness over the greater trochanter‚ and discomfort during activities like sitting‚ walking‚ or climbing stairs․ Patients may experience pain when lying on the affected side or difficulty sleeping due to persistent discomfort․ Radiating pain down the thigh or buttock is common‚ though it rarely extends below the knee․ Swelling and limited hip mobility may also occur‚ making early recognition and intervention crucial for effective management․

Diagnosis of GTPS

Diagnosis involves clinical assessment‚ patient history‚ and imaging to rule out other hip conditions․ Physical exams and MRI or ultrasound confirm the presence of trochanteric inflammation or bursitis․

Differential Diagnosis from Other Hip Conditions

Differentiating GTPS from hip osteoarthritis‚ bursitis‚ or tendinopathies is challenging due to overlapping symptoms․ Accurate diagnosis requires clinical assessment and imaging to rule out other conditions like bursitis or osteoarthritis․ Symptoms of lateral hip pain‚ tenderness‚ and limited movement overlap‚ making precise diagnosis critical․ Imaging techniques such as MRI or ultrasound help confirm inflammation or bursitis‚ ensuring appropriate treatment plans are developed for GTPS specifically․

Role of Imaging and Physical Examination

Imaging techniques like MRI or ultrasound are essential for identifying inflammation or structural issues in GTPS․ Physical exams‚ including palpation and movement assessments‚ help locate pain sources and detect limited mobility․ Clinicians use these tools to confirm diagnoses‚ ruling out other hip conditions․ Imaging provides visual confirmation of bursitis or tendinopathy‚ while physical exams assess pain triggers and movement patterns‚ ensuring accurate diagnosis and tailored treatment plans․

Stretching Exercises for GTPS

Stretching exercises for GTPS target tight hip flexors and iliotibial bands‚ improving flexibility and reducing pain․ Regular stretches enhance mobility and alleviate stiffness‚ essential for managing symptoms effectively․

Half-Kneel Hip Flexor Stretch

Start by kneeling on one knee with the other foot in front‚ ensuring the front knee is at a 90-degree angle․ Slowly lean forward‚ stretching the front hip area until mild tension is felt․ Hold for 15-30 seconds and repeat 2-3 times on each side․ This stretch targets the hip flexors‚ relieving tightness and improving flexibility․ Perform daily to reduce GTPS-related discomfort and enhance hip mobility․ Consistency is key for long-term benefits․

Iliotibial Band and Piriformis Stretches

Stretching the iliotibial (IT) band and piriformis muscles can alleviate lateral hip tension․ For the IT band‚ cross the affected leg over the other while standing‚ then lean toward the unaffected side until a stretch is felt․ Hold for 15-30 seconds․ For the piriformis‚ sit with the ankle of the affected leg resting on the opposite knee․ Gently press down on the knee while maintaining a straight back․ Perform both stretches 2-3 times daily to reduce tightness and improve hip mobility‚ addressing GTPS symptoms effectively․

Strengthening Exercises for GTPS

Strengthening the glutes and core muscles is essential for managing GTPS․ Isometric and eccentric exercises help improve hip stability and reduce pain‚ promoting better functional movement patterns․

Gluteal and Core Strengthening

Strengthening the gluteal muscles and core is vital for managing GTPS․ Exercises like clamshells‚ side-lying abductions‚ and bridging target the gluteus medius and maximus․ Core exercises‚ such as planks and bird-dog poses‚ enhance pelvic stability․ These exercises improve hip joint alignment‚ reduce pain‚ and prevent recurrence․ Research shows that gluteal loading exercises‚ particularly in postmenopausal women‚ significantly improve pain and function․ Consistency and proper form are essential for effectiveness and to avoid further injury․

Isometric and Eccentric Exercises

Isometric exercises‚ such as wall-pressed hip abductions and side-lying leg lifts‚ are effective for strengthening without movement․ Eccentric exercises‚ focusing on muscle lengthening‚ enhance strength and function․ These exercises target the gluteus medius and minimus‚ improving hip stability and reducing pain․ Isometric holds (10-15 seconds) and eccentric movements (e․g․‚ step-downs) are particularly beneficial․ They promote muscle endurance and joint alignment‚ making them ideal for managing GTPS symptoms and improving overall hip function․ Regular practice can lead to significant pain reduction and improved mobility․

Physical Therapy and Additional Treatments

Physical therapy combines exercises with modalities like heat/ice therapy to reduce pain and inflammation․ Additional treatments include steroid injections for severe pain and extracorporeal shockwave therapy (ESWT) for refractory cases‚ promoting tissue repair and pain relief․

Role of Heat/Ice Therapy and Steroid Injections

Heat and ice therapy are commonly used to manage pain and inflammation in GTPS․ Ice reduces swelling and numbs the area‚ while heat relaxes muscles and improves blood flow․ Steroid injections are considered for severe cases‚ delivering anti-inflammatory medication directly to the affected site․ These treatments complement exercises‚ helping patients tolerate physical therapy and daily activities․ However‚ steroid use is limited to avoid tissue weakening and is typically reserved for refractory pain not relieved by other methods․

Extracorporeal Shockwave Therapy (ESWT)

Extracorporeal Shockwave Therapy (ESWT) is a non-invasive treatment using low-energy shockwaves to stimulate healing in damaged tissues․ It is often recommended for chronic cases of GTPS where other treatments have failed․ ESWT promotes blood flow and tissue repair‚ reducing inflammation and pain․ Research suggests it may be effective‚ but further studies are needed to confirm its long-term benefits․ Patient selection and imaging are crucial for optimal outcomes‚ as highlighted by NICE guidelines․ ESWT offers a promising alternative for refractory GTPS cases․

When to Seek Professional Help

Consult a healthcare professional if pain persists despite self-care‚ significantly limits daily activities‚ or worsens over time․ Seek help for severe or unexplained symptoms․

Indications for Physiotherapy or Medical Intervention

Physiotherapy is recommended for persistent hip pain lasting over 6 weeks‚ limited mobility‚ or inability to perform daily activities․ Medical intervention is advised if symptoms worsen despite home exercises‚ or if pain radiates to the knee or lower back․ Imaging or injections may be necessary to confirm diagnosis or reduce inflammation․ Early professional guidance ensures proper treatment and prevents long-term dysfunction‚ especially in cases where pain impacts quality of life or mobility․

Consistent exercise and proper form are essential for managing GTPS‚ improving hip function‚ and reducing pain‚ ensuring long-term recovery and enhanced quality of life effectively․

Effective strategies for GTPS include a combination of stretching and strengthening exercises․ The half-kneel hip flexor stretch and iliotibial band stretches improve flexibility‚ while gluteal and core strengthening exercises enhance stability․ Isometric and eccentric exercises are beneficial for pain management and muscle control․ Consistency and proper form are crucial to avoid aggravation and ensure progress․ Supplementary treatments like heat/ice therapy and extracorporeal shockwave therapy can further support recovery․ Professional guidance ensures a personalized and effective approach to managing symptoms and restoring function․

Importance of Consistency and Proper Form

Consistency and proper form are essential for effective management of GTPS․ Regular exercise prevents muscle imbalances and strengthens the gluteal and core muscles‚ reducing pain and improving function․ Proper form ensures exercises target the correct muscles without causing further injury․ Inconsistent or improperly performed exercises may lead to prolonged symptoms or incomplete recovery․ Adherence to a structured routine‚ guided by a healthcare professional‚ maximizes benefits and promotes long-term relief from GTPS-related discomfort․

Continue Reading

fridge temperature record sheet pdf free download

A fridge temperature record sheet is a essential tool for monitoring and documenting refrigerator temperatures‚ ensuring food safety and compliance with food safety standards․

1․1 What is a Fridge Temperature Record Sheet?

A fridge temperature record sheet is a document used to track and document refrigerator temperatures regularly․ It typically includes columns for date‚ time‚ and temperature readings‚ ensuring consistency in monitoring․ This tool helps maintain food safety by providing a clear record of temperature fluctuations․ Ideal for both residential and commercial use‚ it supports compliance with food safety standards and HACCP requirements‚ ensuring optimal storage conditions for perishable items․

1․2 Importance of Monitoring Fridge Temperatures

Monitoring fridge temperatures is crucial for preventing food spoilage and ensuring food safety․ Bacteria thrive between 40°F and 140°F‚ making consistent refrigeration vital․ Regular checks help maintain optimal storage conditions‚ preventing contamination and extending food freshness․ Compliance with food safety standards like HACCP is essential for businesses‚ while homeowners can avoid foodborne illnesses and energy inefficiency by keeping temperatures stable․ Prompt corrective actions when deviations occur safeguard food quality and safety․

Key Elements of a Fridge Temperature Record Sheet

A fridge temperature record sheet typically includes date‚ time‚ temperature readings‚ and ideal temperature ranges to ensure accurate monitoring and food safety compliance․

2․1 Date and Time of Recording

Recording the date and time is crucial for maintaining accurate temperature logs․ This ensures consistency in monitoring and helps track any deviations over time‚ supporting food safety and compliance requirements․

2․2 Temperature Readings

Temperature readings are the core of any fridge temperature record sheet‚ providing precise data on the fridge’s temperature at specific times․ These readings help ensure food safety by verifying that temperatures remain within safe ranges‚ typically between 1°C and 5°C for fridges and -18°C to -22°C for freezers‚ preventing bacterial growth and food spoilage․ Accurate recordings are essential for compliance with HACCP standards and maintaining quality control․

2․3 Ideal Temperature Ranges

Ideal temperature ranges for fridges are typically between 1°C and 5°C‚ while freezers should operate between -18°C and -22°C․ These ranges ensure food safety and prevent bacterial growth․ Monitoring within these parameters is crucial for maintaining food quality and compliance with food safety regulations․ Regular checks help identify deviations and prompt corrective actions‚ ensuring a safe storage environment for perishable items․ Adhering to these ranges is essential for both residential and commercial settings․

How to Use a Fridge Temperature Record Sheet

Regularly record fridge temperatures‚ note date/time‚ and compare with ideal ranges․ Take corrective actions if temperatures deviate‚ ensuring food safety and compliance with HACCP standards․

3․1 Step-by-Step Guide to Filling Out the Sheet

Enter the date and time of each temperature check․ Record the fridge temperature and compare it to the ideal range (2-5°C)․ Note any deviations and actions taken․ Ensure all entries are legible and verified by staff․ Regular updates help maintain consistency and compliance with food safety standards․

3․2 Frequency of Temperature Checks

Refrigerator temperatures should be checked daily‚ preferably at the same time each day‚ to ensure consistency․ Record the temperature at least once every 24 hours‚ or more frequently in high-risk environments․ This consistent monitoring helps identify deviations early‚ preventing food spoilage and ensuring safety․ Regular checks also support compliance with food safety regulations and maintain accurate records for audits or inspections․

Benefits of Using a Temperature Record Sheet

Using a temperature record sheet ensures food safety‚ compliance with regulations‚ and maintains accurate records for audits‚ helping to prevent spoilage and promote a safe environment․

4․1 Ensuring Food Safety

Monitoring fridge temperatures with a record sheet prevents food spoilage and reduces health risks․ By maintaining temperatures between 1°C and 5°C for fridges and -18°C to -22°C for freezers‚ bacterial growth is controlled․ Regular checks ensure food stays within safe zones‚ preventing contamination and foodborne illnesses․ This practice is vital for homes‚ restaurants‚ and medical facilities to uphold food safety standards and comply with regulations like HACCP․

4․2 Compliance with HACCP and Food Safety Standards

Using a fridge temperature record sheet ensures compliance with HACCP and food safety standards by providing documented proof of consistent temperature monitoring․ Regular temperature checks and accurate records demonstrate adherence to regulatory requirements‚ making audits simpler․ This systematic approach helps maintain food safety protocols‚ ensuring all stored items remain within safe temperature ranges and reducing the risk of non-compliance issues․

Where to Find Free Fridge Temperature Record Sheets

Free fridge temperature record sheets are available on websites like pdfFiller‚ DocHub‚ and FormsBank․ These platforms offer downloadable and customizable templates for food safety and HACCP compliance․

5․1 Websites Offering Free Downloads

Websites like pdfFiller‚ DocHub‚ and FormsBank provide free‚ downloadable fridge temperature record sheets in PDF format․ These templates are customizable‚ allowing users to track fridge and freezer temperatures easily․ They include fields for date‚ time‚ temperature readings‚ and ideal ranges‚ ensuring compliance with food safety standards․ Users can print or share these sheets digitally‚ making them convenient for both home and commercial use․ Regular updates and new templates are available for download to meet specific needs․

5․2 Customizable Templates

Customizable fridge temperature record templates are available for free download‚ allowing users to tailor sheets to their specific needs․ These templates often include editable fields for dates‚ times‚ and temperature ranges․ Some websites offer advanced features like company logo insertion or additional columns for notes․ Users can modify the layout and content to suit home‚ commercial‚ or industrial requirements‚ ensuring the templates are both practical and flexible for various applications․

Best Practices for Maintaining Records

Regularly monitor and document temperatures‚ ensuring accuracy and consistency․ Store records securely for audits and traceability‚ and implement corrective actions promptly if deviations occur․

6․1 Regular Monitoring

Regular monitoring of fridge temperatures is crucial for food safety․ Check temperatures daily‚ ensuring they stay within the ideal range of 1°C to 5°C for fridges and -18°C to -22°C for freezers․ This prevents spoilage and potential health risks․ Use a fridge temperature record sheet PDF to log readings consistently‚ allowing quick identification of deviations․ Frequent checks ensure compliance with food safety standards and help maintain optimal storage conditions for perishable items․

6․2 Corrective Actions for Temperature Deviations

If fridge temperatures deviate from the ideal range‚ immediate corrective actions are necessary․ Check the thermometer for accuracy‚ adjust settings‚ or inspect for equipment malfunctions․ Document the issue and resolution in the fridge temperature record sheet PDF․ Notify staff to ensure food safety and prevent spoilage․ Consistent monitoring and timely interventions help maintain compliance with food safety standards and protect stored items from temperature-related damage․

Digital Tools for Temperature Logging

Digital tools like apps and software enable real-time temperature monitoring‚ automated logging‚ and instant alerts for deviations‚ ensuring compliance with food safety standards efficiently and accurately․

7․1 Apps and Software for Temperature Monitoring

Apps and software like pdfFiller and DocHub streamline temperature logging‚ offering real-time monitoring and automated record-keeping․ These tools reduce human error‚ provide cloud storage‚ and generate detailed reports‚ ensuring compliance with food safety standards․ They enable remote access‚ instant alerts for temperature deviations‚ and seamless integration with digital devices‚ making temperature monitoring efficient and reliable for both residential and commercial use․

7․2 Advantages of Digital Record-Keeping

Digital record-keeping enhances accuracy‚ efficiency‚ and accessibility․ It reduces errors‚ provides secure storage‚ and allows easy retrieval for audits․ Automated alerts for temperature deviations ensure prompt corrective actions‚ maintaining food safety and compliance․ Digital tools also enable sharing and integration with other systems‚ making them superior to manual methods for consistent and reliable temperature monitoring in various settings․

Common Challenges in Temperature Monitoring

Common challenges include equipment malfunctions‚ such as sensor errors‚ and human error during record-keeping‚ which can compromise accuracy and compliance in maintaining temperature logs effectively․

8․1 Equipment Malfunction

Equipment malfunctions‚ such as temperature sensor errors (E2‚ E3‚ E5) or defrost sensor issues‚ can disrupt accurate temperature monitoring․ These errors may cause incorrect readings or system failures‚ leading to potential food safety risks․ Regular maintenance and calibration of sensors are crucial to prevent such malfunctions․ Additionally‚ users should refer to the user manual or contact customer support for troubleshooting guidance to ensure seamless temperature logging and compliance with safety standards․

8․2 Human Error in Record-Keeping

Human error is a common challenge in maintaining accurate temperature records․ Inconsistent logging‚ incorrect entries‚ or forgetting to document readings can compromise data reliability․ Proper training and clear guidelines are essential to minimize these mistakes․ Implementing digital tools or automated systems can also reduce human error‚ ensuring precise and consistent temperature monitoring for food safety and compliance with regulatory standards․

Real-World Applications of Temperature Logs

Temperature logs are crucial in residential kitchens for food safety and in commercial settings for HACCP compliance‚ ensuring refrigerated items remain at safe storage temperatures consistently․

9․1 Residential Use

Homeowners use fridge temperature record sheets to monitor their refrigerator and freezer temperatures regularly․ This ensures food stays fresh and safe to eat‚ preventing spoilage and foodborne illnesses․ By maintaining consistent temperature logs‚ families can verify their appliances are functioning properly and adjust settings as needed for optimal food storage․

9․2 Commercial and Industrial Use

In commercial and industrial settings‚ fridge temperature record sheets are crucial for maintaining food safety and regulatory compliance․ Restaurants‚ cafes‚ and food storage facilities use these logs to ensure consistent monitoring of refrigeration units․ This practice helps prevent food contamination and ensures adherence to HACCP and food safety standards․ Regular temperature checks are essential for audits and inspections‚ safeguarding business operations and customer trust․

Using fridge temperature record sheets ensures food safety‚ compliance‚ and efficient monitoring․ Download free templates to maintain accurate logs and protect your stored items effectively always․

10․1 Summary of Key Points

Fridge temperature record sheets are vital for ensuring food safety and compliance with food safety standards․ They help monitor and document fridge temperatures‚ ensuring ideal ranges (2-5°C for fridges‚ -18 to -22°C for freezers)․ Regular monitoring prevents food spoilage and potential health risks․ Free downloadable templates simplify logging‚ while digital tools enhance accuracy․ Maintaining these records is essential for audits and troubleshooting‚ ensuring a safe and efficient storage environment for food and other perishables․

10․2 Final Tips for Effective Temperature Monitoring

Consistently check fridge temperatures to ensure food safety․ Use free downloadable templates for accurate logging․ Address temperature deviations promptly to prevent spoilage․ Regularly review and update records for compliance․ Train staff on proper monitoring techniques․ Consider digital tools for real-time tracking and alerts․ Maintain organized records for audits and troubleshooting․ Ensure fridge temperatures remain within safe ranges (2-5°C for fridges‚ -18 to -22°C for freezers) to protect food quality and safety․

Continue Reading

simple crochet cardigan pattern free pdf

The Nina Bean Cardigan is a simple yet stylish choice, perfect for beginners. This oversized design features pocket options and is available as a downloadable PDF, complete with a photo pattern and video tutorial for easy learning.

Why Choose Free PDF Patterns for Crochet Cardigans

Opting for free PDF patterns for crocheting cardigans is an excellent choice for crafters of all skill levels. These patterns are readily available online, offering a cost-effective and convenient way to start your project. Many free PDF patterns are designed with beginners in mind, featuring step-by-step instructions and photo guides to ensure a smooth learning process.

One of the standout benefits of free PDF patterns is their versatility. They often cater to a wide range of styles, from granny square cardigans to oversized and chunky designs. Additionally, many patterns include video tutorials, providing visual guidance that complements the written instructions. This combination makes it easier for beginners to master techniques and for experienced crocheters to explore new designs.

Another advantage is the ability to download and print these patterns instantly, allowing you to start your project without delays. Many free PDF patterns also offer customization options, enabling you to adjust sizes, yarn weights, and styles to suit your preferences. Whether you’re creating a cardigan for yourself or as a gift, free PDF patterns provide a flexible and accessible way to bring your ideas to life.

With hundreds of free crochet cardigan patterns available online, you can explore various designs and find the one that perfectly matches your skill level and creative vision. These patterns are a great way to save money while still enjoying high-quality, detailed instructions.

Key Features of a Simple Crochet Cardigan Pattern

A simple crochet cardigan pattern is designed to be easy to follow and accessible for crafters of all skill levels. These patterns often feature basic stitches and straightforward constructions, such as the popular rectangle cardigan design, which requires only two simple rectangles to create a cozy garment. Many patterns are tailored for beginners, with clear instructions and photo guides to help you understand each step.

One of the standout features of simple patterns is their versatility. They often include options for customization, such as adjusting sleeve lengths, adding pockets, or modifying the neckline. Patterns like the Nina Bean Cardigan and the Briar Pocket Cardigan offer these options, allowing you to personalize your project. Additionally, many patterns are available in a wide range of sizes, from XXS to XXL, ensuring a perfect fit for everyone.

Simple crochet cardigan patterns also emphasize minimal shaping, making them less intimidating for those new to garment crochet. They often use chunky yarns or open stitches for a relaxed, stylish look. With these features, simple patterns are ideal for crafting a beautiful, functional cardigan without the complexity of advanced techniques.

Lastly, many patterns include video tutorials and detailed measurements to ensure accuracy and confidence in your work. These resources make simple crochet cardigan patterns a great way to enjoy a fun and rewarding crafting experience.

Materials and Tools Needed for Crocheting a Cardigan

To start crocheting a cardigan, you’ll need a few essential materials and tools. The most critical item is yarn, which comes in various weights and fibers. Medium-weight yarns like Caron or Valley Yarns are popular for cardigans due to their softness and durability. Choose a yarn that matches the season—lighter yarns for summer and chunkier ones for winter.

A crochet hook is another must-have tool. The hook size will depend on the yarn weight and the pattern you’re using. Many simple patterns recommend a hook size between 5mm to 6mm. Additional tools include tapestry needles for weaving in ends, stitch markers for keeping track of your place, and a measuring tape to ensure accurate sizing.

Optional but helpful tools are stitch dictionaries for advanced techniques and yarn needles for sewing seams if your pattern requires it. Always check the specific materials list in your chosen pattern, as some designs may call for additional supplies like buttons or zippers. With these basics, you’re ready to create a beautiful and cozy cardigan.

Step-by-Step Guide to Crocheting a Simple Cardigan

Crocheting a simple cardigan is a straightforward process that can be completed in a few steps, even for beginners. Start by creating a foundation chain to serve as the base of your cardigan. Use a chain stitch to achieve the desired length, ensuring it fits comfortably around your bust or torso.

Next, work rows of single crochet or half double crochet stitches to form the main body of the cardigan. Many patterns, like the Easy Rectangle Cardigan, use two simple rectangles sewn together at the sides. Continue crocheting until your fabric reaches the desired length, ensuring it drapes well and fits your frame.

Shape the cardigan by adding armholes and a neckline. This can be done by skipping stitches or decreasing rows; For a more tailored look, consider adding buttons or a zipper. Finally, sew the seams together and weave in any loose ends for a polished finish.

With patience and attention to detail, you can create a cozy and stylish cardigan using a free PDF pattern as your guide.

Customization Options for Your Crochet Cardigan

Customizing your crochet cardigan allows you to add a personal touch and make it uniquely yours. One popular option is to experiment with different yarn weights, such as lightweight yarns for summer or chunky yarns for winter. You can also choose from a variety of colors and textures to match your wardrobe or current trends.

Another way to personalize your cardigan is by adjusting the sleeve length. Opt for short sleeves, long sleeves, or even a sleeveless design depending on your preference. Additionally, you can add pockets for functionality, as seen in patterns like the Nina Bean Cardigan, which offers two pocket options.

Embellishments such as buttons, ribbons, or crochet flowers can enhance the visual appeal of your cardigan. Many free PDF patterns, like the Easy Rectangle Cardigan, allow for easy modifications to fit your style. Whether it’s changing the neckline shape or adding a hood, the possibilities are endless.

By exploring these customization options, you can transform a simple pattern into a one-of-a-kind garment that reflects your creativity and personal style.

Understanding Sizes and Measurements in Crochet Patterns

Understanding sizes and measurements is crucial when working with crochet patterns to ensure your cardigan fits perfectly. Most patterns, such as the Easy Rectangle Cardigan, include size charts ranging from XXS to XXL, catering to diverse body types. These charts typically provide measurements for the bust, length, and sleeve length, helping you choose the right size for your project.

It’s important to differentiate between your body measurements and the garment’s finished measurements. Many patterns, like the Blue Star Cardigan, offer finished measurements in inches or centimeters, ensuring a comfortable fit with the right amount of ease. Ease refers to the extra space built into the garment for comfort and style.

To achieve accurate results, always measure your work as you go and use a tape measure or gauge swatch to ensure consistency. Adjusting hook sizes or stitch counts can help customize the fit further. Understanding these principles will help you create a cardigan that is both comfortable and flattering.

By carefully following size guidelines and making necessary adjustments, you can craft a cardigan that fits perfectly and meets your personal style preferences.

Popular Styles of Simple Crochet Cardigans

Simple crochet cardigans come in a variety of styles, catering to different preferences and seasons. One popular style is the oversized cardigan, which offers a cozy, relaxed fit and is often paired with pockets for added functionality. The Nina Bean Cardigan is a great example, featuring a modern design with optional pockets.

Another trend is the rectangular cardigan, made from simple rectangles sewn together. The Easy Rectangle Cardigan pattern is a favorite among crocheters, offering a straightforward construction method and a stylish drape. This design is ideal for beginners and works well for both casual and semi-formal looks.

For warmer weather, lightweight summer cardigans are a hit. These patterns often incorporate lace or openwork stitches, providing breathability and a delicate appearance. The Easy Summer Crochet Cardigan is a prime example, offering a free pattern with a video tutorial perfect for those new to crochet.

Additionally, chunky crochet cardigans are popular for colder months, using thick yarns to create a snug and warm garment. These styles are often quick to crochet and make for great layering pieces. With so many options available, crocheters can easily find a style that matches their skill level and wardrobe needs.

The Role of Video Tutorials in Learning Crochet

Video tutorials have become an essential resource for learning crochet, especially for beginners working on simple cardigan patterns. These visual guides provide step-by-step instructions, making it easier to understand complex stitches and techniques. Many free PDF crochet patterns, such as the Nina Bean Cardigan and the Easy Summer Crochet Cardigan, now include links to video tutorials;

One of the key benefits of video tutorials is their ability to demonstrate how stitches should look and feel in real time. For example, the Blue Star Cardigan pattern offers both right- and left-handed versions of its tutorial, ensuring accessibility for all crocheters. Videos also allow learners to pause, rewind, and replay sections, making the learning process more flexible and stress-free.

Additionally, video tutorials often cover common mistakes and how to fix them, which is invaluable for those new to crochet. This combination of visual and auditory instruction helps to build confidence and skill, making it easier to complete projects like simple crochet cardigans. With the rise of free video tutorials, learning to crochet has never been more accessible or enjoyable.

Where to Find Free Crochet Cardigan Patterns

Discovering free crochet cardigan patterns is easier than ever, thanks to the wealth of online resources available. Websites like Etsy, Ravelry, and LoveCrafts offer a wide selection of downloadable PDF patterns, many of which are free. Platforms such as Yarnspirations and Moogly also provide an extensive library of patterns, including simple crochet cardigan designs suitable for beginners.

Additionally, blogs and crochet communities often share free crochet cardigan patterns as part of their tutorials. For example, the Nina Bean Cardigan and the Easy Rectangle Cardigan are popular choices that come with detailed instructions and photos. Many designers also offer free PDF patterns on their websites, such as the Briar Pocket Cardigan and the Blue Star Cardigan, which are perfect for those looking to create stylish and cozy garments.

With so many resources available, crafters can easily find a simple crochet cardigan pattern that matches their skill level and style preferences. Whether you’re a beginner or an experienced crocheter, these free patterns provide a great way to start your next project.

Tips for Beginners: Mastering the Basics of Crochet

Mastering the basics of crochet is essential for successfully creating a simple crochet cardigan. Start by choosing the right tools: select a hook and yarn that feel comfortable to work with. Practice basic stitches like the chain stitch, single crochet, and double crochet, as these are foundational to most patterns.

Understanding gauge is crucial to ensure your cardigan fits properly. Swatch before starting your project to avoid size discrepancies. For beginners, it’s also helpful to use video tutorials alongside written patterns, as visual guidance can clarify complex steps.

Start with a simple pattern, such as the Easy Rectangle Cardigan or the Nina Bean Cardigan, which are designed for beginners. These patterns often include step-by-step instructions and photos to guide you through the process.

Don’t be afraid to make mistakes—they’re part of the learning process. Frogging (ripping out stitches) is a common practice, so stay patient and persistent. With practice, you’ll build confidence and skill, making your crochet journey enjoyable and rewarding.

Common Mistakes to Avoid When Crocheting a Cardigan

When working on a simple crochet cardigan pattern, it’s easy to encounter common mistakes that can disrupt your progress. One of the most frequent errors is incorrect gauge, which can lead to a cardigan that’s either too tight or too loose. Always swatch before starting your project to ensure accuracy.

Another mistake is miscounting stitches, especially when working in rounds or shaping the cardigan. Keep track of your stitches using stitch markers or by regularly counting them to maintain consistency.

Inconsistent tension is another pitfall; uneven stitches can make the cardigan look unprofessional. Practice maintaining a steady tension and avoid pulling the yarn too tightly or loosely.

Additionally, ignoring pattern instructions can lead to errors, especially for beginners. Always follow the pattern step-by-step, and don’t skip details like seam allowances or buttonhole placements.

Finally, not blocking the finished cardigan can leave it looking misshapen. Blocking helps even out the stitches and gives your cardigan a polished finish.

By being mindful of these common mistakes, you can create a beautiful, professional-looking cardigan using a simple crochet cardigan pattern.

Crocheting a cardigan is a rewarding project that combines creativity with practicality. With the wide availability of simple crochet cardigan patterns in free PDF formats, anyone can embark on this craft, regardless of skill level. Whether you’re a beginner or an experienced crafter, these patterns offer clear instructions and versatility to suit your style.

The internet is filled with resources, from free downloadable patterns to video tutorials, making it easier than ever to learn and improve. Patterns like the Nina Bean Cardigan or the Easy Rectangle Cardigan demonstrate how simplicity can lead to stunning results.

Don’t hesitate to explore the world of crochet and start your next project today. With patience and practice, you’ll create a cozy, stylish cardigan that reflects your personal touch. Happy crocheting!

Continue Reading

potty training chart printable pdf

Potty training charts are visual tools designed to help toddlers track progress during toilet training․ They offer a simple, engaging way to monitor successes and setbacks, fostering consistency and motivation․ Available as printable PDFs, these charts are customizable, allowing parents to personalize them with themes, stickers, and rewards․ They serve as a motivational aid, helping children stay focused on their potty training journey while providing a sense of achievement with each milestone reached․

What is a Potty Training Chart?

A potty training chart is a visual tool designed to help toddlers track their progress during toilet training․ Typically available as printable PDFs, these charts provide a structured format for monitoring successes and setbacks․ They often feature customizable spaces to mark achievements, such as using the potty successfully or staying dry․ Many charts include themes, stickers, or reward systems to keep children motivated․ Parents can personalize them with their child’s name or favorite characters, making the process engaging and tailored to individual needs․ They serve as a clear, visual guide for both kids and parents․

Why Use a Potty Training Chart?

A potty training chart is an effective tool for making the toilet training process easier and more engaging for young children․ It provides a clear visual guide to track progress, helping kids understand their goals and celebrate small achievements․ By marking successes, children gain a sense of accomplishment, which boosts motivation and confidence․ Parents also benefit from the chart’s ability to identify patterns and consistency, making it easier to address challenges․ Additionally, customizable themes and rewards systems make the process fun and tailored to a child’s preferences, fostering a positive experience overall․

Benefits of Using a Printable Potty Training Chart

Printable potty training charts help track progress, encourage consistency, and motivate children with rewards․ They are customizable, easy to use, and provide a clear visual guide for success․

Encourages Consistency and Routine

Printable potty training charts help establish a consistent routine by providing a clear schedule for bathroom visits․ Parents can track progress visually, ensuring regular attempts and reducing accidents․ Customizable charts allow for tailored routines, adapting to a child’s unique needs․ By marking successful uses, children learn to associate the action with a structured schedule, fostering a sense of responsibility․ Consistency builds habits, and these charts serve as a reliable tool to guide both parents and toddlers through the potty training process with clarity and predictability․

Motivates Children with Rewards

Printable potty training charts are an excellent way to motivate children by incorporating rewards․ Stickers, stars, or other visual markers can be used to celebrate successes, making the process fun and engaging․ Rewards provide a sense of accomplishment, encouraging children to continue using the potty․ Many charts include themed designs, such as popular characters, which add excitement․ This positive reinforcement helps build confidence and keeps kids eager to progress․ By linking rewards to milestones, parents can create a system that fosters enthusiasm and perseverance during the potty training journey․

Tracks Progress Effectively

Printable potty training charts are invaluable for tracking a child’s progress․ They provide a clear visual record of successes and setbacks, helping parents identify patterns and stay consistent․ Each completed task or achievement is marked, creating a sense of accomplishment․ This tool allows parents to monitor daily efforts, celebrate milestones, and adjust strategies as needed․ By documenting progress, these charts help maintain motivation and provide a clear path toward potty training success․ They also serve as a reminder of how far the child has come, boosting confidence and morale․

How to Create a Potty Training Chart

Design a template with rows for days and columns for tasks like “morning,” “afternoon,” and “night․” Add visuals or themes to make it engaging․ Include space for stickers or rewards to motivate progress․ Customize fonts, colors, and layouts to suit your child’s preferences․ Ensure it’s easy to update daily, providing a clear visual of achievements and areas for improvement․

Steps to Design a Custom Potty Training Chart

Start by choosing a template or create a grid layout with rows for days and columns for different times (e․g․, morning, afternoon, night)․ Add colorful themes or popular characters like Elmo or Daniel Tiger to make it engaging․ Include sections for stickers or rewards to motivate progress․ Personalize the chart by adding your child’s name and preferred theme․ Use a PDF format for easy printing and ensure it’s customizable, allowing adjustments to fonts, colors, and layouts․ Make it interactive by incorporating a reward system, such as stickers for successful uses, and provide space for notes or milestones․ Ensure the design is clear and easy to update daily, offering a visual track of achievements and areas for improvement․ This structured yet flexible approach helps parents tailor the chart to their child’s needs, fostering consistency and excitement during potty training․

Customization Options for Parents

Parents can personalize potty training charts by selecting themes, such as princess, superhero, or animal designs, to match their child’s interests․ They can choose from various formats like PDF, PNG, or JPG, and adjust the layout to fit A4 or US Letter sizes․ Customization includes adding the child’s name, preferred colors, and fonts․ Some charts allow incorporating milestone markers for rewards, while others offer blank spaces for stickers or notes․ This flexibility ensures the chart aligns with the child’s personality, making the potty training process more engaging and effective․

Popular Themes and Designs for Potty Training Charts

Popular themes include princess, superhero, and animal designs, appealing to children’s interests․ Vibrant colors and fun patterns make charts engaging, motivating kids to participate actively․

Character-Themed Charts (e․g․, Elmo, Daniel Tiger)

Character-themed potty training charts, such as those featuring Elmo or Daniel Tiger, are highly engaging for young children․ These charts leverage beloved characters to make the potty training process fun and relatable․ By incorporating familiar faces, they help kids feel comfortable and excited about using the potty․ Parents can find these charts in printable PDF formats, often customizable with a child’s name or specific milestones; The combination of a favorite character and a reward system encourages consistency and celebrates small victories, making the learning process enjoyable and effective․

Colorful and Fun Designs

Colorful and fun designs make potty training charts visually appealing and engaging for children․ Bright colors and playful patterns capture their attention, while creative illustrations add an element of excitement․ Many charts feature vibrant themes tailored to boys or girls, with customizable options to match their interests․ Parents can choose from a variety of styles, ensuring the chart feels personalized and motivating․ These eye-catching designs help toddlers stay enthusiastic about tracking their progress, turning potty training into a positive and enjoyable experience․

Using Stickers and Rewards in Potty Training

Stickers and rewards add fun and motivation to potty training․ They provide immediate positive reinforcement and help track progress on printable charts․ Kids love the visual rewards!

How Stickers Can Motivate Kids

Stickers are powerful motivators for children during potty training․ They provide immediate feedback and a sense of accomplishment, encouraging kids to repeat successful behaviors․ Parents can place stickers on printable charts to celebrate each achievement, making the process fun and engaging․ Over time, this positive reinforcement builds confidence and reinforces the habit of using the potty consistently․ Stickers also allow children to visually track their progress, making the learning process both rewarding and exciting․

Examples of Reward Systems

Reward systems, such as sticker charts or milestone markers, help motivate children during potty training․ For instance, a “candy path” chart rewards kids with a treat every fifth successful use․ Some charts include stickers for small achievements, while others offer larger rewards, like toys or outings, for reaching significant milestones․ These systems create a sense of accomplishment and encourage consistency, making the potty training process more engaging and effective for young learners․

Downloading and Printing Potty Training Charts

Printable potty training charts are widely available online in PDF, PNG, and JPG formats․ They can be customized with fonts, colors, and text, ensuring a perfect fit for your child’s needs․ Designed for both A4 and US Letter sizes, these charts are easy to download and print at home or at a local print shop, making them a convenient tool for parents guiding their toddlers through potty training․

Where to Find Free Printable PDFs

Free printable potty training charts in PDF format are easily accessible online․ Websites like Pinterest, Etsy, and parenting blogs offer a variety of designs, from character-themed charts featuring popular characters like Elmo and Daniel Tiger to colorful and customizable templates․ Many sites allow direct downloads, while others may require signing up for newsletters to access their free resources․ Additionally, educational platforms and parenting communities often provide downloadable PDFs tailored for different stages of potty training, ensuring you can find one that suits your child’s needs and preferences․

Printing Tips for Best Results

For optimal printing of potty training charts, use high-quality paper and a reliable printer․ Choose A4 or US Letter sizes, depending on your preference․ Ensure your printer is set to the correct paper size and orientation․ PDF files are ideal for crisp text and vibrant colors․ Consider using cardstock for durability, especially if you plan to laminate the chart․ Many charts are available in PNG or JPG formats for flexibility․ Print in color to make the designs engaging for your child․ Laminate the chart for easy cleaning and reuse, extending its lifespan throughout the potty training journey․

Potty training charts are an effective tool for guiding children through toilet training, helping track progress and celebrate milestones, providing motivation and building confidence, essential for a successful journey․

Final Thoughts on Potty Training Success

Consistency and positive reinforcement are key to successful potty training․ Printable charts serve as powerful tools to track progress, celebrate milestones, and motivate children․ By using rewards like stickers or praise, parents can encourage their child’s effort and build confidence․ These charts help create a sense of accomplishment, making the potty training journey more engaging and rewarding for both children and parents․ With patience and the right tools, parents can help their little ones master this important life skill and feel proud of their achievements․

Tips for Parents

Using a printable potty training chart can greatly enhance your child’s learning experience․ Personalize the chart with your child’s name or favorite characters to make it engaging․ Consistently update the chart to track progress and celebrate small victories with stickers or praise․ Be patient and remember that accidents are part of the process․ Combine the chart with a reward system, such as small prizes for reaching milestones, to keep your child motivated․ Lastly, make it fun by involving your child in selecting themes or designs for their chart․

Continue Reading

zanussi washer dryer user manual

Welcome to the Zanussi Washer Dryer User Manual. This guide is designed to help you understand and use your appliance effectively and safely. Always read this manual carefully before installation and first use to ensure optimal performance and longevity of your washer dryer.

1.1 Overview of the Manual’s Purpose and Structure

This manual provides comprehensive guidance for safe and efficient use of your Zanussi Washer Dryer. It covers installation, operation, maintenance, and troubleshooting, ensuring optimal performance. The structure is divided into sections, addressing safety, features, cycles, and care tips, making it easy to navigate and understand; This guide is essential for maximizing the appliance’s potential and longevity while ensuring user safety and satisfaction.

1.2 Importance of Reading the Manual for Safe and Effective Use

Reading this manual is crucial for safe and effective operation of your Zanussi Washer Dryer. It provides essential safety guidelines, installation instructions, and details on cycles and features. Understanding the content ensures proper use, prevents accidents, and prolongs the appliance’s lifespan. Failure to follow instructions may lead to hazards or damage, so careful review is highly recommended before first use.

Safety Information and Precautions

Ensure safe operation by following all safety guidelines in this manual; Avoid hazards by keeping flammable items away and adhering to installation and usage instructions carefully.

2.1 General Safety Guidelines for Installation and Operation

Always follow safety guidelines to ensure safe installation and operation. Keep flammable materials away from the appliance. Ensure the washer dryer is installed on a stable, level surface. Avoid overloading the machine, as specified in the manual. Never leave children unattended near the appliance while it is in operation. Regularly inspect electrical connections and ensure proper ventilation to prevent hazards. Follow all instructions carefully to avoid accidents and ensure safe usage.

2.2 Specific Warnings for Washer Dryer Usage

  • Never stop the washer dryer before the end of the drying cycle to prevent fire hazards.
  • Avoid washing articles with whalebones, torn material, or items without hems.
  • Do not use fabric softeners or similar products unless specified by the manufacturer.
  • Remove all flammable items like lighters or matches from clothing before washing.
  • Always unplug the appliance and turn off the water supply when not in use.

2.3 Precautions for Loading and Unloading the Appliance

When loading and unloading your Zanussi washer dryer, ensure the appliance is balanced to avoid vibration. Avoid overloading, as this can damage clothes and the machine. Always remove items from pockets to prevent damage or blockages. Handle fragile or delicate fabrics with care. Check for forgotten items before starting a cycle. Never leave flammable materials near the appliance during operation.

Installation and Setup of the Washer Dryer

Ensure the washer dryer is installed on a level, stable surface. Connect water and electrical supplies securely. Follow the manual for proper installation and setup procedures.

3.1 Step-by-Step Installation Instructions

Begin by placing the washer dryer on a level, stable surface. Ensure the appliance is not installed on a column. Attach the rear brackets as shown in figures 4 or 5, depending on the machine’s side design. Securely connect the water supply hoses to the machine and water outlets. Plug in the washer dryer, ensuring the electrical connection meets safety standards. Finally, install any additional accessories like the stand, following the provided instructions carefully.

3.2 Requirements for Proper Ventilation and Electrical Connections

Ensure proper ventilation to prevent moisture buildup and fire hazards. Install the washer dryer in a well-ventilated area, avoiding confined spaces. The electrical connection must meet safety standards, using a grounded plug. Avoid using extension cords and ensure the circuit can handle the appliance’s power load. Follow the manufacturer’s guidelines for electrical setup to guarantee safe and efficient operation of your Zanussi washer dryer.

3.3 Leveling the Appliance for Optimal Performance

Proper leveling ensures stable operation and prevents vibration. Use a spirit level to check balance. Adjust the feet to ensure the appliance is level both front-to-back and side-to-side. An unbalanced washer dryer may cause noise or poor performance. After leveling, tighten the locknuts to secure the feet. Ensure the appliance is placed on a firm, even surface for optimal functionality and to minimize wear and tear during use.

Understanding the Control Panel and Features

The control panel offers intuitive buttons for selecting wash and dry cycles, adjusting temperature, and customizing settings. Familiarize yourself with the display and options to optimize usage.

4.1 Layout and Functions of the Control Panel

The control panel features a user-friendly interface with buttons for selecting wash and dry cycles, adjusting temperature, and customizing settings. The display shows cycle progress, temperature, and spin speed. Additional buttons allow you to pause or resume the cycle, while indicator lights provide feedback on the appliance’s status. Familiarize yourself with the layout to efficiently navigate and customize your washer dryer operations.

4.2 Explanation of Wash and Dry Cycle Options

The washer dryer offers multiple wash cycles, including cotton, synthetic, and delicate modes, each optimized for specific fabric types. Drying cycles include options for timed drying, with settings tailored to cotton, synthetic, or wool fabrics. Additional features like eco mode reduce energy consumption. Selecting the right cycle ensures optimal cleaning and drying while protecting your garments. Always refer to the cycle guide for best results.

4;3 Special Features and Customization Options

Your Zanussi washer dryer includes advanced features like delay start, eco mode, and child lock for added convenience. Customization options allow you to adjust settings such as temperature, spin speed, and drying time. The non-stop program combines washing and drying in one cycle, while fabric-specific settings ensure gentle care for delicate items. These features enhance efficiency and adapt to your laundry needs.

Wash and Dry Cycles: Modes and Options

Your Zanussi washer dryer offers various wash and dry cycles, including a non-stop program for combined washing and drying. Choose from modes like cotton, synthetics, or delicate fabrics, with options to customize temperature, spin speed, and drying levels for tailored care.

5.1 Description of Different Wash Modes and Their Uses

The Zanussi washer dryer features multiple wash modes tailored for different fabric types. The cotton mode is ideal for heavily soiled items, while synthetic mode gently cleans man-made fibers. Delicate mode protects sensitive fabrics, and the non-stop program combines washing and drying for convenience. Each mode adjusts water temperature, spin speed, and cycle intensity to ensure optimal cleaning and care for your laundry.

5.2 Explanation of Drying Cycle Options and Settings

The Zanussi washer dryer offers versatile drying cycles to suit various fabrics. The non-stop programme combines washing and drying for convenience. Timed drying allows selecting the cycle duration based on fabric type, while eco mode optimizes energy use. Sensitive fabrics benefit from lower heat settings, and bulky items can be dried efficiently with higher heat. Always select the appropriate cycle for fabric type to ensure safe and effective drying.

5.3 Combining Wash and Dry Modes for Optimal Results

To achieve the best results, pair wash and dry cycles according to fabric type and soil level. Use delicate wash with low heat for sensitive fabrics, and heavy-duty wash with high heat for sturdy items. For mixed loads, separate fabrics to prevent damage. Opt for eco modes to save energy while maintaining performance. Check load capacity to avoid overloading, ensuring efficient cleaning and drying. Adjust settings for special care items like wool or silk, and plan cycle times accordingly. Customizable options may allow fine-tuning drying time or temperature after selecting a wash cycle, enhancing flexibility for various laundry needs.

Maintenance and Care of the Washer Dryer

Regularly clean the detergent drawer and filters to ensure optimal performance. Check and replace wearable parts to prevent damage. Dry the interior after use to prevent mold growth.

6.1 Regular Cleaning and Filter Maintenance

Regularly clean the detergent drawer and filters to ensure optimal performance. Check and replace filters weekly to remove debris. After each use, leave the door open to dry the interior. This prevents mold growth and odors. Clean the gasket and drum periodically for hygiene. Refer to the manual for specific cleaning instructions tailored to your Zanussi model.

6.2 Checking and Replacing Wearable Parts

Regularly inspect wearable parts like filters, gaskets, and seals to ensure proper function. Check for signs of wear, such as leaks or noise. Replace worn parts promptly to prevent damage. Always refer to the user manual for guidance on replacement procedures and use genuine Zanussi parts to maintain performance and warranty validity. This helps extend the appliance’s lifespan and ensures reliability.

6.3 Tips for Preventing Odors and Mold Growth

Regularly clean the interior, gasket, and detergent drawer to remove residue. After each cycle, leave the door open to dry the interior. Check and clean filters to ensure proper airflow. Run a cleaning cycle with a suitable cleaner or vinegar to eliminate odors. Ensure good ventilation in the room to prevent moisture buildup. These steps help maintain freshness and prevent mold growth in your washer dryer.

Troubleshooting Common Issues

Identify and resolve common problems with error codes and cycle interruptions. Refer to the manual for solutions or contact a professional if issues persist.

7.1 Identifying and Resolving Common Error Codes

Common error codes like E01 or E02 indicate issues such as drainage problems or sensor malfunctions. Refer to your user manual for specific code meanings and step-by-step solutions. Ensure proper troubleshooting by following the manual’s guidance. If unresolved, contact a certified technician for professional assistance to avoid further damage or safety risks.

7.2 Solutions for Issues During Wash or Dry Cycles

If the washer dryer stops mid-cycle or displays an error, check for blockages in filters or drainage issues. Ensure proper loading and balance. For incomplete drying, verify venting is clear and settings match fabric types. Restart the cycle if interrupted. Refer to the manual for specific solutions or reset procedures. If unresolved, contact Zanussi support for further assistance.

7.3 When to Contact a Professional Technician

Contact a professional technician if issues persist after troubleshooting, such as recurring error codes (e.g., E01, E02, E03) or mechanical failures. Seek expert help for internal damage, torn belts, or complex repairs. Always use Zanussi-authorized technicians to ensure warranty validity and safe, reliable service. Refer to the manual or Zanussi’s official support for trusted assistance and maintenance.

Energy Efficiency and Cost-Saving Tips

Optimize energy use by selecting eco-friendly cycles and maintaining proper load sizes. Regularly clean filters and ensure proper ventilation to enhance efficiency and reduce operational costs.

8.1 Understanding Energy Labels and Ratings

Energy labels provide crucial information about your washer dryer’s efficiency. They rate appliances from A (most efficient) to G (least efficient). The label details energy consumption per cycle, water usage, and noise levels. Higher-rated models use less energy and water, reducing utility bills. Understanding these ratings helps you make eco-friendly choices and ensures compliance with EcoDesign regulations aimed at minimizing environmental impact.

8.2 Optimizing Wash and Dry Cycles for Energy Savings

Selecting the right wash and dry cycles can significantly reduce energy consumption. Use eco-friendly modes for smaller loads and lower temperatures. Avoid overloading the appliance, as this can increase energy use. Regularly check and maintain filters to ensure efficient operation. By optimizing cycle settings, you can achieve better energy savings while maintaining effective cleaning and drying performance.

8.3 Maintaining the Appliance for Long-Term Efficiency

Regular cleaning of filters and vents ensures optimal airflow and energy efficiency. Check for blockages in the venting system and clean them promptly. Ensure the appliance is leveled correctly to avoid vibration and noise. Leave the door slightly open after use to dry the interior, preventing mold growth. Regularly inspect and replace worn-out parts to maintain performance and efficiency over time.

Regular maintenance, proper usage, and adherence to guidelines ensure optimal performance and longevity. Refer to troubleshooting sections for common issues and maintain your appliance for efficient operation.

9.1 Summarizing Key Points for Effective Use

Always follow safety guidelines and installation instructions for optimal performance. Use appropriate wash and dry cycles, and ensure proper ventilation. Regularly clean filters and maintain the appliance to prevent odors and mold. Refer to the manual for troubleshooting common issues and energy-saving tips. By adhering to these guidelines, you can extend the lifespan of your Zanussi washer dryer and ensure efficient operation.

9.2 Encouraging Proper Maintenance and Care

Regular maintenance is crucial for the longevity and efficiency of your Zanussi washer dryer. Clean filters and gaskets frequently to prevent blockages and mold growth. Check for worn parts and replace them promptly. Leave the door open after use to dry the interior. For tougher odors, run a cleaning cycle with vinegar. Proper care ensures reliable performance and extends the appliance’s lifespan while maintaining energy efficiency.

Continue Reading

de’longhi dolce gusto coffee machine instructions

The DeLonghi Dolce Gusto coffee machine offers a convenient and high-quality brewing experience with its capsule-based system, allowing users to create a variety of coffee drinks effortlessly.

1.1 Overview of the Machine and Its Features

The DeLonghi Dolce Gusto coffee machine is a compact, capsule-based brewing system designed for convenience and versatility. It features an intuitive interface, adjustable drip tray, and customizable settings for coffee strength and temperature. The machine automatically pierces capsules, ensuring optimal extraction, and offers a sleek design that fits seamlessly into any kitchen. Its energy-efficient technology and variable temperature control enhance the brewing experience, making it ideal for coffee lovers seeking quality and ease.

1.2 Benefits of Using a Capsule-Based Coffee Machine

A capsule-based coffee machine like the DeLonghi Dolce Gusto offers unmatched convenience, consistent flavor, and minimal cleanup. Each capsule ensures precise coffee measurement, eliminating waste and providing a wide variety of flavor options. Its mess-free design and quick brewing process make it ideal for home and office use, delivering high-quality coffee with every capsule.

Unboxing and Initial Setup

Place the DeLonghi Dolce Gusto on a stable, flat surface near a power outlet. Ensure easy access for refilling water and inserting capsules, optimizing your brewing experience.

2.1 Unboxing the Machine and Accessories

Upon unboxing, you’ll find the DeLonghi Dolce Gusto machine, a water tank, drip tray, and a selection of coffee capsules. The machine is compact and lightweight, designed for easy placement. Ensure all accessories are included and inspect for damage. A quick start guide is also provided to help you begin your brewing journey effortlessly.

2.2 Placing the Machine on Your Countertop

Place the DeLonghi Dolce Gusto machine on a flat, stable countertop, ensuring it is away from water sources and heat. Position it in a location that allows easy access to the water tank and capsule insertion. The compact design ensures it fits neatly in most kitchens, making it a stylish and functional addition to your space.

2.3 Connecting the Machine to a Power Source

Plug the DeLonghi Dolce Gusto machine directly into a nearby wall outlet using the provided power cord. Ensure the outlet matches the machine’s voltage requirements. Avoid using extension cords for safety. Once connected, the machine will power on, and you can proceed with the initial setup. Always follow safety guidelines to prevent electrical issues.

Understanding the User Manual

The DeLonghi Dolce Gusto user manual provides detailed instructions for setup, operation, and maintenance. It is available online as a downloadable PDF for easy access.

3.1 Where to Find the Official DeLonghi Dolce Gusto Manual

The official DeLonghi Dolce Gusto manual can be found on the DeLonghi Dolce Gusto website or through their customer support. It is also available as a downloadable PDF on their official product pages. Specific models, like the Jovia EDG 250 or Piccolo XS EDG210.R, have dedicated manuals accessible online for free.

3.2 Key Sections of the Manual to Focus On

The manual’s key sections include setup instructions, operating guidelines, and troubleshooting tips. These sections provide essential information for first-time users, ensuring smooth operation and maintenance. Additionally, the manual covers safety precautions and warranty details, making it a comprehensive guide for optimal use of your DeLonghi Dolce Gusto machine.

Basic Operation of the DeLonghi Dolce Gusto

Filling the water tank, inserting a capsule, and selecting your drink setting are the primary steps. The machine automatically manages brewing, ensuring a perfect cup every time.

4.1 Step-by-Step Guide to Brewing Your First Cup

  • Prepare the machine by ensuring the water tank is filled and the drip tray is in place.
  • Insert a NESCAFÉ Dolce Gusto capsule into the machine, ensuring it clicks securely.
  • Select your desired drink size and strength using the control buttons.
  • Press the brew button to start the process. The machine will automatically pierce the capsule and dispense the coffee.
  • Once brewing is complete, remove your cup and discard the used capsule.

4.2 Adjusting Settings for Different Coffee Strengths

The DeLonghi Dolce Gusto allows customization of coffee strength and size. Use the control buttons to adjust brew settings, ensuring the perfect balance for your preference. For stronger coffee, select a smaller cup size or higher intensity. Some models feature adjustable temperature settings. Experiment with different capsules and settings to find your ideal brew. Regular descaling ensures optimal performance.

Cleaning and Maintaining the Machine

Regular cleaning and descaling are essential for maintaining the performance and longevity of your DeLonghi Dolce Gusto coffee machine. Always use water and mild detergents, avoiding harsh chemicals.

5.1 Daily Cleaning Routine

Perform a daily cleaning routine to maintain your machine’s hygiene and performance. After each use, rinse the capsule holder and drip tray with warm water. Wipe the machine’s exterior with a damp cloth and mild detergent, ensuring no residue remains. Regularly empty the used capsule container and clean the coffee outlet to prevent any buildup. This routine ensures optimal function and freshness in every brew.

5.2 Descaling the Machine for Optimal Performance

Descaling is crucial for maintaining your DeLonghi Dolce Gusto machine’s efficiency. Use a DeLonghi-approved descaling solution or compatible product. Follow the manual’s instructions to activate the descaling mode. Run the solution through the machine, then rinse thoroughly with clean water. Regular descaling prevents mineral buildup, ensuring your machine continues to deliver excellent coffee quality and longevity.

Troubleshooting Common Issues

Common issues include the machine not turning on, capsule insertion problems, or coffee not flowing properly. Check power connections, ensure capsules are aligned, and descale regularly to resolve these issues effectively.

6.1 Machine Not Turning On

If the machine doesn’t turn on, first check the power cord connection and ensure it’s properly plugged into a functioning outlet. Verify the outlet works by testing it with another appliance. If the issue persists, consult the user manual or contact customer support for further assistance. Always prioritize safety and avoid tampering with internal components.

6.2 Issues with Capsule Insertion

If the capsule isn’t inserting properly, ensure it’s aligned correctly and the machine is clean. Check for blockages in the capsule holder and gently push the capsule until it clicks. If issues persist, refer to the user manual or contact customer support for assistance. Proper alignment and a clean machine are essential for smooth operation.

6.3 Coffee Not Flowing Properly

If coffee isn’t flowing, check for blockages in the machine’s outlets or capsule holder. Ensure the capsule is properly aligned and seated. Regular descaling can prevent mineral buildup, which may restrict flow. Refer to the user manual for guidance on cleaning and maintaining your DeLonghi Dolce Gusto machine to resolve this issue effectively.

Advanced Features of the DeLonghi Dolce Gusto

The DeLonghi Dolce Gusto offers advanced customization options, allowing users to adjust coffee strength and temperature for a tailored brewing experience, plus hot and cold beverage capabilities.

7.1 Customizing Your Coffee Experience

The DeLonghi Dolce Gusto allows users to customize their coffee experience by adjusting brew strength, coffee size, and temperature settings. With a wide range of capsules available, users can explore various flavors and create personalized drinks. The machine also supports both hot and cold beverages, offering versatility for any preference. Experiment with settings to find your perfect cup.

7.2 Using the Machine for Hot and Cold Beverages

The DeLonghi Dolce Gusto machine is versatile, allowing you to create both hot and cold beverages with ease. For hot drinks, simply insert the capsule and brew. For cold beverages, use the dedicated cold setting or adjust the drink size and temperature. This feature makes it ideal for iced coffee, teas, and other chilled drinks, enhancing your coffee experience year-round.

Comparing Different DeLonghi Dolce Gusto Models

DeLonghi Dolce Gusto models vary in design, features, and size, offering options for compact spaces or advanced settings. Compare models like Genio, Infinissima, Piccolo, and Eclipse to find the best fit for your needs.

8;1 Key Differences Between Popular Models

Popular DeLonghi Dolce Gusto models like Genio 2, Infinissima, Piccolo XS, and Eclipse vary in design, features, and size. Genio 2 offers advanced settings, while Infinissima is sleek and compact. Piccolo XS is ultra-compact, ideal for small spaces, and Eclipse features a unique capsule system. Each model caters to different preferences, ensuring a tailored coffee experience for every user.

8.2 Choosing the Right Model for Your Needs

Assess your needs by considering space, budget, and desired features. Compact models like Piccolo XS suit small kitchens, while Genio 2 offers advanced customization. If you prefer modern design, Infinissima or Eclipse may be ideal. Evaluate your coffee preferences and lifestyle to select a model that aligns with your daily brewing habits and enhances your coffee experience.

First-Time User Guide

Unbox, place, and plug in your machine. Prepare by filling the water tank and running the initial rinse cycle to ensure optimal performance for your first brew.

9.1 Preparing the Machine for First Use

Unbox and carefully place the machine on a stable surface. Plug it into a power source and ensure all parts are intact. Fill the water tank with fresh, filtered water, avoiding any contaminants. Before brewing, run the initial rinse cycle by following the manual’s instructions to cleanse the internal system. This step ensures optimal performance and flavor for your first brew.

9.2 Running the Initial Rinse Cycle

Fill the water tank and close the lid. Place a large container under the coffee outlet. Turn on the machine and allow it to run a full cycle without a capsule. This process cleans the internal system, ensuring no residues remain. Once complete, your machine is ready for its first use, delivering freshly brewed coffee with optimal flavor.

Frequently Asked Questions

Common questions include capsule compatibility, troubleshooting, and energy efficiency. Refer to the user manual for detailed solutions and tips to optimize your coffee machine’s performance.

10.1 Common Questions About Capsule Compatibility

Users often ask which capsules are compatible with the DeLonghi Dolce Gusto. Only NESCAFÉ Dolce Gusto capsules are designed for these machines. Using other capsules may damage the machine. The unique capsule system ensures a perfect fit and optimal extraction. For troubleshooting, ensure capsules are properly aligned and pierced by the machine. Regularly rinse the machine to maintain performance and prevent clogs.

10.2 Tips for Achieving the Perfect Brew

For a perfect brew, use genuine NESCAFÉ Dolce Gusto capsules. Align the capsule correctly to ensure proper piercing. Adjust the drip tray based on drink type (hot or cold). Rinse the machine after each use to prevent residue buildup. Experiment with capsule varieties to find your ideal flavor. Always follow the user manual for optimal results and machine longevity.

Health and Safety Precautions

Always read the manual and follow safety guidelines. Avoid touching hot parts and keep children away. Never use the machine near water or in humid conditions improperly.

11.1 Important Safety Information

Safety is paramount when using the DeLonghi Dolce Gusto. Always handle hot parts with care, keep children away, and avoid improper use near water. Ensure the machine is placed on a stable, heat-resistant surface. Unplug the machine when not in use and follow all guidelines in the manual to prevent accidents and ensure longevity.

11.2 Avoiding Common Mistakes

Avoid common mistakes by ensuring proper capsule insertion, regular descaling, and daily cleaning. Never use damaged capsules or force the machine’s parts, as this can cause malfunction. Keep the water tank filled and avoid overheating by maintaining adequate spacing around the machine. Always unplug it during cleaning and follow the manual’s guidelines to prevent damage and ensure optimal performance over time.

Eco-Friendly Usage and Recycling

Promote sustainability by recycling used capsules through designated programs and minimizing energy consumption. Regular descaling and proper maintenance also extend the machine’s lifespan, reducing waste and environmental impact.

12.1 Recycling Capsules Responsibly

Recycling your DeLonghi Dolce Gusto capsules responsibly is crucial for minimizing environmental impact. Collect used capsules and check local recycling programs or the manufacturer’s website for drop-off locations. Many communities offer specific facilities for coffee capsules. Proper recycling helps conserve resources and reduces landfill waste, supporting a more sustainable future.

12.2 Energy Efficiency Tips

Maximize energy efficiency by turning off the machine when not in use and using the energy-saving mode. Regularly descale your DeLonghi Dolce Gusto to maintain optimal performance and reduce energy consumption. Unplug the machine during extended periods of inactivity to avoid standby power usage, helping both the environment and your energy bill.

Continue Reading