
The AMSO U.S. Government and Politics PDF is a comprehensive study guide designed to help students master key concepts in American political science. It offers detailed explanations, practical examples, and structured content to enhance understanding of the U.S. political system, making it an essential resource for academic success.
Overview of the AMSO Study Guide
The AMSO U.S. Government and Politics PDF serves as a detailed and organized resource for students seeking to understand the complexities of American political systems. It provides a clear and concise breakdown of essential concepts, ensuring that learners can grasp foundational ideas and advanced topics alike. The guide is structured to align with standard curriculum requirements, making it a valuable tool for both classroom learning and independent study. By incorporating real-world examples and practical applications, the AMSO guide helps students connect theoretical knowledge with contemporary political scenarios. Its user-friendly format and comprehensive coverage make it an indispensable resource for anyone aiming to excel in U.S. government and politics studies.
Importance of the AMSO Guide for Political Science Students
The AMSO U.S. Government and Politics PDF is an invaluable resource for political science students, offering a thorough understanding of the American political system. It simplifies complex concepts, making them accessible for learners at all levels. The guide aligns with standard curriculum requirements, ensuring students are well-prepared for exams and assignments. By providing insights into historical and contemporary political developments, it helps students develop critical thinking skills and analytical abilities. Additionally, the guide serves as a reliable reference for independent study, enabling students to reinforce their knowledge and stay updated on key political issues. Its structured approach and comprehensive coverage make it a must-have tool for anyone aiming to excel in political science studies and gain a deeper understanding of U.S. government dynamics.
Structure of the AMSO U.S. Government and Politics PDF
The AMSO guide is organized into clear chapters, covering foundational concepts, government branches, political processes, civil rights, and study aids, ensuring a logical and comprehensive learning experience.
Chapter Breakdown and Key Topics
The AMSO U.S. Government and Politics PDF is divided into well-structured chapters, each focusing on essential aspects of American political science. The guide begins with foundational concepts, such as the U.S. Constitution and its amendments, providing a historical and legal framework. Subsequent chapters delve into federalism, the division of powers, and the three branches of government, offering detailed insights into their roles and interactions. Political parties, elections, and civil rights are also prominently featured, with case studies and landmark Supreme Court decisions highlighted. The guide further explores foreign policy and national security, ensuring a comprehensive understanding of both domestic and international governance. Each chapter is complemented by key topics, charts, and summaries, making it an invaluable resource for students preparing for exams or seeking a deeper grasp of U.S. politics.
Features of the PDF Version
The AMSO U.S. Government and Politics PDF is designed with user-friendly features to enhance learning. It includes a clear, organized layout with easy-to-read fonts and proper spacing, ensuring readability on various devices. The PDF is fully searchable, allowing students to quickly locate specific topics or keywords. It also supports highlighting and note-taking, enabling users to interact with the content actively. Additionally, the guide includes bookmarks for easy navigation between chapters and sections. The PDF is compatible with both desktop and mobile devices, making it accessible for studying on the go. These features collectively create a seamless and efficient study experience, catering to the needs of students preparing for exams or conducting in-depth research.
Key Topics Covered in the AMSO Guide
The AMSO guide covers essential topics like the U.S. Constitution, federalism, the three branches of government, political parties, elections, civil rights, and foreign policy, providing a comprehensive understanding of American governance.
The U.S. Constitution and Its Amendments
The U.S. Constitution, ratified in 1788, serves as the foundational document of the American government. It establishes the framework of the federal system, the separation of powers, and the relationship between the government and its citizens. The AMSO guide provides a detailed analysis of the Constitution’s Preamble, the Seven Articles, and the Bill of Rights. It also explores the significance of key amendments, such as the 13th Amendment abolishing slavery, the 19th Amendment granting women’s suffrage, and the 26th Amendment lowering the voting age to 18. The guide emphasizes how these amendments have shaped civil liberties, federalism, and the evolving nature of American democracy. By examining landmark Supreme Court cases and historical context, the AMSO guide helps students understand the Constitution’s enduring impact on modern governance and legal principles.
Federalism and the Division of Powers
Federalism is a cornerstone of the U.S. political system, dividing power between the federal government and state governments. The AMSO guide thoroughly explains this framework, highlighting how the Constitution allocates responsibilities through the supremacy clause and the 10th Amendment. It explores the historical evolution of federalism, from dual federalism to cooperative and new federalism, and examines modern debates over states’ rights and federal authority. The guide also discusses the role of the judiciary in resolving federal-state conflicts and the impact of federal mandates on state policies. By analyzing case studies and real-world examples, the AMSO guide helps students grasp the complexities of federalism and its significance in shaping American governance and policy implementation at all levels.
The Three Branches of Government
The AMSO guide provides a detailed exploration of the three branches of the U.S. government: the Legislative, Executive, and Judicial. It explains their distinct roles and responsibilities, emphasizing the system of checks and balances designed to ensure no single branch dominates. The guide delves into how Congress, as the Legislative branch, creates laws; the Executive branch, led by the President, enforces them; and the Judicial branch, headed by the Supreme Court, interprets laws. The AMSO guide also examines landmark cases and real-world examples to illustrate how these branches interact and influence policy-making. This section is crucial for understanding the balance of power and its impact on governance, making it a foundational element of the guide’s comprehensive coverage of U.S. government and politics.
Political Parties and Their Roles
The AMSO guide thoroughly examines the role of political parties in shaping U.S. government and politics. It highlights the dominance of the two-party system, focusing on Democrats and Republicans, while also touching on the influence of third parties. The guide explains how political parties organize and finance campaigns, recruit candidates, and shape policy agendas. It discusses their role in elections, from primaries to general elections, and how they influence voter alignment and public opinion. Additionally, the guide explores how political parties contribute to political polarization and coalition-building. By understanding the functions and evolution of political parties, students gain insight into the dynamics of American democracy and the challenges of maintaining a balanced political system. This section is vital for grasping the interconnectedness of parties, elections, and governance.
Political Participation and Elections
The AMSO guide explores political participation and elections, detailing voter behavior, election processes, and their impact on shaping the U.S. political landscape.
Voting Rights and Electoral Processes
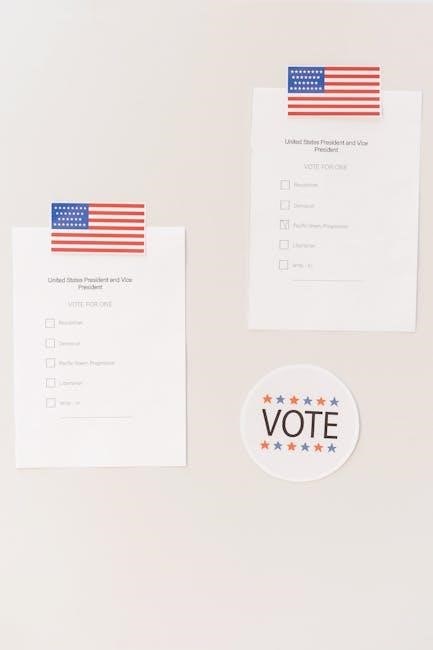
The AMSO guide provides a detailed analysis of voting rights and electoral processes, tracing their evolution and significance in U.S. democracy. It explores the expansion of voting rights through constitutional amendments, such as the 15th, 19th, and 26th Amendments, and discusses modern challenges like voter ID laws and gerrymandering. The guide also examines the Electoral College system, its historical roots, and its role in presidential elections. Additionally, it covers key Supreme Court decisions that have shaped voting rights, such as Shelby County v. Holder, and highlights the impact of voter suppression and disenfranchisement. By addressing both historical and contemporary issues, the AMSO guide equips students with a comprehensive understanding of how elections function and the ongoing struggles to ensure equal voting rights for all citizens.
Public Opinion and Its Impact on Policy
Public opinion plays a crucial role in shaping U.S. policy, as it reflects the collective views and attitudes of citizens on various issues. The AMSO guide explores how public opinion is measured through polls, surveys, and elections, influencing policymakers’ decisions. It highlights how political leaders often align their agendas with popular sentiment to gain support and legitimacy. The guide also examines the mechanisms through which public opinion translates into policy, such as grassroots movements, lobbying, and media coverage. Additionally, it discusses the challenges of measuring public opinion accurately, including misinformation and polarization. By understanding these dynamics, students can better appreciate how public opinion serves as a cornerstone of democratic governance and accountability in the U.S. political system.
Campaign Finance and Its Influence
Campaign finance is a critical aspect of U.S. politics, shaping election outcomes and policy decisions. The AMSO guide delves into the role of money in political campaigns, including sources such as political action committees (PACs), Super PACs, and individual donations. It examines how campaign finance laws, like the Bipartisan Campaign Reform Act, aim to regulate fundraising and spending. The guide also explores the impact of landmark Supreme Court decisions, such as Citizens United v. FEC, which significantly altered the campaign finance landscape by allowing unlimited corporate and union expenditures. Additionally, it discusses the influence of money on candidate viability, voter perception, and policy priorities. Understanding campaign finance is essential for grasping how financial resources shape political power and representation in the U.S. government.

Foreign Policy and National Security
The AMSO guide explores U.S. foreign policy strategies, national security frameworks, and the roles of key agencies in maintaining global stability and protecting national interests effectively.
Key Concepts in U.S. Foreign Policy
The AMSO guide delves into foundational principles shaping U.S. foreign policy, such as realism, liberalism, and isolationism. It examines strategies like containment, deterrence, and soft power diplomacy, emphasizing their historical and contemporary applications. The guide also explores the role of economic diplomacy, international alliances, and humanitarian interventions, providing insights into how these concepts influence global relations and national security. By breaking down complex theories and policies, the AMSO guide equips students with a robust understanding of U.S. foreign policy frameworks and their real-world implications.
National Security Agencies and Their Roles
The AMSO guide provides a detailed overview of key national security agencies and their functions. Agencies like the Department of Homeland Security (DHS) focus on domestic security, while the Central Intelligence Agency (CIA) and National Security Agency (NSA) handle foreign intelligence and surveillance. The Federal Bureau of Investigation (FBI) plays a dual role in domestic law enforcement and counterintelligence. The Department of Defense (DoD) oversees military operations to protect national interests. These agencies work collaboratively to ensure the safety and security of the United States, addressing threats such as terrorism, cyberattacks, and foreign espionage. The guide explains how these organizations operate within legal frameworks and their significance in maintaining national security.

Civil Rights and Liberties

The AMSO guide explores the foundational principles of civil rights and liberties, emphasizing their protection under the U.S. Constitution and their significance in American society.
Landmark Supreme Court Cases
The AMSO guide provides an in-depth analysis of landmark Supreme Court cases that have shaped civil rights and liberties in the United States. Cases such as Brown v. Board of Education, which overturned racial segregation in public schools, and Roe v. Wade, addressing reproductive rights, are thoroughly examined. The guide highlights how these decisions have influenced constitutional interpretations and societal progress. By exploring these legal milestones, students gain a deeper understanding of the judiciary’s role in protecting individual freedoms and promoting equality. The AMSO guide ensures that learners can grasp the historical and contemporary significance of these cases, making it an invaluable resource for studying U.S. government and politics.
Protection of Individual Rights
The AMSO guide emphasizes the importance of protecting individual rights within the U.S; political framework. It explores how the Bill of Rights and subsequent amendments safeguard freedoms such as speech, religion, and equal protection under the law. The guide delves into key protections like due process, privacy rights, and the prohibition of unreasonable searches and seizures. It also examines how these rights are upheld through judicial decisions and legislative actions. By providing clear explanations and real-world examples, the AMSO guide helps students understand the balance between individual liberties and government authority. This section is crucial for grasping the foundational principles of American democracy and the ongoing efforts to ensure justice and equality for all citizens.
Using the AMSO Guide for Exam Preparation
The AMSO guide is an invaluable tool for exam preparation, offering practice questions, detailed summaries, and strategic tips to enhance understanding and retention of key political concepts.

Study Tips for Maximizing Retention
To maximize retention when using the AMSO guide, incorporate active reading techniques such as highlighting and note-taking. Break study sessions into manageable chunks, focusing on one topic at a time. Utilize the guide’s practice questions to test understanding and identify weak areas. Engage in group discussions or teach concepts to others to reinforce learning. Regularly review summaries and key terms to build long-term memory. Prioritize consistent study habits over cramming, as spaced repetition enhances retention. Additionally, align your study schedule with the guide’s structure to ensure comprehensive coverage of all topics; By combining these strategies, students can effectively prepare for exams and retain critical information from the AMSO guide.
Practice Questions and Review Materials
The AMSO guide includes a wide range of practice questions and review materials to help students assess their understanding of U.S. government and politics. These questions are designed to mirror actual exam formats, ensuring students are well-prepared for the types of inquiries they may encounter. The review materials provide detailed explanations for correct and incorrect answers, enabling learners to identify and address gaps in their knowledge. Additionally, the guide offers chapter-specific review sections, allowing students to focus on areas where they need improvement. By regularly engaging with these practice questions and review materials, students can build confidence and refine their critical thinking skills, ultimately achieving a deeper mastery of the subject matter. Consistent use of these resources is key to successful exam preparation.
The AMSO U.S. Government and Politics PDF is a valuable resource for students, offering comprehensive coverage of key topics and practical tools for academic success.
Final Thoughts on the AMSO Guide
The AMSO U.S. Government and Politics PDF is an indispensable resource for students seeking a deep understanding of American political systems. Its structured approach ensures clarity and accessibility, making complex concepts manageable. The guide’s emphasis on key topics, such as the Constitution, federalism, and civil rights, provides a solid foundation for academic success. Additionally, its practical tools, like practice questions and study tips, cater to diverse learning styles. Whether for exam preparation or long-term knowledge retention, the AMSO guide is a reliable companion. Its comprehensive coverage and user-friendly format make it a top choice for students aiming to excel in political science. This guide is not just a study aid but a gateway to mastering U.S. government and politics effectively.
Recommendations for Further Study
To deepen your understanding of U.S. government and politics, consider supplementing the AMSO guide with additional resources. Start by exploring reputable textbooks like American Government: Institutions and Policies or Government by the People. These texts provide complementary perspectives and in-depth analyses of key topics. Additionally, online platforms like Khan Academy, Coursera, and edX offer courses on American politics and government, which can enhance your learning. Engage with primary sources, such as Supreme Court decisions, the Federalist Papers, and historical speeches, to gain a richer context. Participate in mock trials, debates, or simulations to apply theoretical knowledge practically. Finally, stay informed by following credible news outlets and subscribing to political analysis podcasts; These steps will help you build a well-rounded understanding of U.S. government and politics beyond the AMSO guide.